Draft & Publish
Page summary:Draft & Publish separates drafts from live entries, allowing editors to stage content before release. This documentation shows how to enable it per content type and manage publish or unpublish actions.
The Draft & Publish feature allows to manage drafts for your content.
Configuration
Path to configure the feature: Content Type Builder
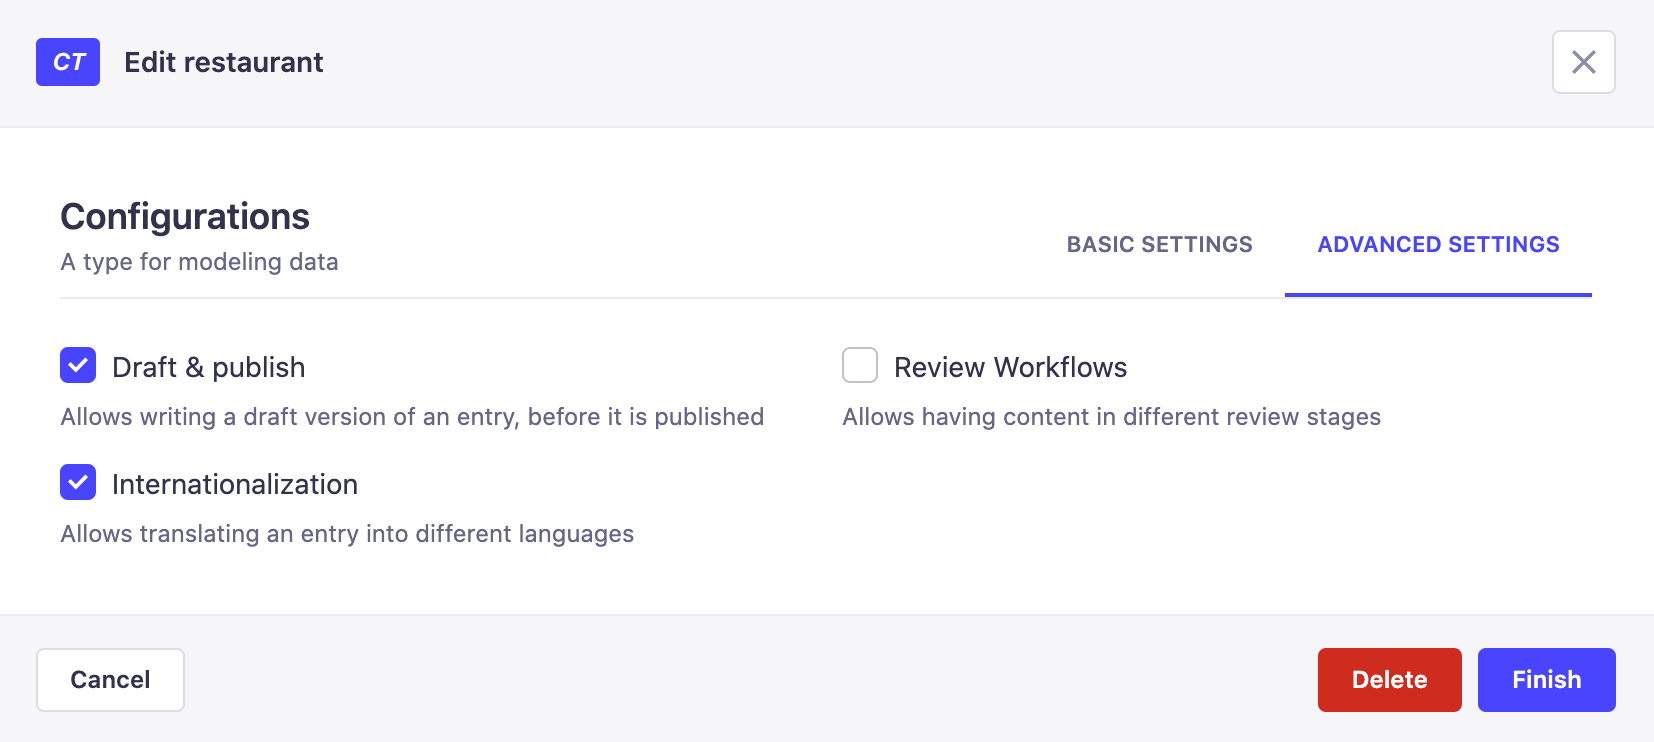
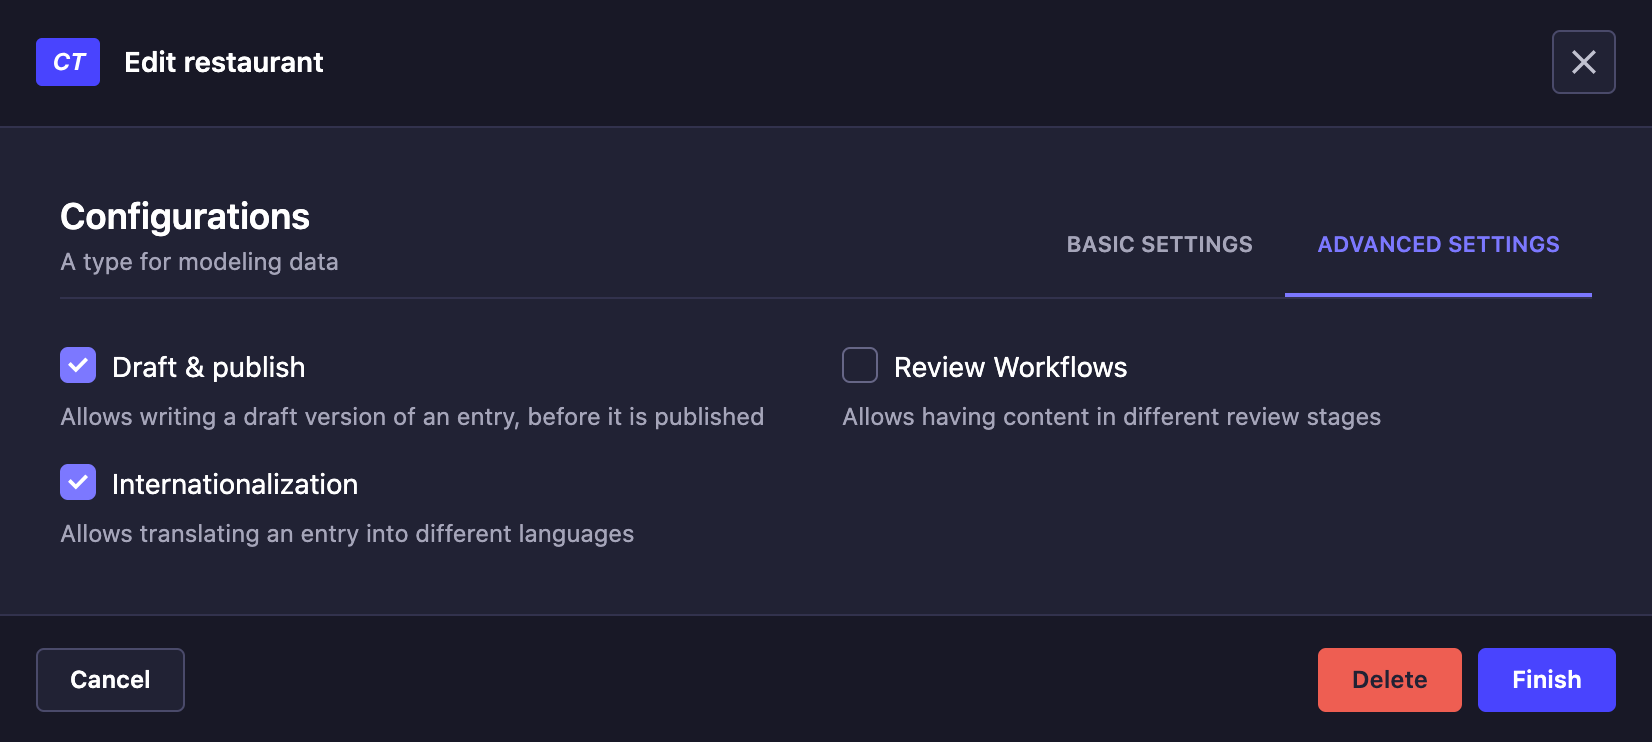
For your content types to be managed with Draft & Publish in the Content Manager, the feature must be enabled through the Content-type Builder. Draft & Publish can be configured for each content type.
- Either edit an already created content type of your choice, or create a new content type (see Content Type Builder documentation for more information).
- Go to the Advanced settings tab.
- Tick the Draft & Publish option.
- Click the Finish button.
When Draft & Publish is enabled on a content type, the attribute name status is reserved by Strapi and cannot be used for a user-defined attribute. The Content-type Builder will block:
- Adding an attribute named
statusto a Draft & Publish-enabled content type. - Enabling Draft & Publish on a content type that already has a
statusattribute.
If a content type inherited a status attribute from a Strapi v4 project, Strapi 5 logs a warning at bootstrap. Rename the attribute before re-enabling Draft & Publish to avoid API conflicts. See the migration guide for the full procedure.
Recording the first publication date experimental_firstPublishedAtThis feature requires the experimental_firstPublishedAt feature flag to be enabled.
When this future flag is enabled (see features configuration), Strapi automatically adds a firstPublishedAt attribute to all content-types that use Draft & Publish. The attribute saves the date and time when an entry is first published and never changes even if the entry is unpublished and published again.
If the feature flag is disabled later, the firstPublishedAt attribute and its stored values are removed.
Usage
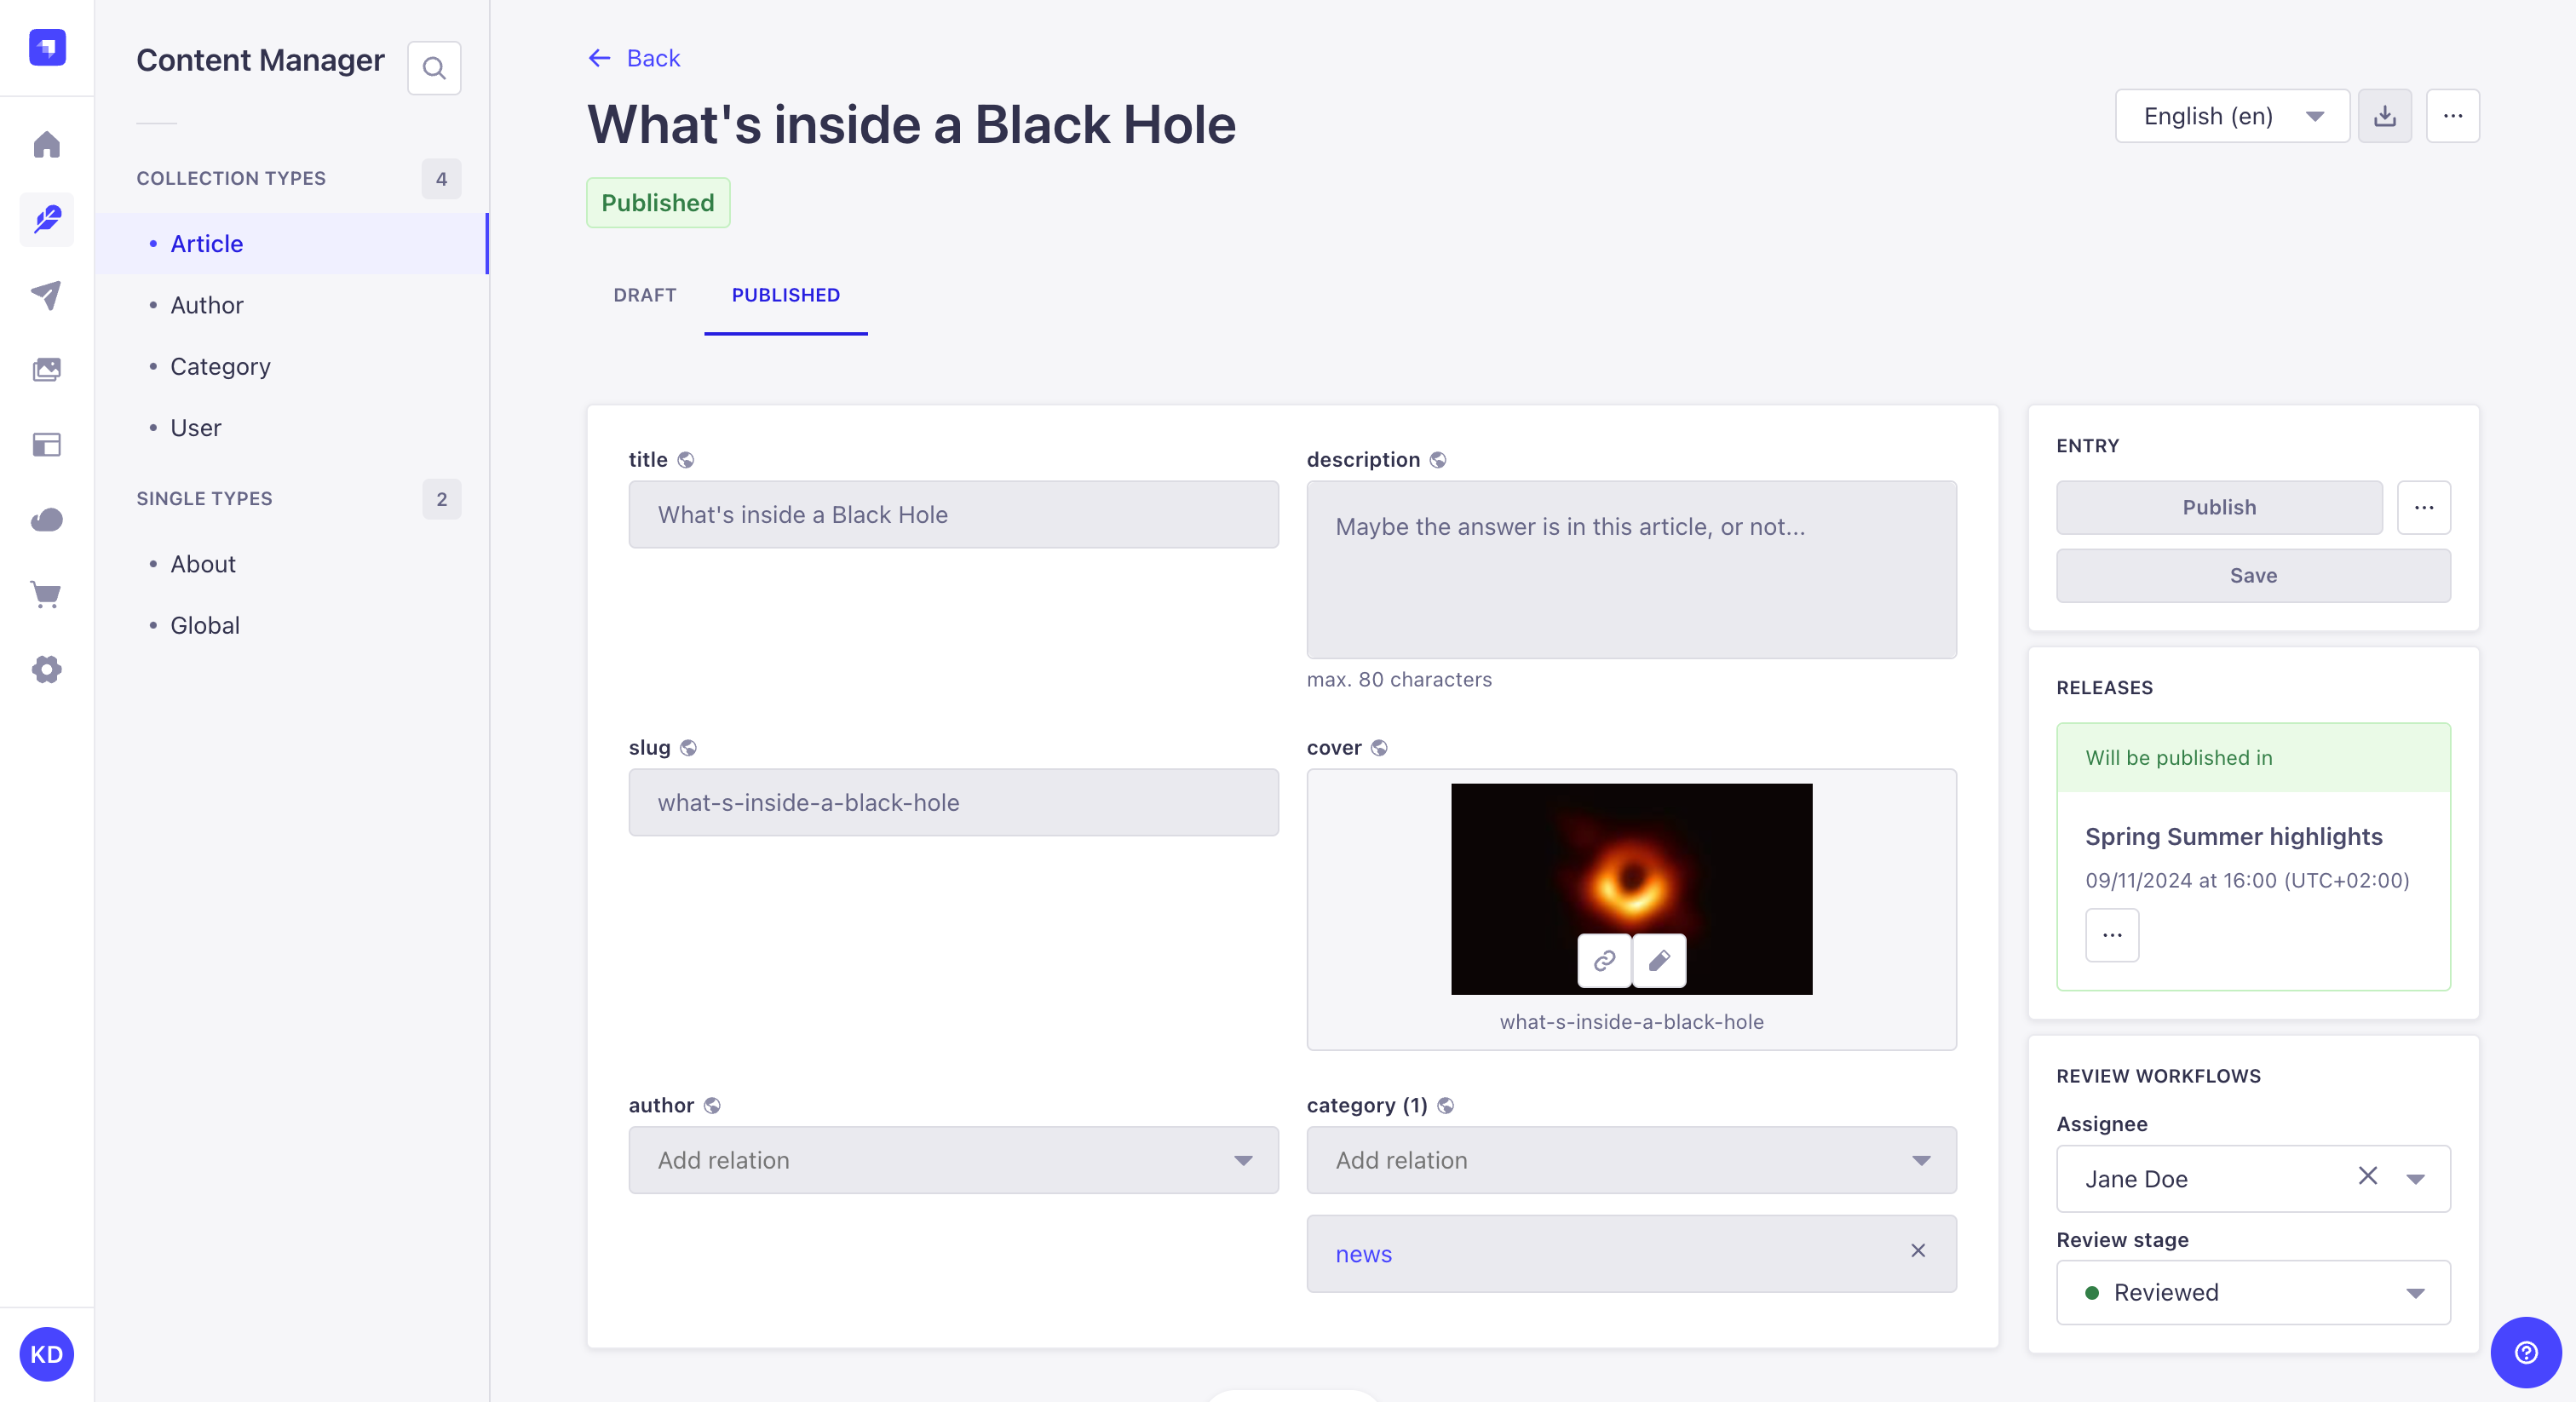
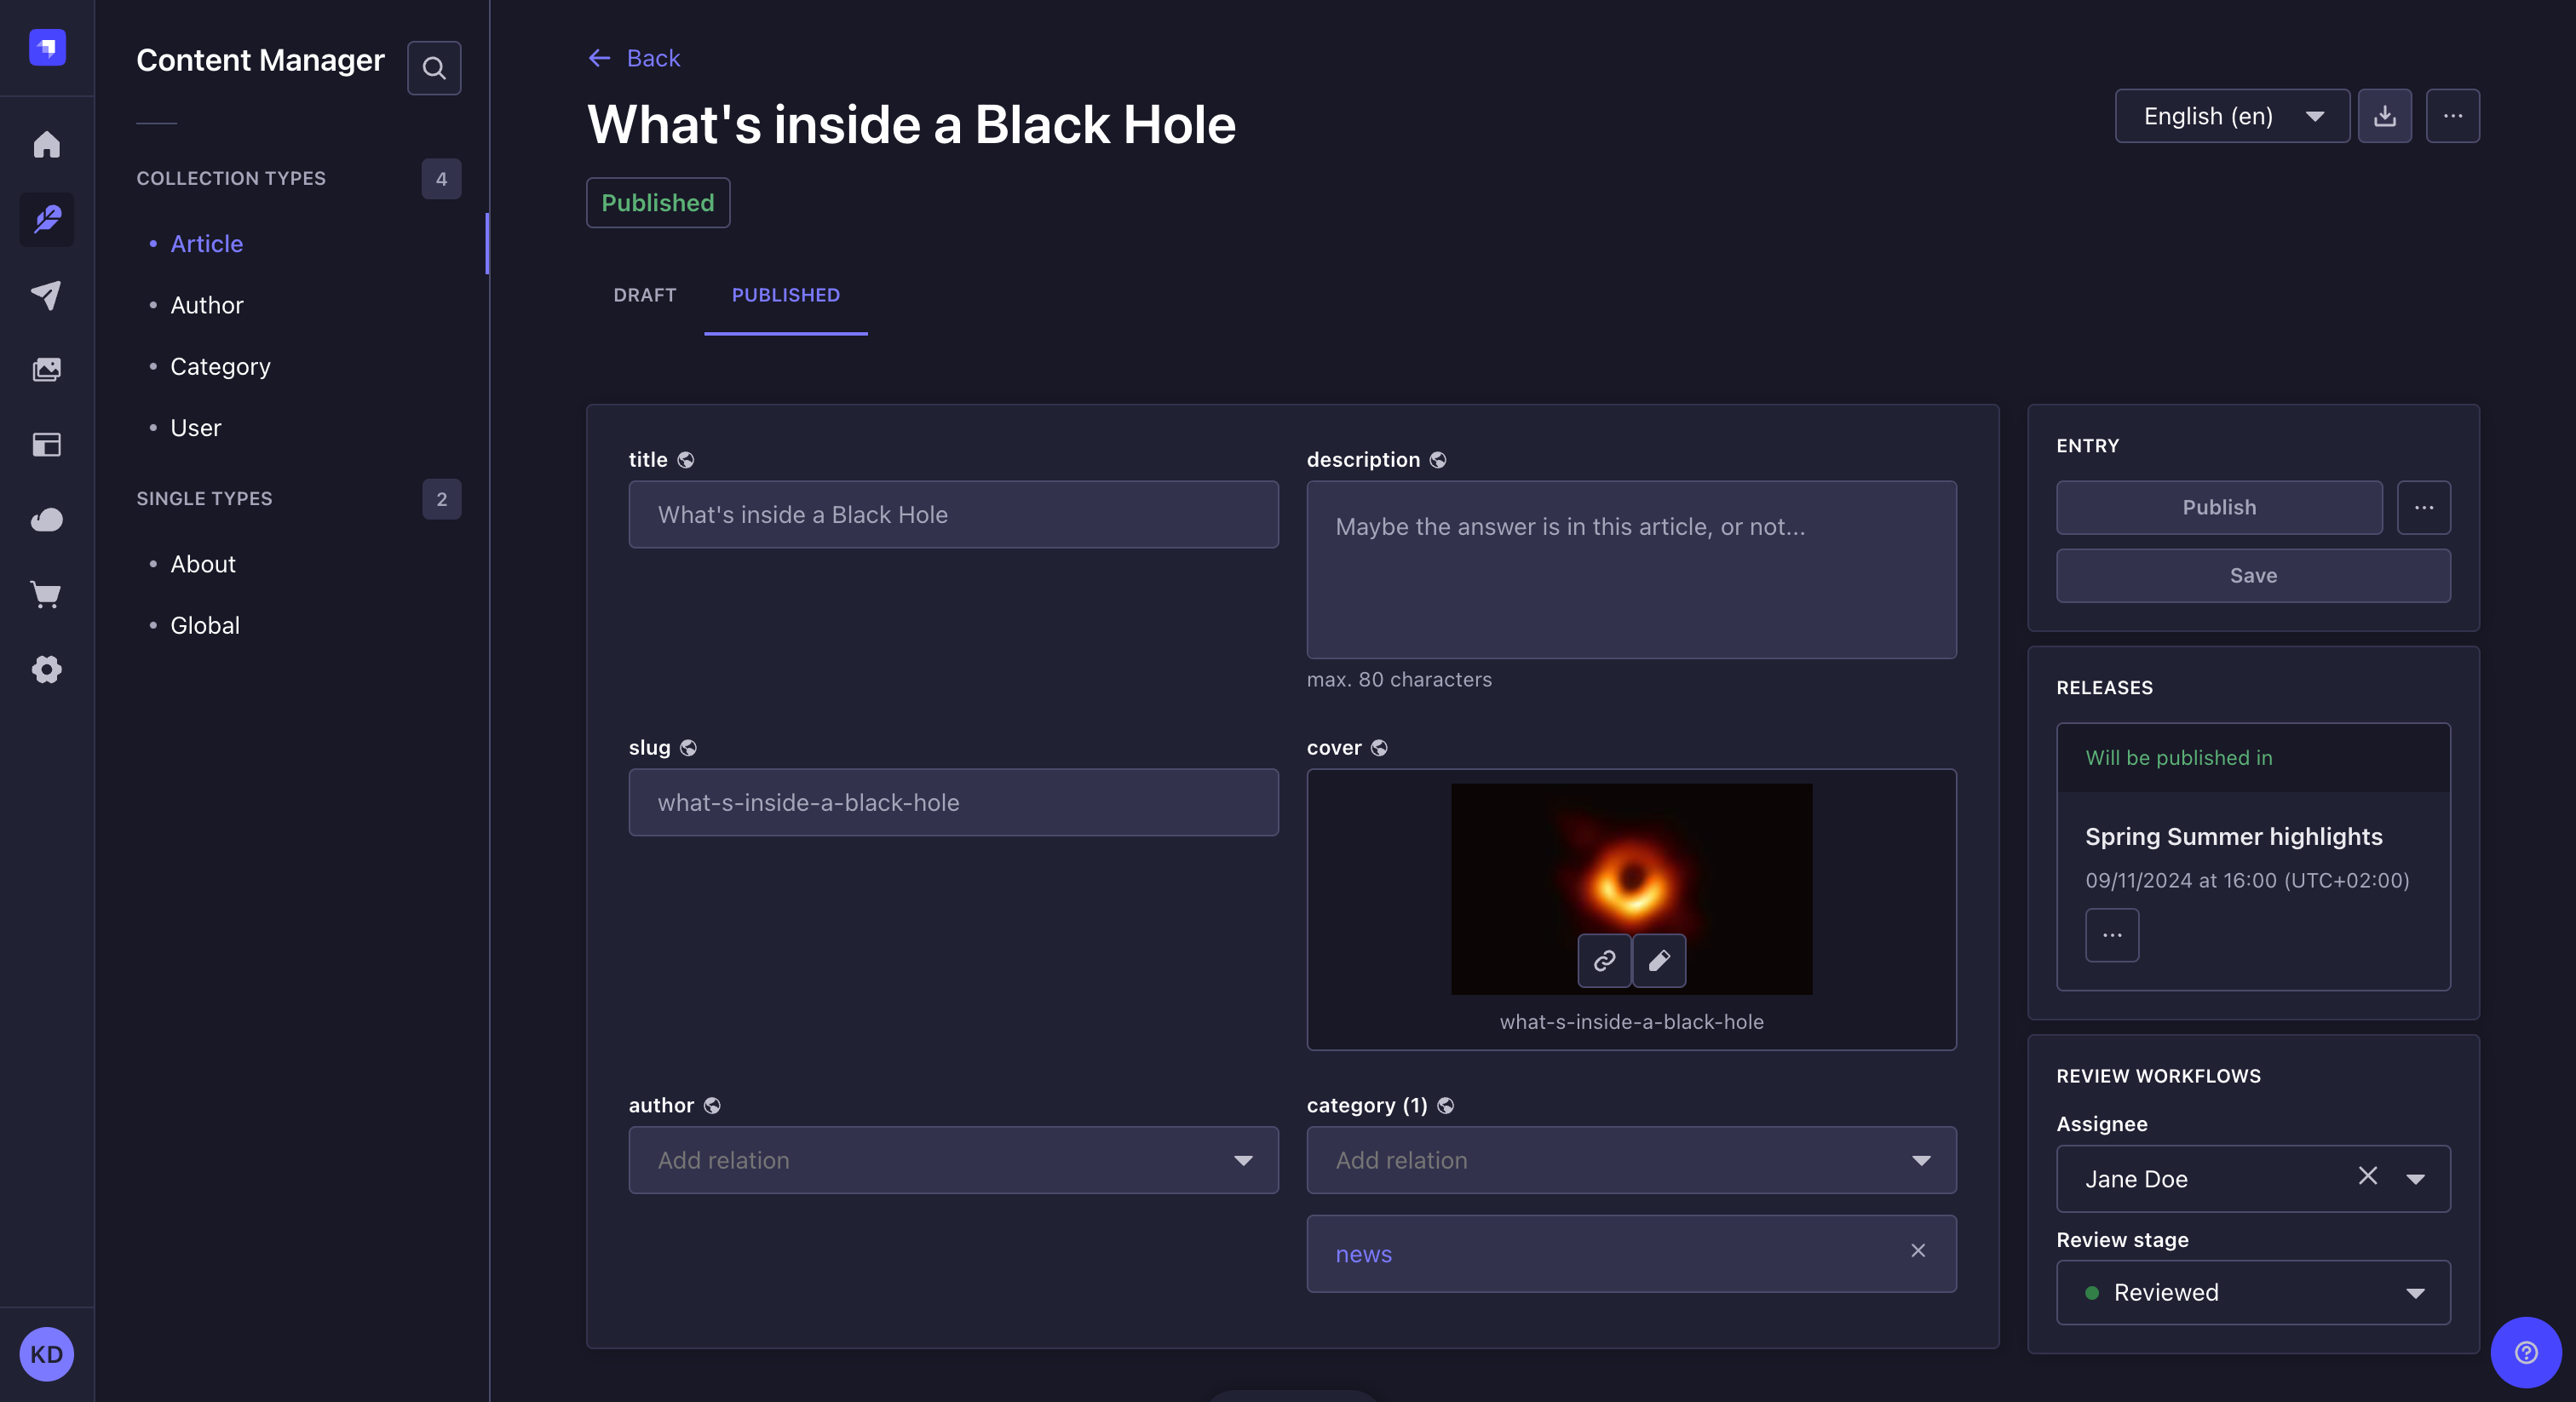
With Draft & Publish enabled, the Content Manager's edit view indicates the current status of your content type's entry at the top of the interface. Your content can have 3 statuses:
- Published: The content was previously published. There are no pending draft changes saved.
- Modified: The content was previously published. You made some changes to the draft version and saved these changes, but the changes have not been published yet.
- Draft: The content has never been published yet.
When Draft & Publish is eanbled, in the Content Manager list view, you can filter entries by status using the Filters button. You can also sort entries by publication status by clicking the Status column header in the list view.
Working with drafts
Path: Content Manager, edit view of your content type
While editing a document, you can see 2 tabs:
- The Draft tab is where you can edit your content.
- The Published tab is a read-only tab where edition of all fields is disabled. The Published tab only exists to show what is the content of fields in the published version.
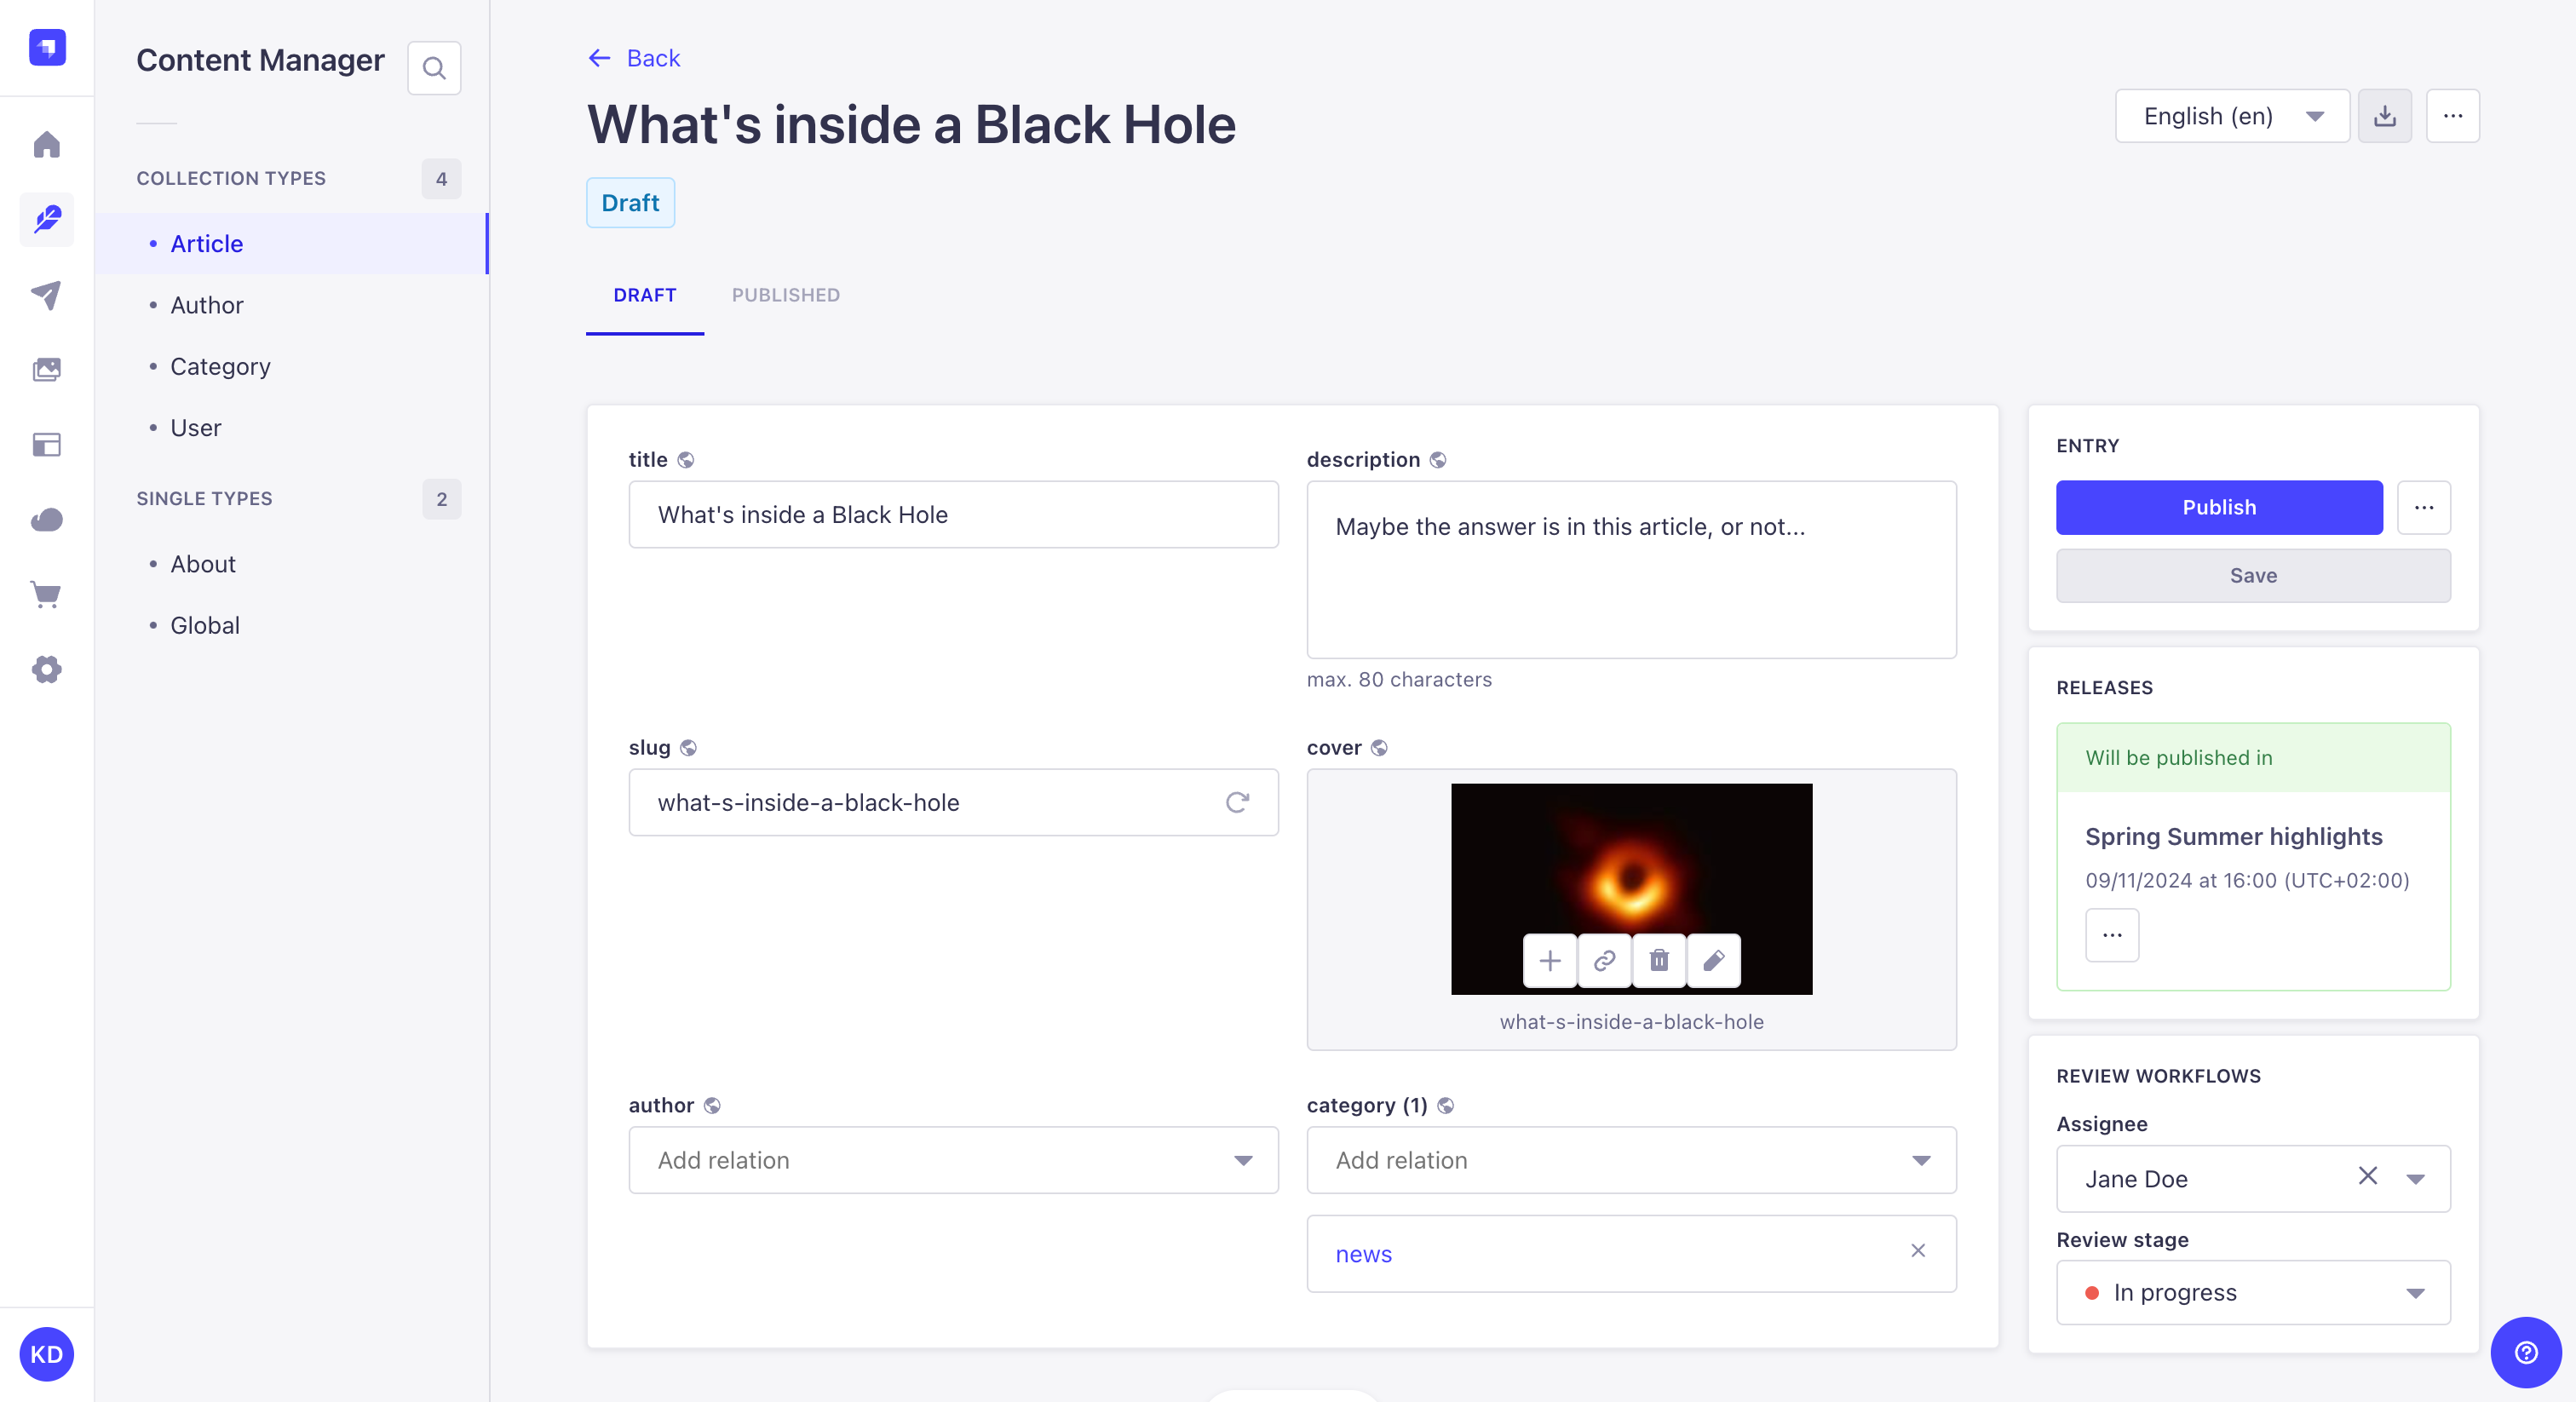
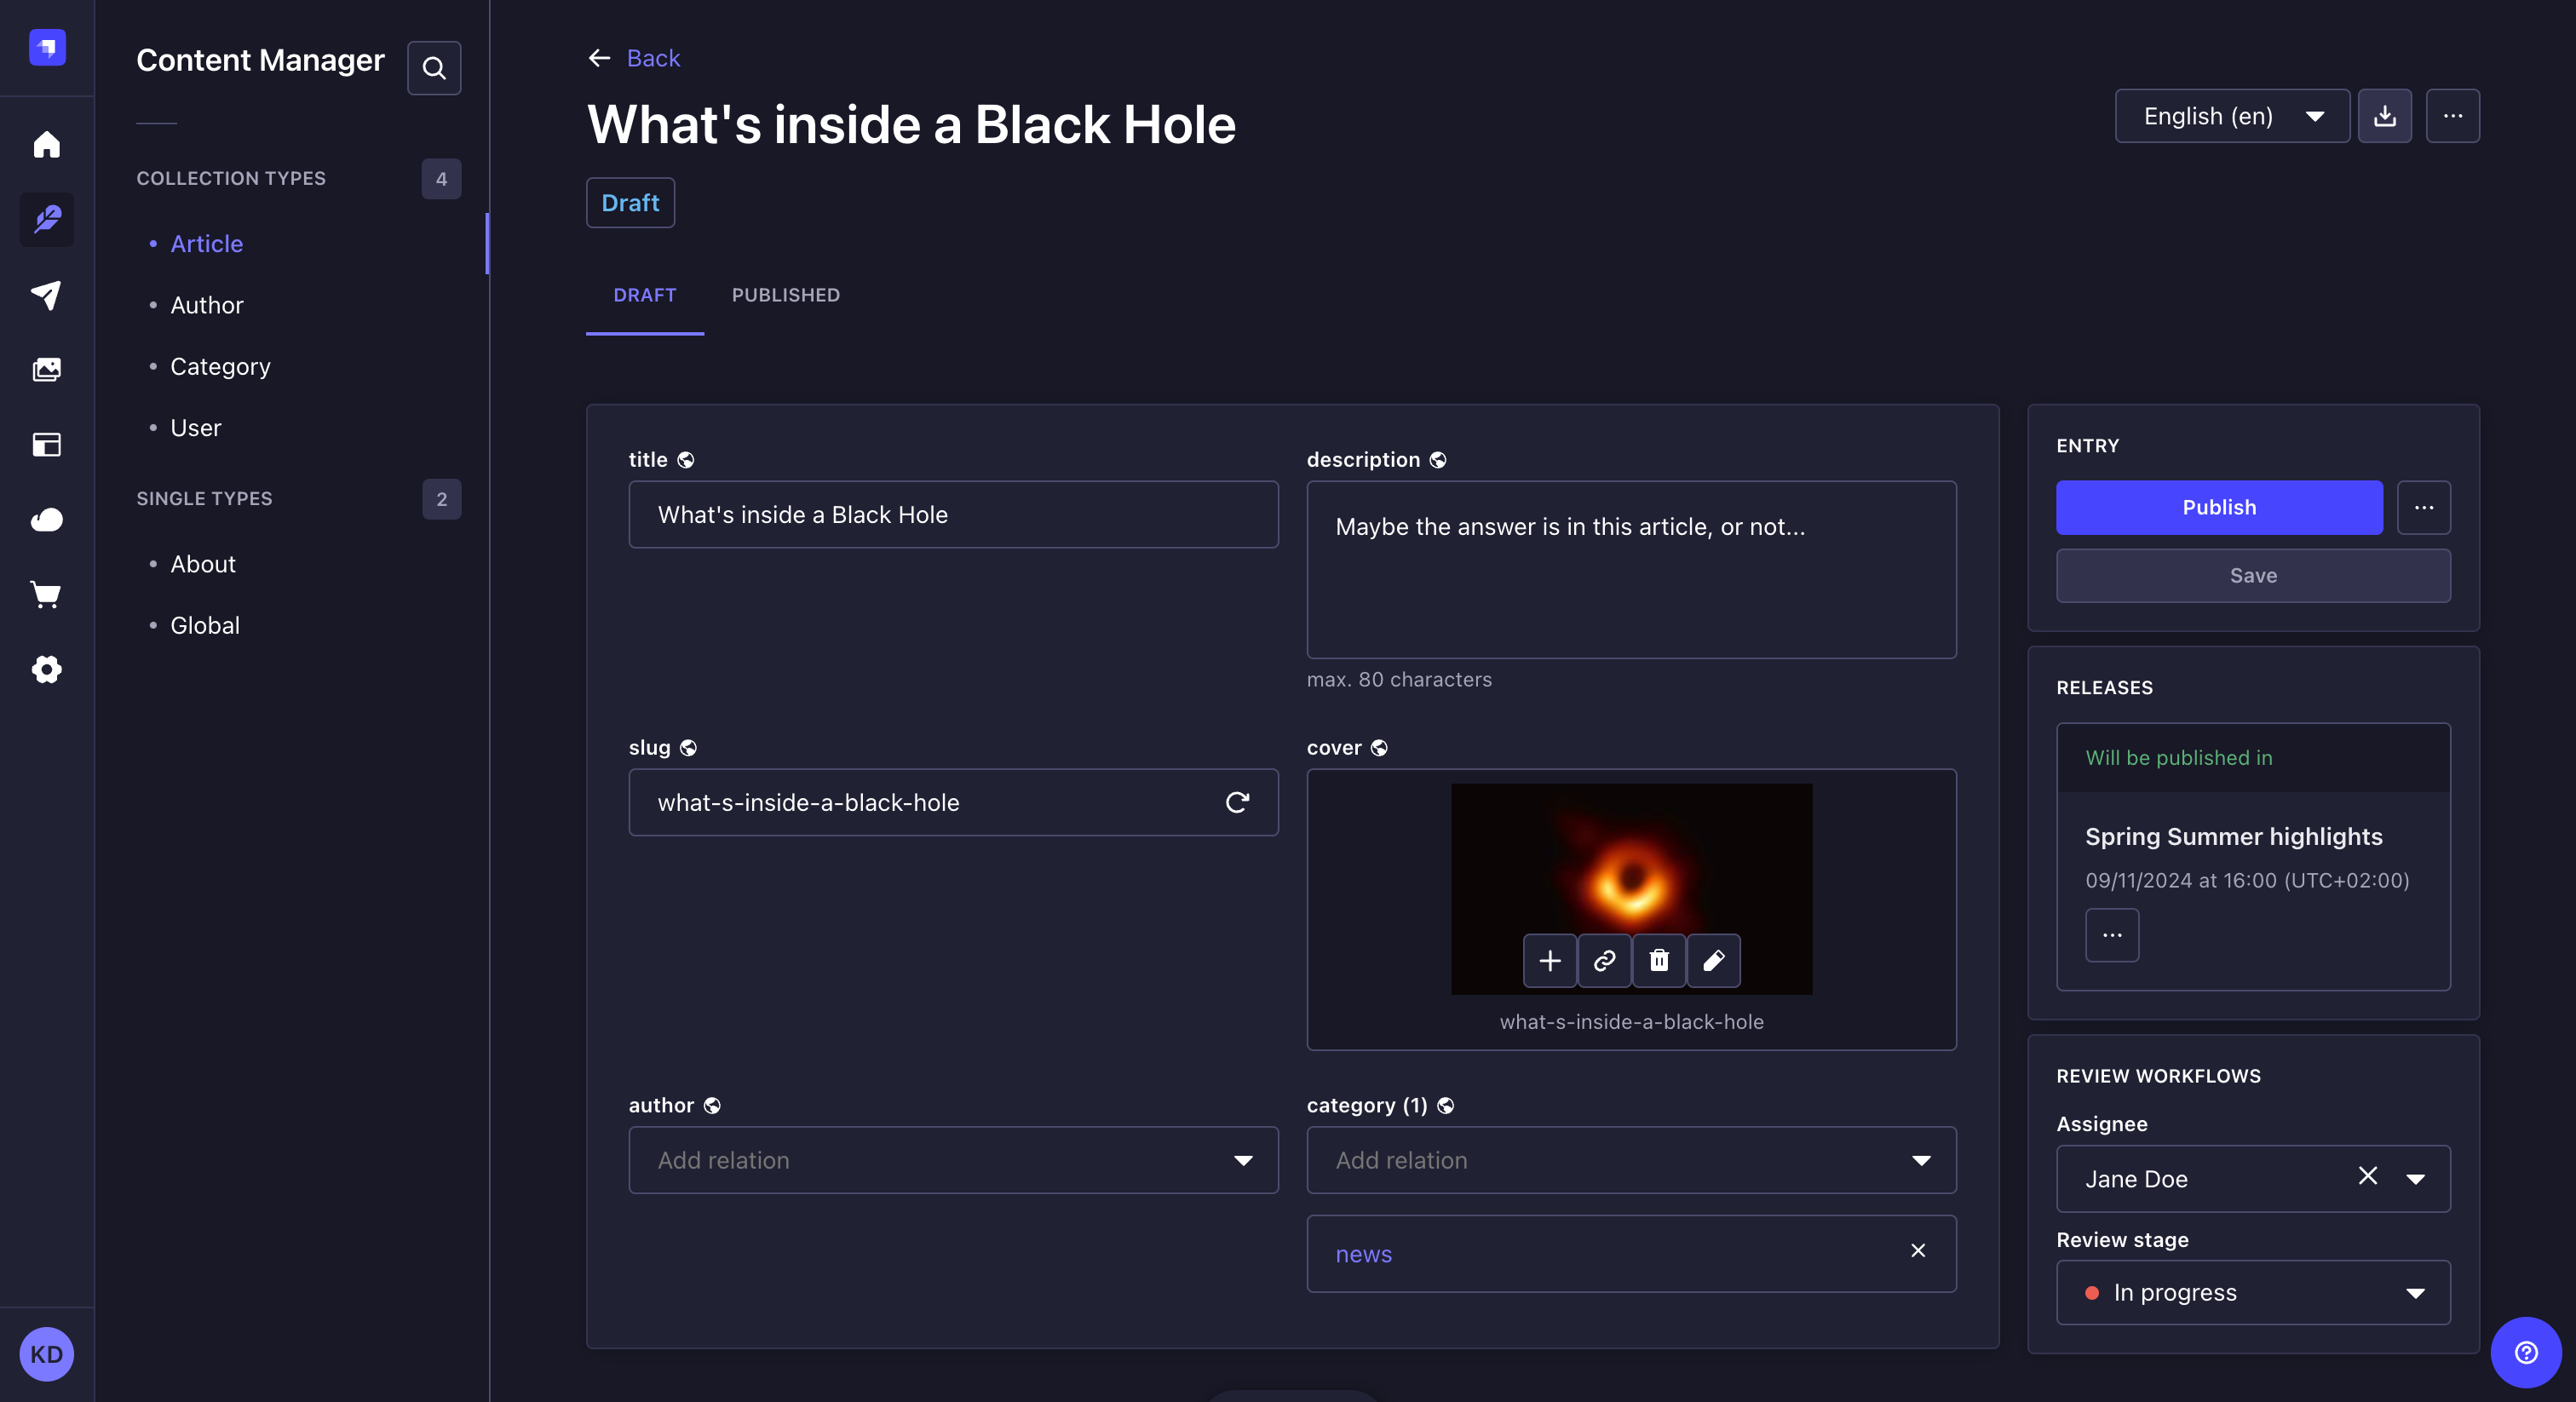
By default, each newly created content is a draft. Drafts can be modified and saved at will, using the Save button in the Entry box on the right side of the interface, until they are ready to be published.
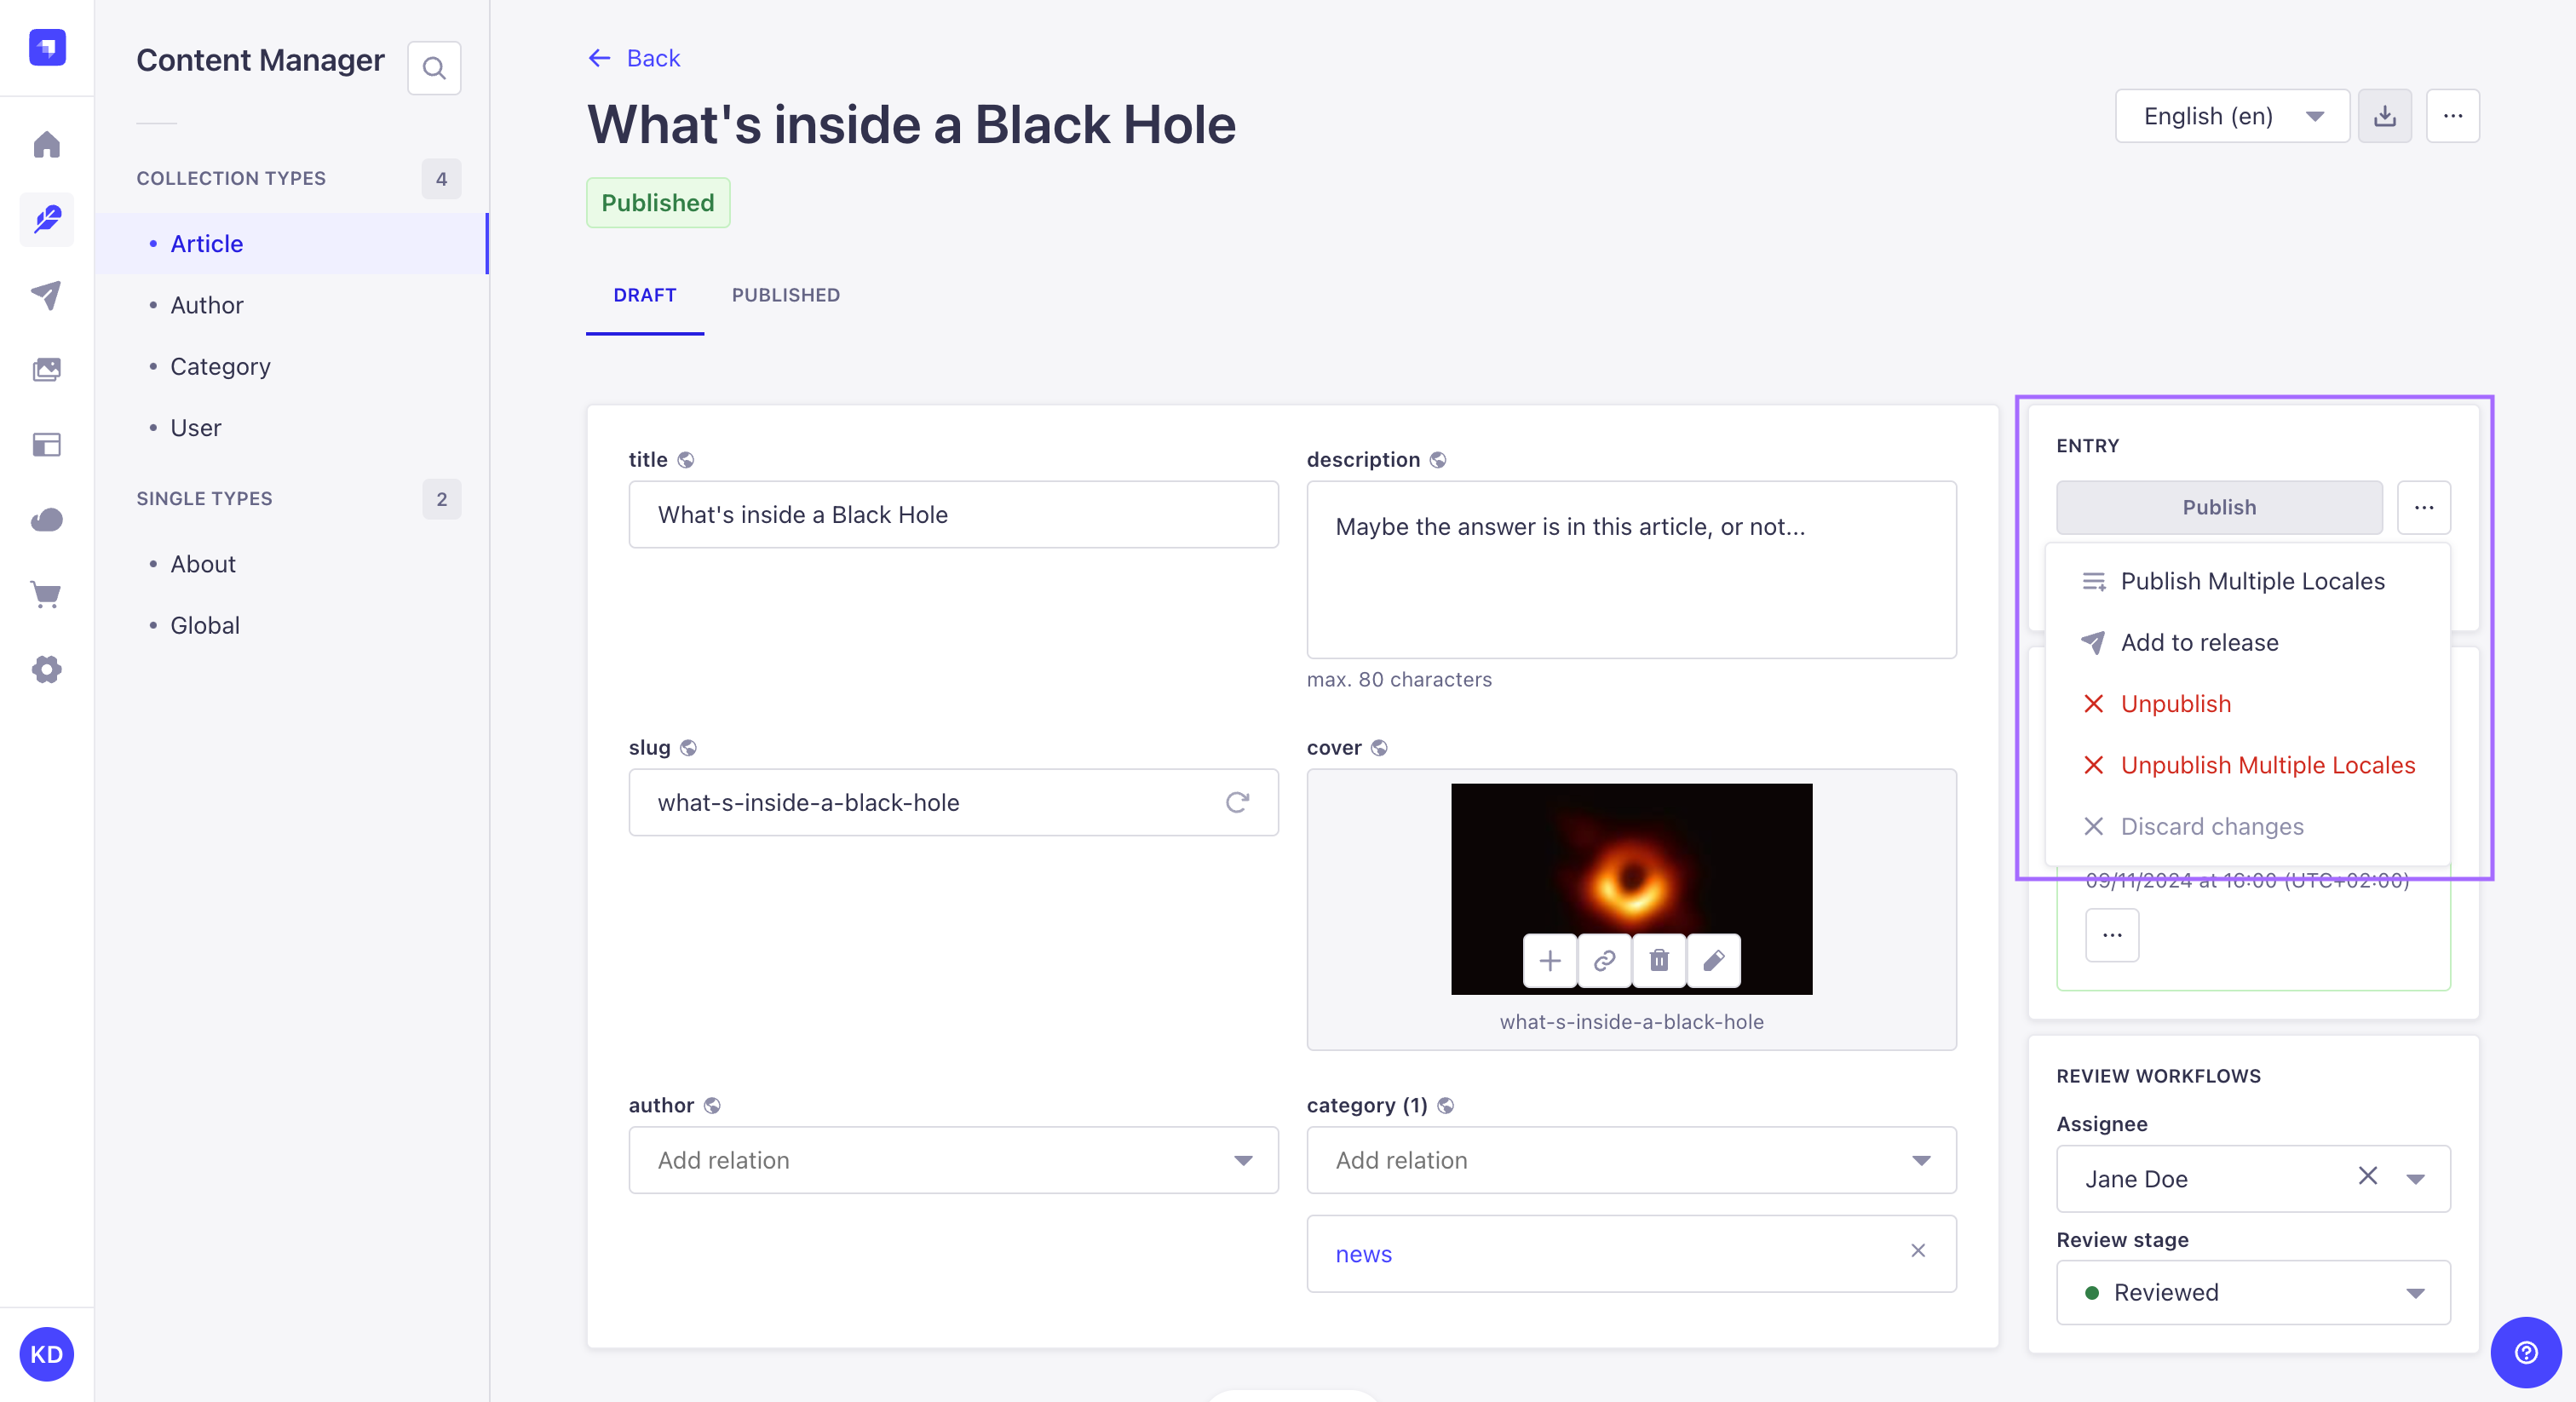
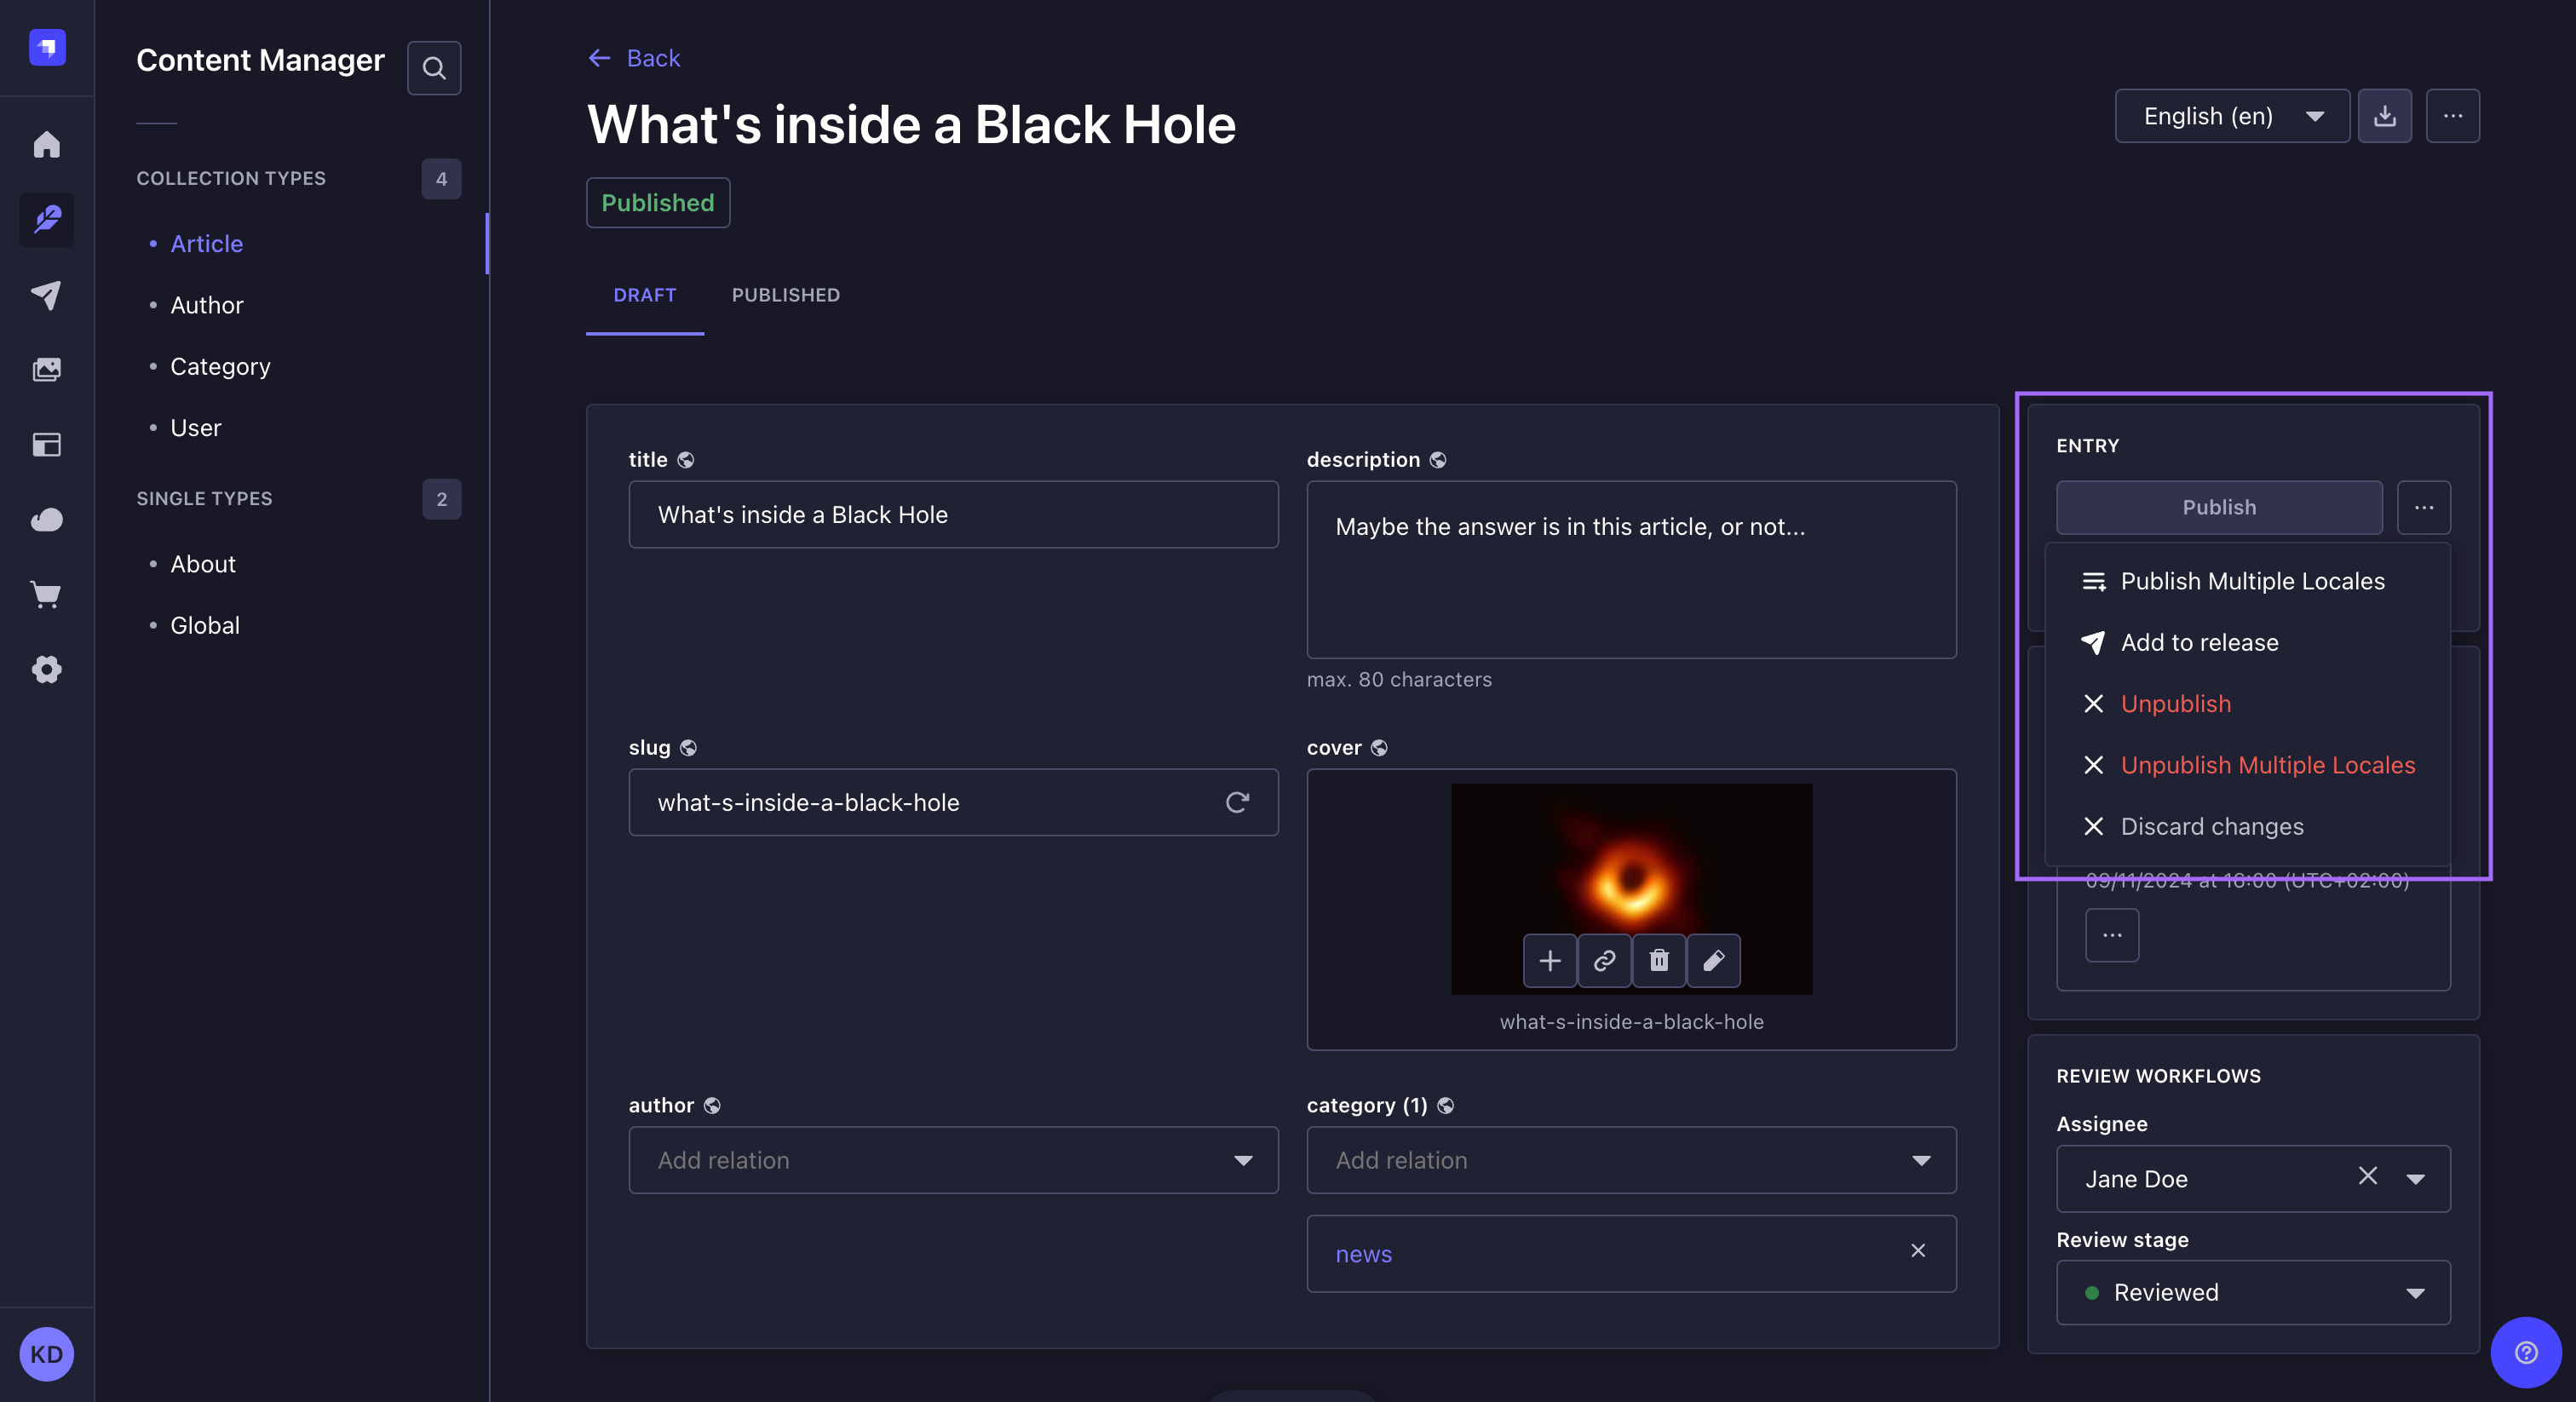
Once you made changes to a draft, you have 3 possible options, all available in the Entry box on the right side of the interface:
- Publish your document (see Publishing a draft),
- Save your draft for later retrieval,
- or discard changes, by clicking on and choosing Discard changes.
Publishing a draft
Path: Content Manager, edit view of your content type
To publish a draft, click on the Publish button in the Entry box on the right side of the interface.
After a draft is published:
- The content of the Draft and Published tabs should be exactly the same (but the Published tab remains read-only).
- The status, below the document's title, will switch to "Published".
Before publishing a draft, make sure it doesn't have relations with other non-published content, otherwise some of the content may not be available through the API.
When a document has both a draft and a published version available, the published version can be found in the Published tab. If the document has only a draft version, you can not click on the Published tab.
To schedule publication (i.e. convert a draft to a published entry at a given date and time) you can include it in a release and schedule the publication of that release. Please refer to the Releases feature documentation for more information.
Unpublishing content
Path: Content Manager, edit view of your content type
To unpublish a previously published content: from the Draft tab, click on in the Entry box on the right side of the interface and choose the Unpublish button.
If the draft version of the document contains content different from the published version, you can decide what to do with both content when unpublishing:
- From the Draft tab, click on in the Entry box on the right side of the interface and choose the Unpublish button.
- In the Confirmation dialog that opens, you can choose to:
- Unpublish and keep last draft, so that all the content you currently have in the Draft tab is preserved, but the all the content from the Published tab is definitely gone
- Unpublish and replace last draft to discard any existing content in the Draft tab and replace it with the content of all fields from the Published tab
- Click Confirm. The desired changes will be applied to both the Draft and Published tabs and the new status of the entry will also be reflected below the entry title.
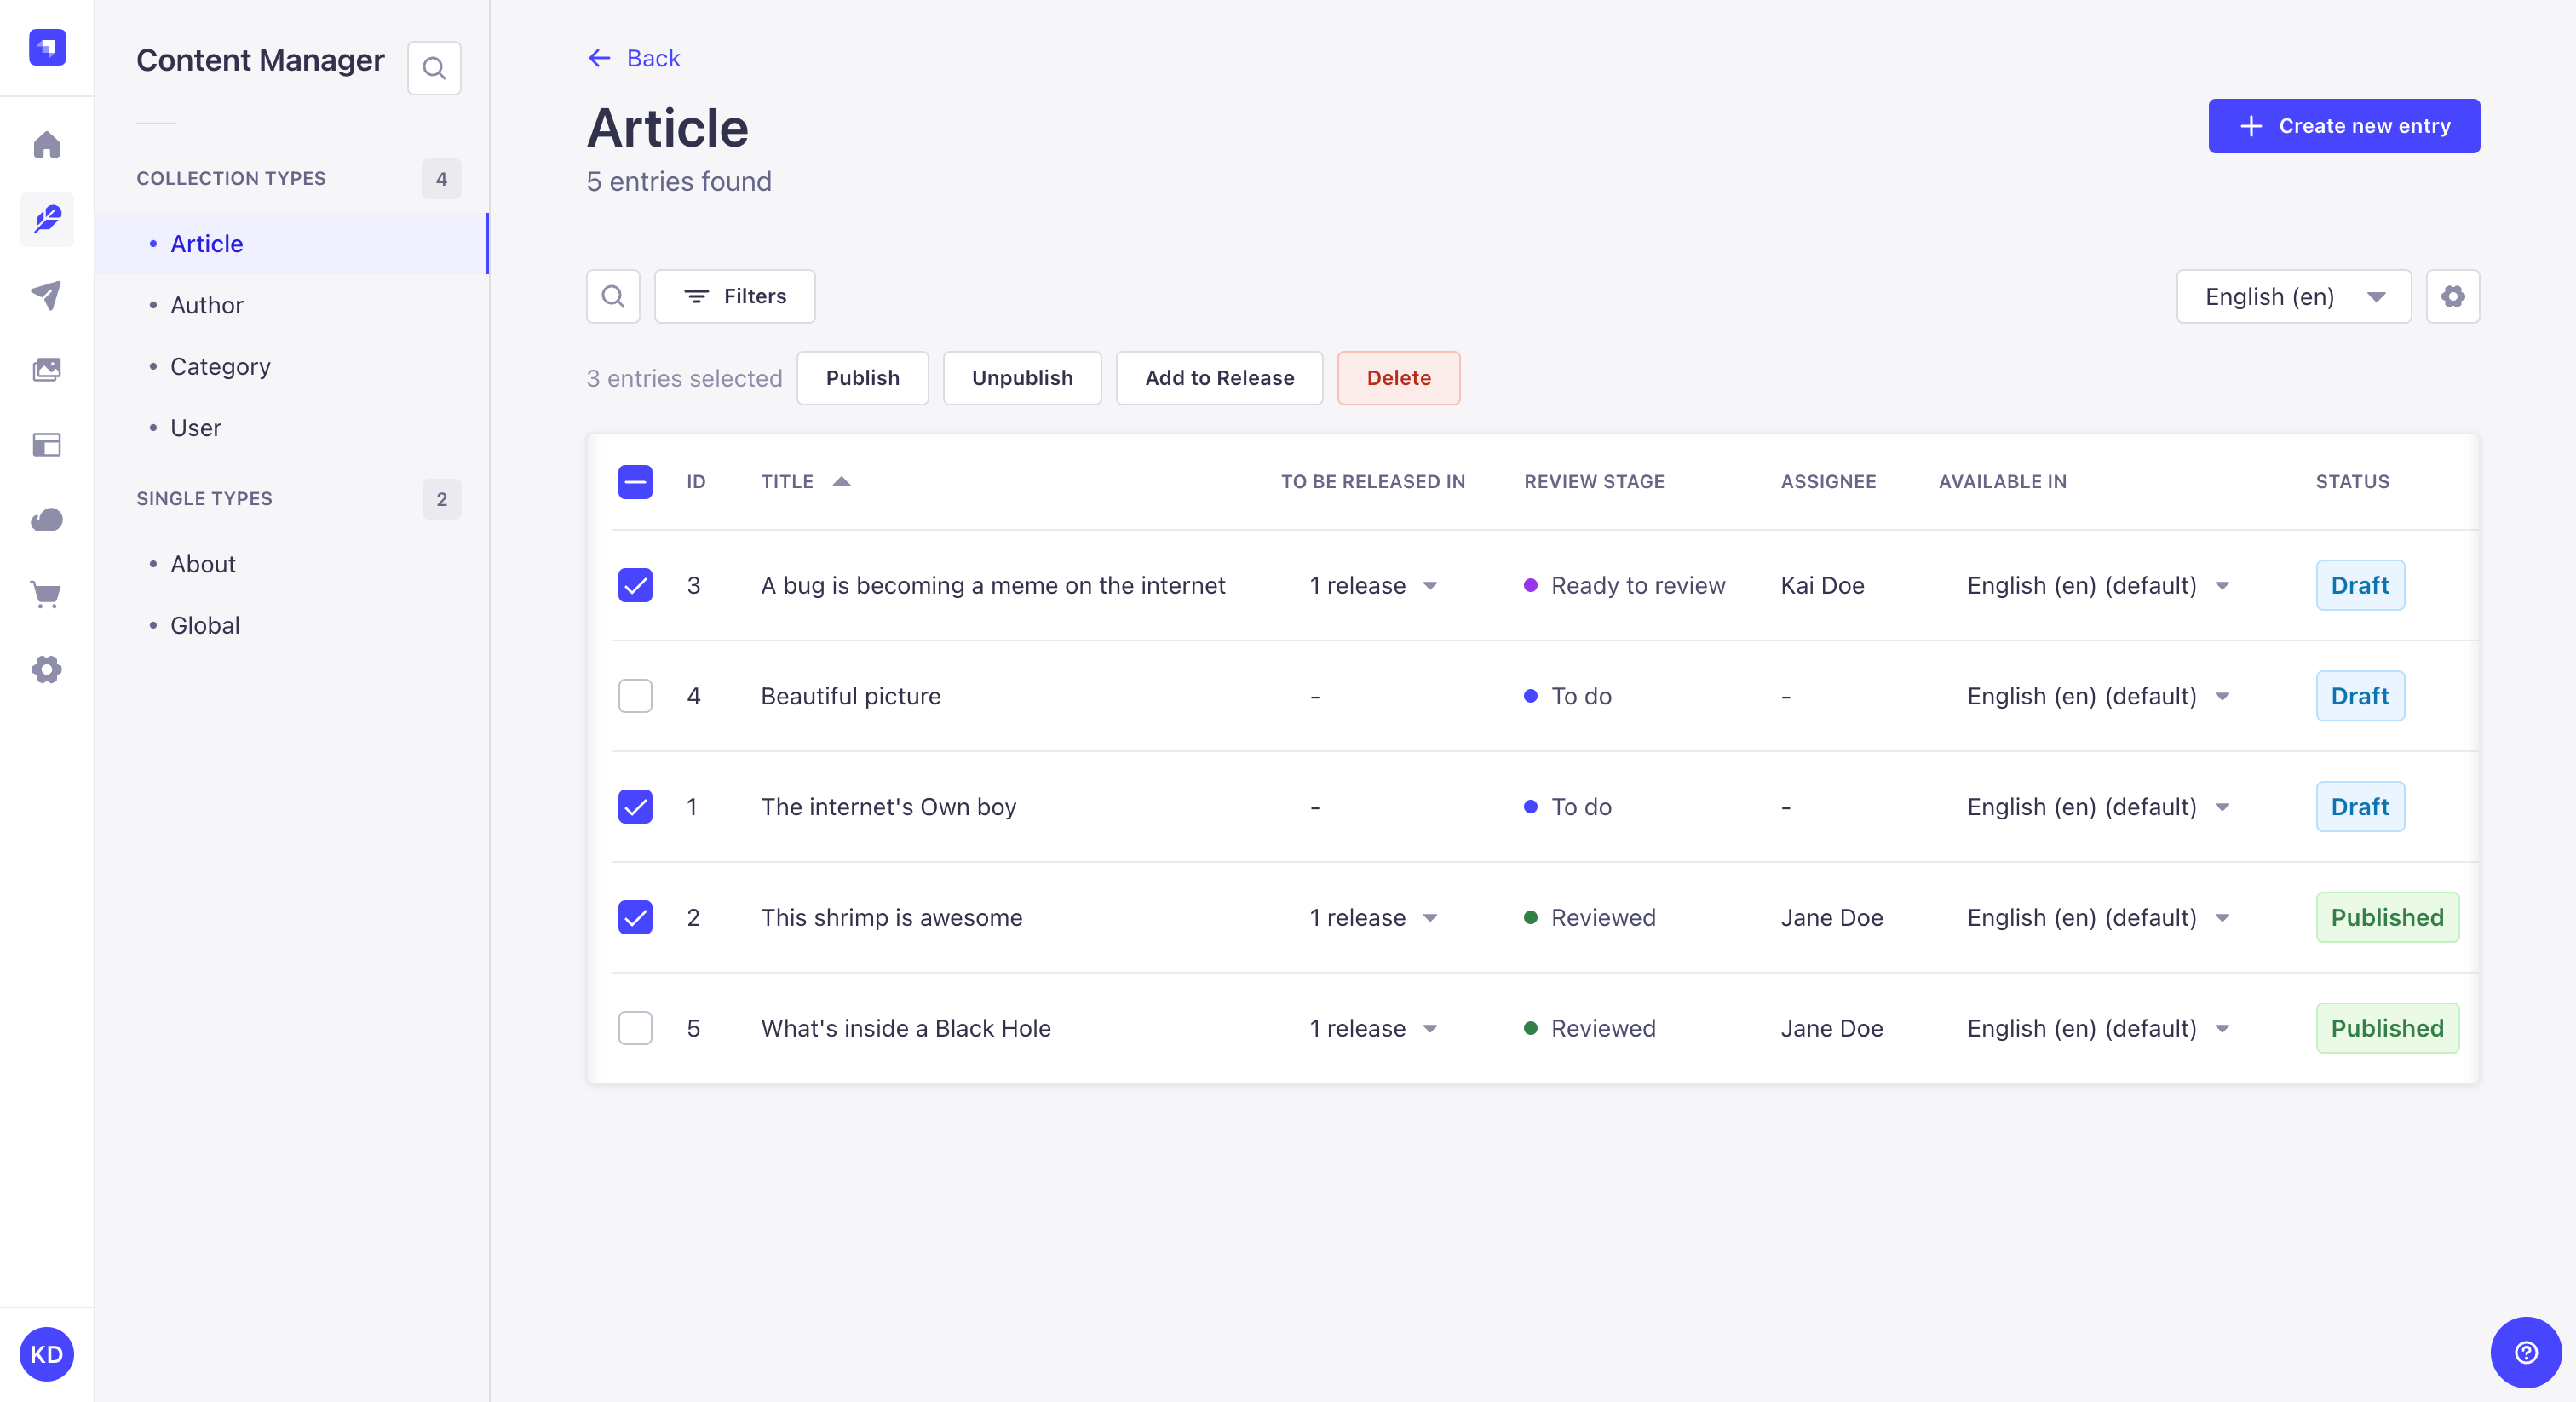
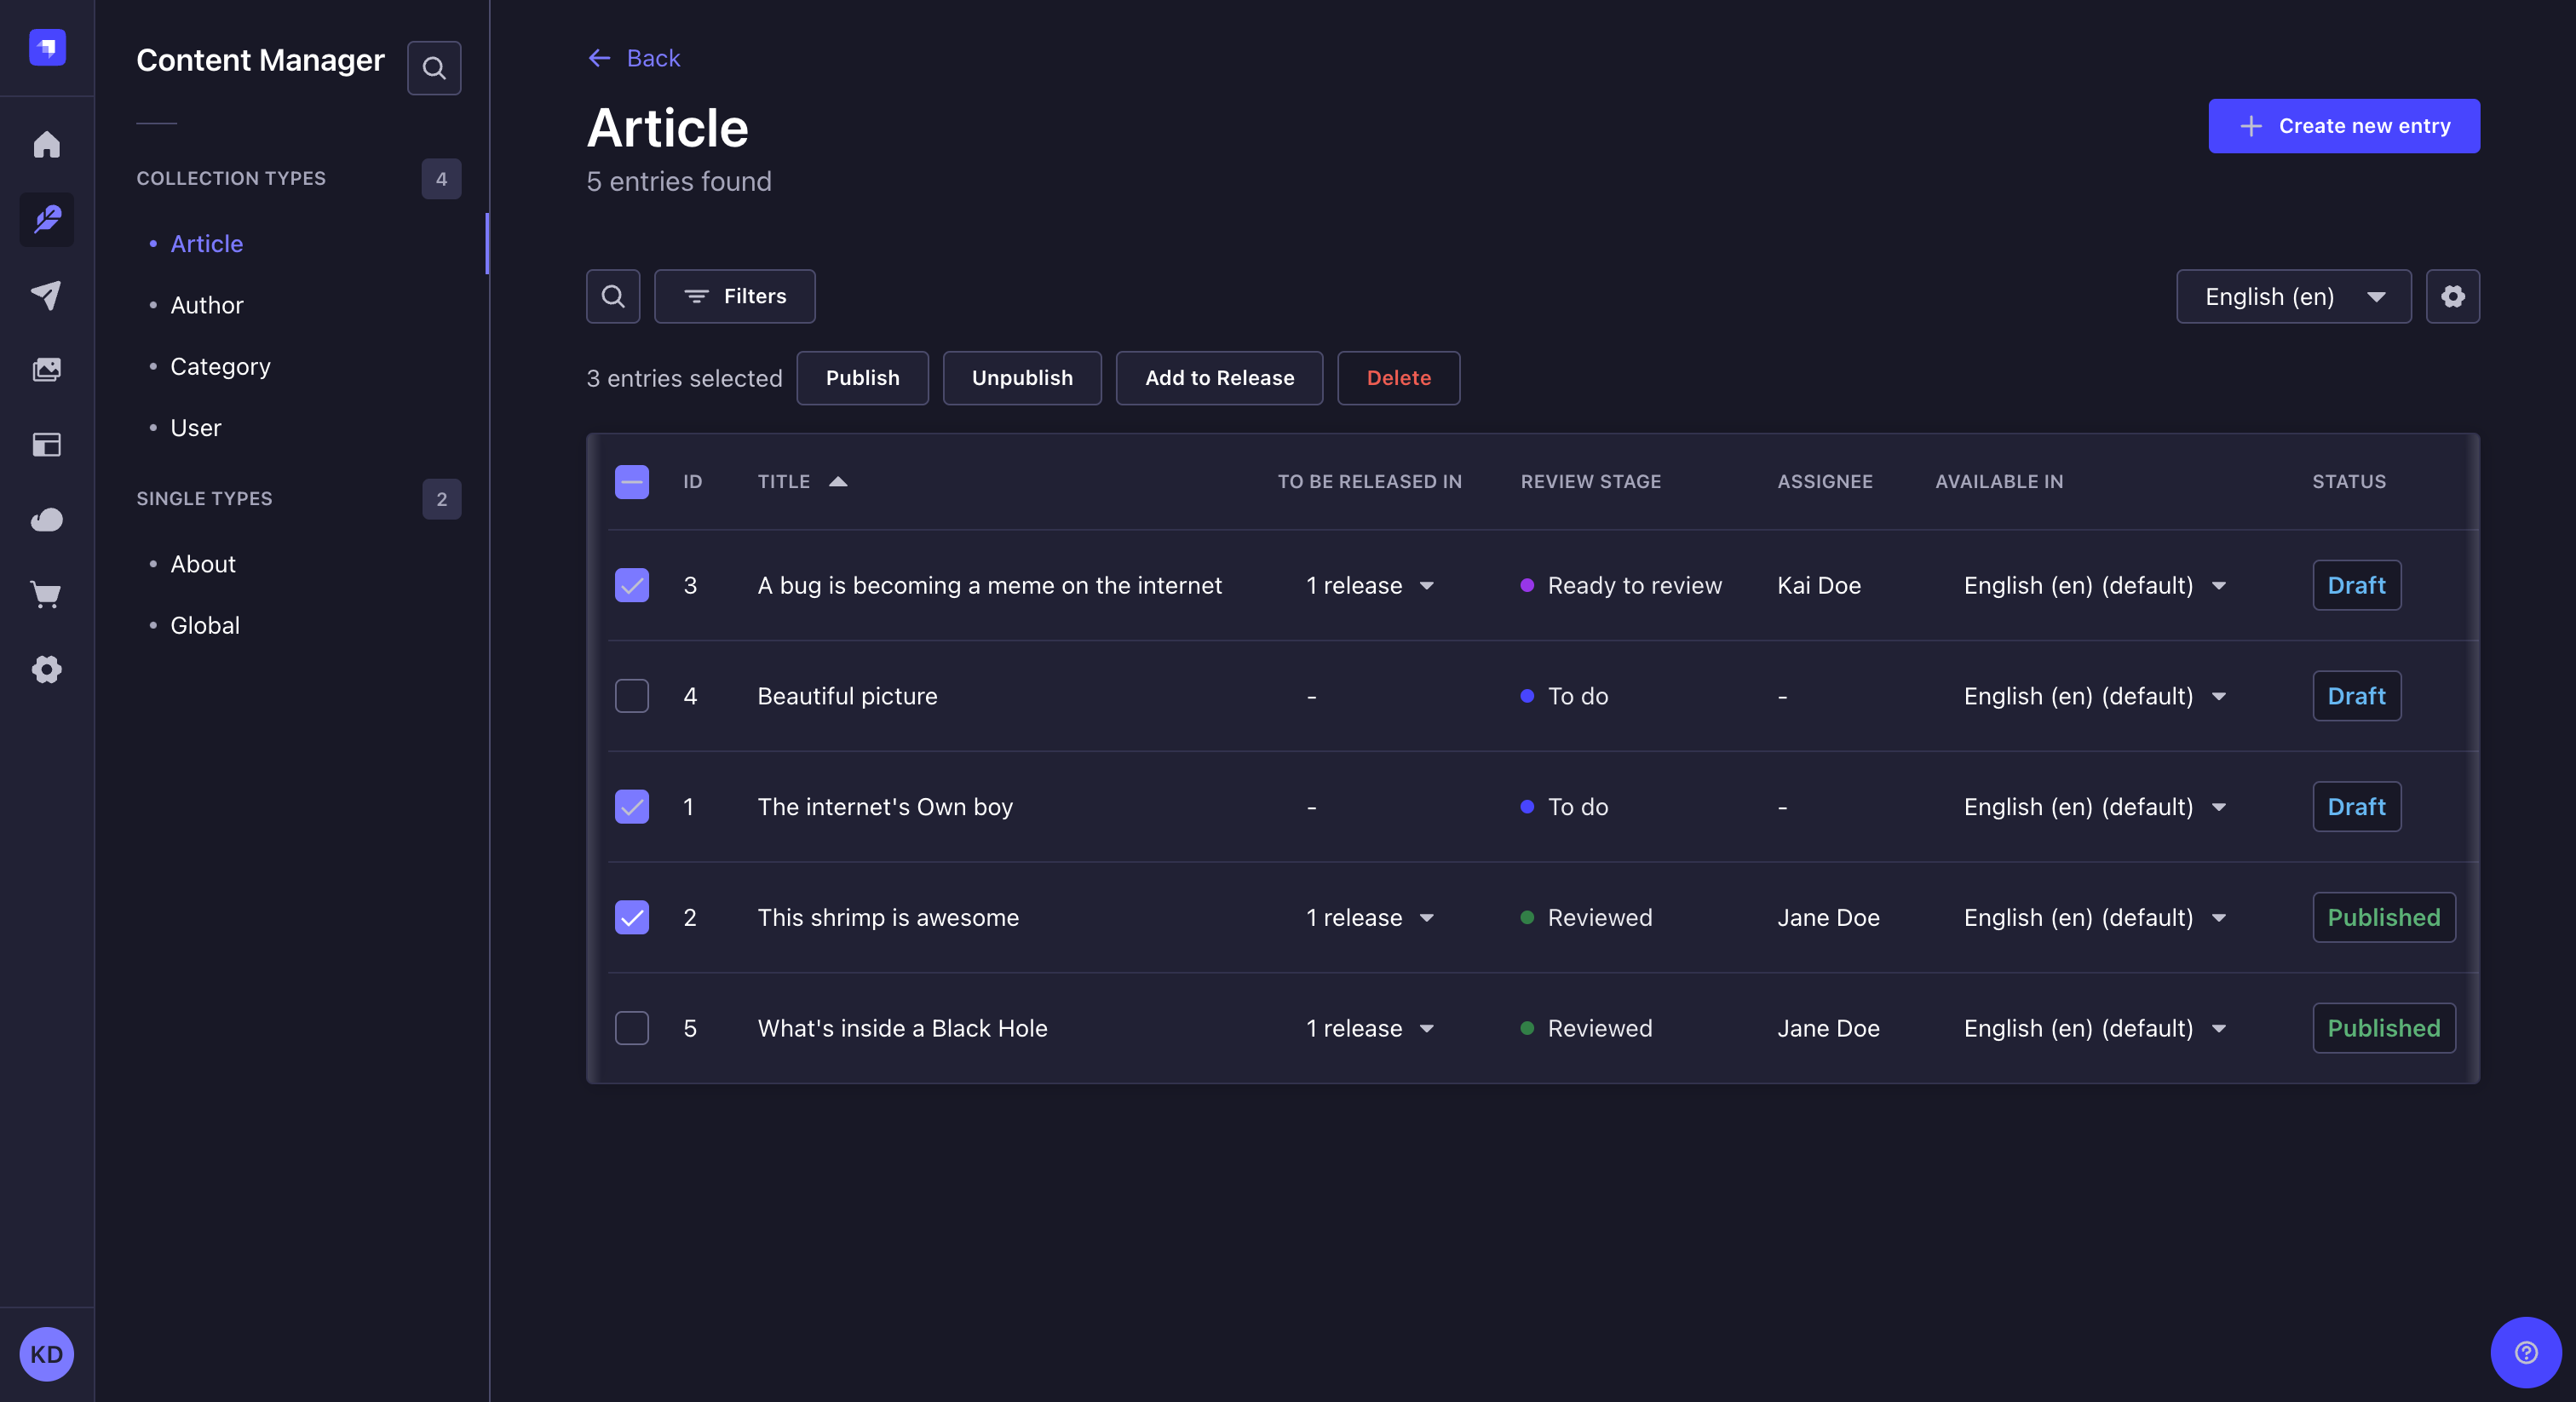
Bulk actions
Path: Content Manager, list view of your content type
Selecting multiple entries from the Content Manager's list view will display additional buttons to publish or unpublish several entries simultaneously. This is what is called "bulk publishing/unpublishing".
If the Internationalization feature is installed, the bulk publish/unpublish actions only apply to the currently selected locale.
Bulk publishing drafts
To publish several entries at the same time:
- From the list view of the Content Manager, select your entries to publish by ticking the box on the left side of the entries' record.
- Click on the Publish button located above the header of the table.
- In the Publish entries dialog, check the list of selected entries and their status:
- Ready to publish: the entry can be published
- "[field name] is required", "[field name] is too short" or "[field name] is too long": the entry cannot be published because of the issue stated in the red warning message.
- (optional) If some of your entries have a status, click the edit buttons to fix the issues until all entries have the Ready to publish status. Note that you will have to click on the Refresh button to update the Publish entries dialog as you fix the various entries issues.
- Click the Publish button.
- In the confirmation dialog box, confirm your choice by clicking again on the Publish button.
Bulk unpublishing content
To unpublish several entries at the same time:
- From the list view of the Content Manager, select your entries to unpublish by ticking the box on the left side of the entries' record.
- Click on the Unpublish button located above the header of the table.
- In the confirmation dialog box, confirm your choice by clicking again on the Unpublish button.
Usage with APIs
Draft or published content can be requested, created, updated, and deleted using the status parameter through the various front-end APIs accessible from Strapi's Content API. To query documents by the relationship between their draft and published versions, such as never-published or modified documents, use the publicationFilter parameter (REST and GraphQL) or the equivalent Document Service API option.
REST API
Learn how to use the status parameter with the REST API.
REST API: publicationFilter
Query never-published, modified, and other publication-related groups of documents.
GraphQL API
Learn how to use the status parameter with GraphQL API.
GraphQL API: publicationFilter
Query never-published, modified, and more with the PublicationFilter enum.
On the back-end server of Strapi, the Document Service API can also query and manage draft and published content: