OpenAPI specification generation
Strapi provides a command-line tool to generate OpenAPI specifications for your applications.
The CLI tool automatically creates comprehensive API documentation that describes all available endpoints, parameters, and response formats in your Strapi application's Content API. Among the possible use cases, the generated specification can then be easily integrated into documentation tools like Swagger UI .
The OpenAPI generation feature is currently experimental. Its behavior and output might change in future releases without following semantic versioning. For additional information and context, please refer to the Strapi Contributor Docs .
Generating an OpenAPI specification
The OpenAPI generation tool is included with Strapi core and doesn't require additional installation. You can use it directly from the command line in any Strapi project to generate comprehensive API documentation.
CLI usage
Executing the command without any arguments will generate a specification.json file at the root of your Strapi folder project:
- Yarn
- NPM
yarn strapi openapi generate
npm run strapi openapi generate
You can also path an optional --output argument to specify the path and filename, as in the following example:
- Yarn
- NPM
yarn strapi openapi generate --output ./docs/api-spec.json
npm run strapi openapi generate -- --output ./docs/api-spec.json
Specification structure and content
The generated OpenAPI specification follows the OpenAPI 3.1.0 standard and could look like in the following shortened example:
The generated OpenAPI specification includes all available API endpoints in your Strapi application, and information about these endpoints, such as the following:
- CRUD operations for all content types
- Custom API routes defined in your application
- Authentication endpoints for user management
- File upload endpoints for media handling
- Plugin endpoints from installed plugins
Integrating with Swagger UI
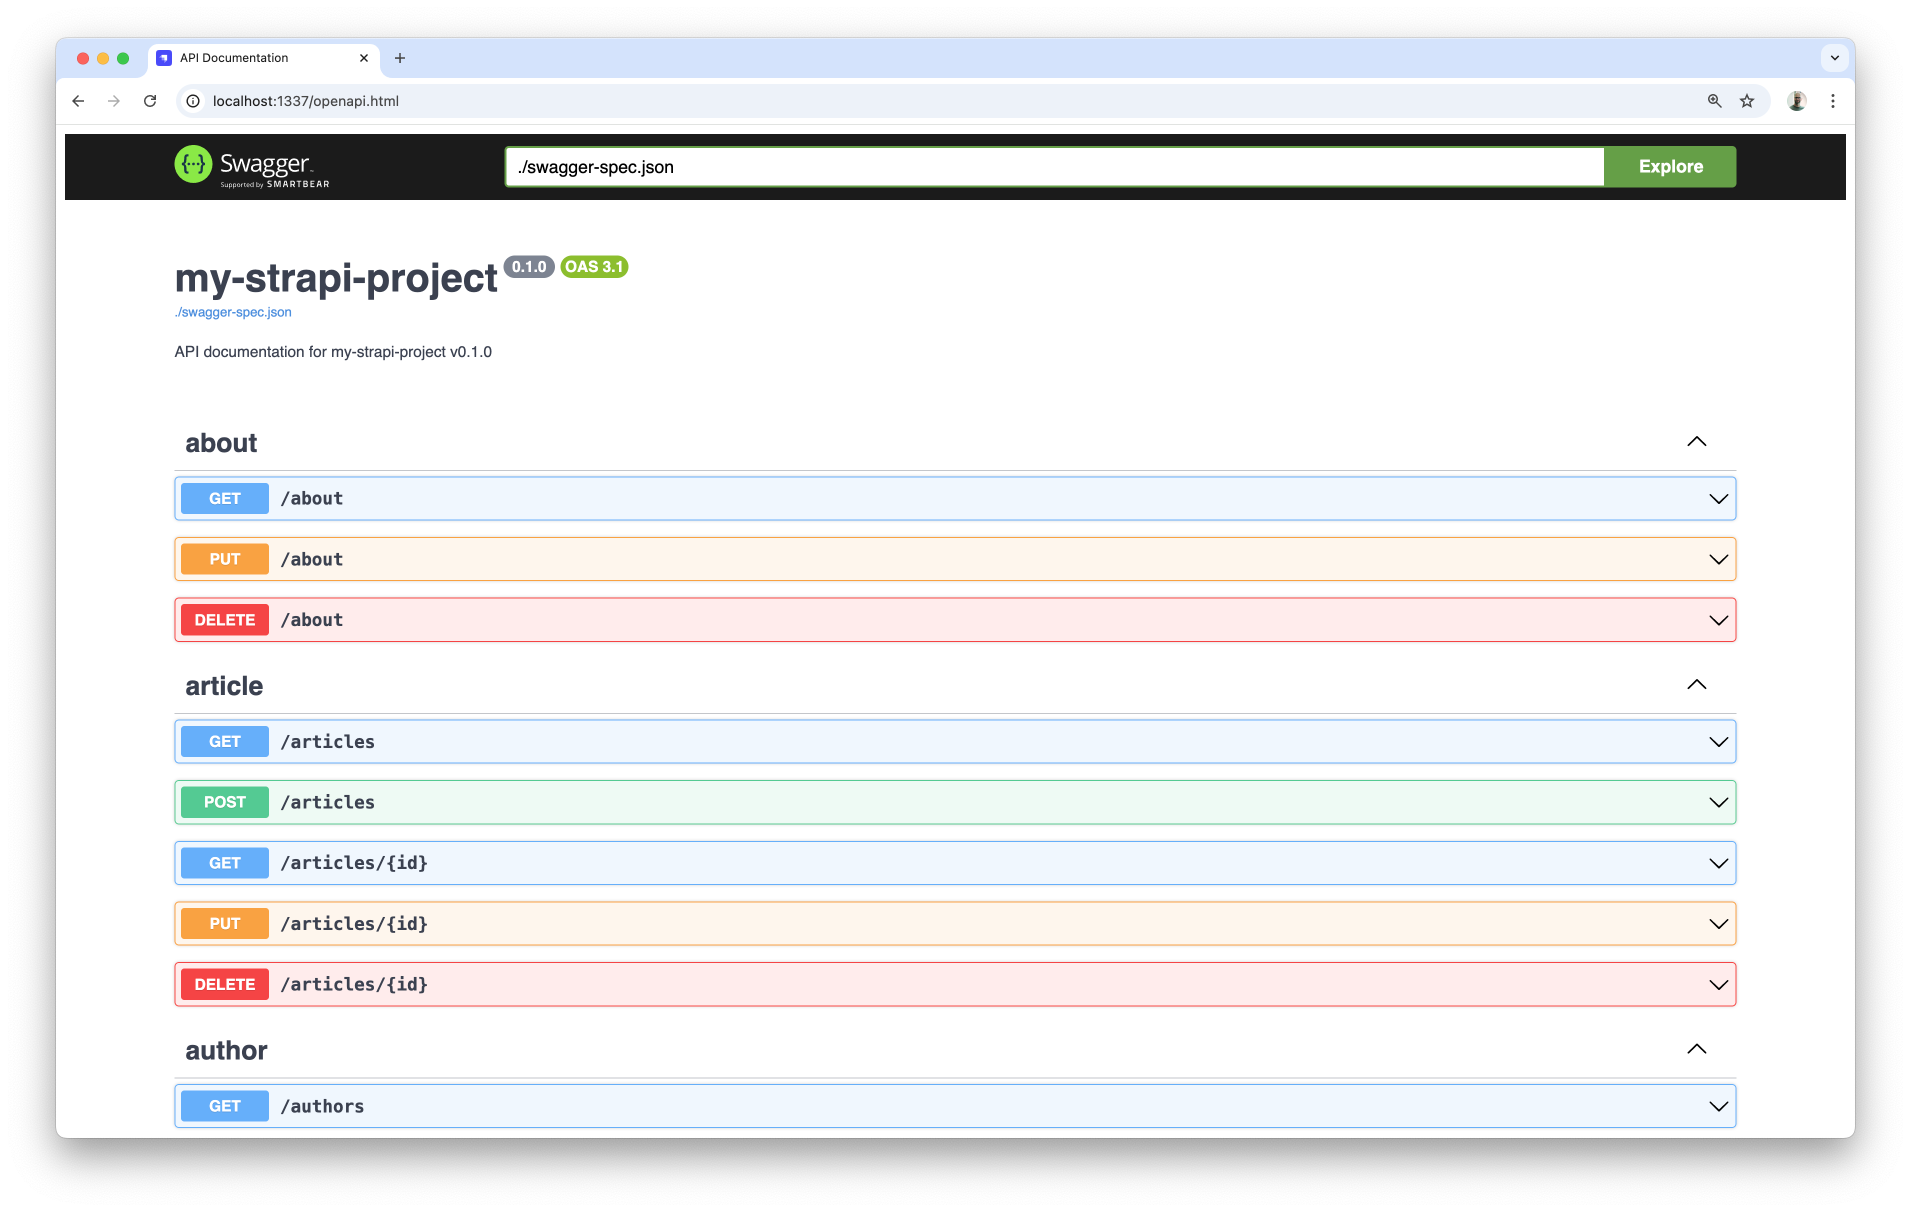
With the following steps you can quickly generate a Swagger UI-compatible page:
-
Generate a specification:
- Yarn
- NPM
yarn strapi openapi generate --output ./public/swagger-spec.jsonnpm run strapi openapi generate -- --output ./public/swagger-spec.json -
Update the
/config/middlewares.jsconfiguration file with the following code:- JavaScript
- TypeScript
/config/middlewares.jsmodule.exports = [
'strapi::logger',
'strapi::errors',
{
name: 'strapi::security',
config: {
contentSecurityPolicy: {
useDefaults: true,
directives: {
'script-src': ["'self'", "'unsafe-inline'", 'https://unpkg.com'],
'style-src': ["'self'", "'unsafe-inline'", 'https://unpkg.com'],
'connect-src': ["'self'", 'https:'],
'img-src': ["'self'", 'data:', 'blob:', 'https:'],
'media-src': ["'self'", 'data:', 'blob:'],
upgradeInsecureRequests: null,
},
},
},
},
'strapi::cors',
'strapi::poweredBy',
'strapi::query',
'strapi::body',
'strapi::session',
'strapi::favicon',
'strapi::public',
];/config/middlewares.tsexport default [
'strapi::logger',
'strapi::errors',
{
name: 'strapi::security',
config: {
contentSecurityPolicy: {
useDefaults: true,
directives: {
'script-src': ["'self'", "'unsafe-inline'", 'https://unpkg.com'],
'style-src': ["'self'", "'unsafe-inline'", 'https://unpkg.com'],
'connect-src': ["'self'", 'https:'],
'img-src': ["'self'", 'data:', 'blob:', 'https:'],
'media-src': ["'self'", 'data:', 'blob:'],
upgradeInsecureRequests: null,
},
},
},
},
'strapi::cors',
'strapi::poweredBy',
'strapi::query',
'strapi::body',
'strapi::session',
'strapi::favicon',
'strapi::public',
];This will ensure the Swagger UI display from unpkg.com is not blocked by Strapi's CSP policy handled by the security middleware.
-
Create a
public/openapi.htmlfile in your Strapi project to display the Swagger UI, with the following code:<!DOCTYPE html>
<html>
<head>
<title>API Documentation</title>
<link
rel="stylesheet"
type="text/css"
href="https://unpkg.com/swagger-ui-dist@5.0.0/swagger-ui.css"
/>
</head>
<body>
<div id="swagger-ui"></div>
<script src="https://unpkg.com/swagger-ui-dist@5.0.0/swagger-ui-bundle.js"></script>
<script src="https://unpkg.com/swagger-ui-dist@5.0.0/swagger-ui-standalone-preset.js"></script>
<script>
window.onload = function () {
SwaggerUIBundle({
url: './swagger-spec.json',
dom_id: '#swagger-ui',
presets: [
SwaggerUIBundle.presets.apis,
SwaggerUIStandalonePreset
],
layout: 'StandaloneLayout',
});
};
</script>
</body>
</html> -
Restart the Strapi server with
yarn developornpm run developand visit the/openapi.htmlpage. The Swagger UI should be displayed: