Content-type Builder
Page summary:The Content-type Builder is a tool for designing content types and components. This documentation gives an overview of the Content-type Builder and covers field options, relations, component usage, and shares data modeling tips.
From the Content-type Builder, accessible via the main navigation of the admin panel, users can create and edit their content types.
Overview
The Content-type Builder allows the creation and management of content-types, which can be:
- Collection types: content-types that can manage several entries.
- Single types: content-types that can only manage one entry.
- Components: content structure that can be used in multiple collection types and single types. Although they are technically not proper content-types because they cannot exist independently, components are also created and managed through the Content-type Builder, in the same way as collection and single types.
All 3 are displayed as categories in the sub navigation of the Content-type Builder. In each category are listed all content-types and components that have already been created.
Collection types and single types can also be grouped into folders, to keep the sub navigation organized as a project grows.
Click the search icon in the Content-type Builder sub navigation to find a specific collection type, single type, or component.
In the Content-type Builder's sub navigation is also displayed a centralised Save button that applies for all content-types and components. Along with the display of statuses for both content-types/components and fields, this allows you to work on several content-types and components at the same time. The following statuses can be displayed:
NeworNindicates that a content-type/component or field is new and hasn't been saved yet,ModifiedorMindicates that a content-type/component or field has been modified since the last save,DeletedorDindicates that a content-type/component or field has been deleted but that it will only be confirmed once saved.
Clicking on the ... button next to Save gives access to other options, such as Undo/Redo last change and Discard all changes. These options are also centralised, meaning that they apply to the last action(s) that was/were done on all content-types, components and fields since the last time you saved.
Configuration
The Content-type Builder requires no configuration to be used. The folders used to organize content-types are however stored in a dedicated file, which can be edited directly.
Code-based configuration
The folders displayed in the Content-type Builder sub navigation are stored in the src/content-structure/groups.json file.
The file is versioned with the rest of your project, so the organization defined locally is shared with your team and deployed with your application.
Folder organization therefore travels with your project's code: deploy the file to move it from one environment to another.
Data Transfer does not include the content structure file in exports, imports or transfers.
Folders are called groups in the file, and are listed per section, collectionTypes and singleTypes. Each group has an identifier, a name, a parent, and a list of children:
{
  "version": 1,
  "sections": {
    "collectionTypes": {
      "groups": [
        {
          "id": "grp_x8k2m4p7q1",
          "name": "Restaurants",
          "parent": null,
          "children": [{ "type": "group", "id": "grp_c3v9n5t2w6" }]
        },
        {
          "id": "grp_c3v9n5t2w6",
          "name": "Menus",
          "parent": "grp_x8k2m4p7q1",
          "children": [{ "type": "contentType", "uid": "api::menu.menu" }]
        }
      ]
    },
    "singleTypes": {
      "groups": []
    }
  }
}
The following properties are available:
| Property | Description |
|---|---|
version | Version of the file format. The only supported value is 1. |
id | Identifier of the folder: any non-empty string, unique across both sections. The Content-type Builder generates identifiers prefixed with grp_, and hand-written identifiers such as products are valid. |
name | Name of the folder, from 1 to 255 characters, without leading or trailing spaces. 2 folders that share the same parent must have different names, whatever their case. |
parent | Identifier of the parent folder, or null for a folder at the root of its section. |
children | Ordered list of the content-types and folders the folder contains. A content-type is referenced by its uid, a folder by its id. |
Folders can be nested up to 3 levels deep, and a content-type can only belong to one folder.
Editing the file by hand: what Strapi reads, and what it does with an invalid file
At build time, the file is compiled to dist/src/content-structure/groups.json, and this built version is the one Strapi reads when the server starts.
Edit the source file, never the one in dist, which is replaced by the next build. A file edited by hand is taken into account once the application has been rebuilt and restarted.
Entries that cannot be used are repaired or ignored at startup, and a message prefixed with [content-structure] is logged. For instance:
- a reference to a content-type that no longer exists is dropped from its folder,
- a folder whose parent is missing is moved back to the root of its section.
If the file itself cannot be read, the server starts without any folder.
Saving from the Content-type Builder is stricter than reading the file at startup: a structure that breaks one of the rules above is rejected instead of being repaired. Make sure a hand-written file follows these rules before building and deploying it.
Components are not part of the content structure file, and cannot be organized into folders.
Usage
Creating content-types
The Content-type Builder allows you to create new content-types: single and collection types, but also components.
Creating content-types with Strapi AI NewThis content is new.
GrowthThis feature is available with a Growth plan.When enabled, Strapi AI adds an assistant that helps you create or edit content types with natural language.
To use Strapi AI with the Content-Type Builder, click on the button in the bottom right corner of the admin panel, and describe what you need:
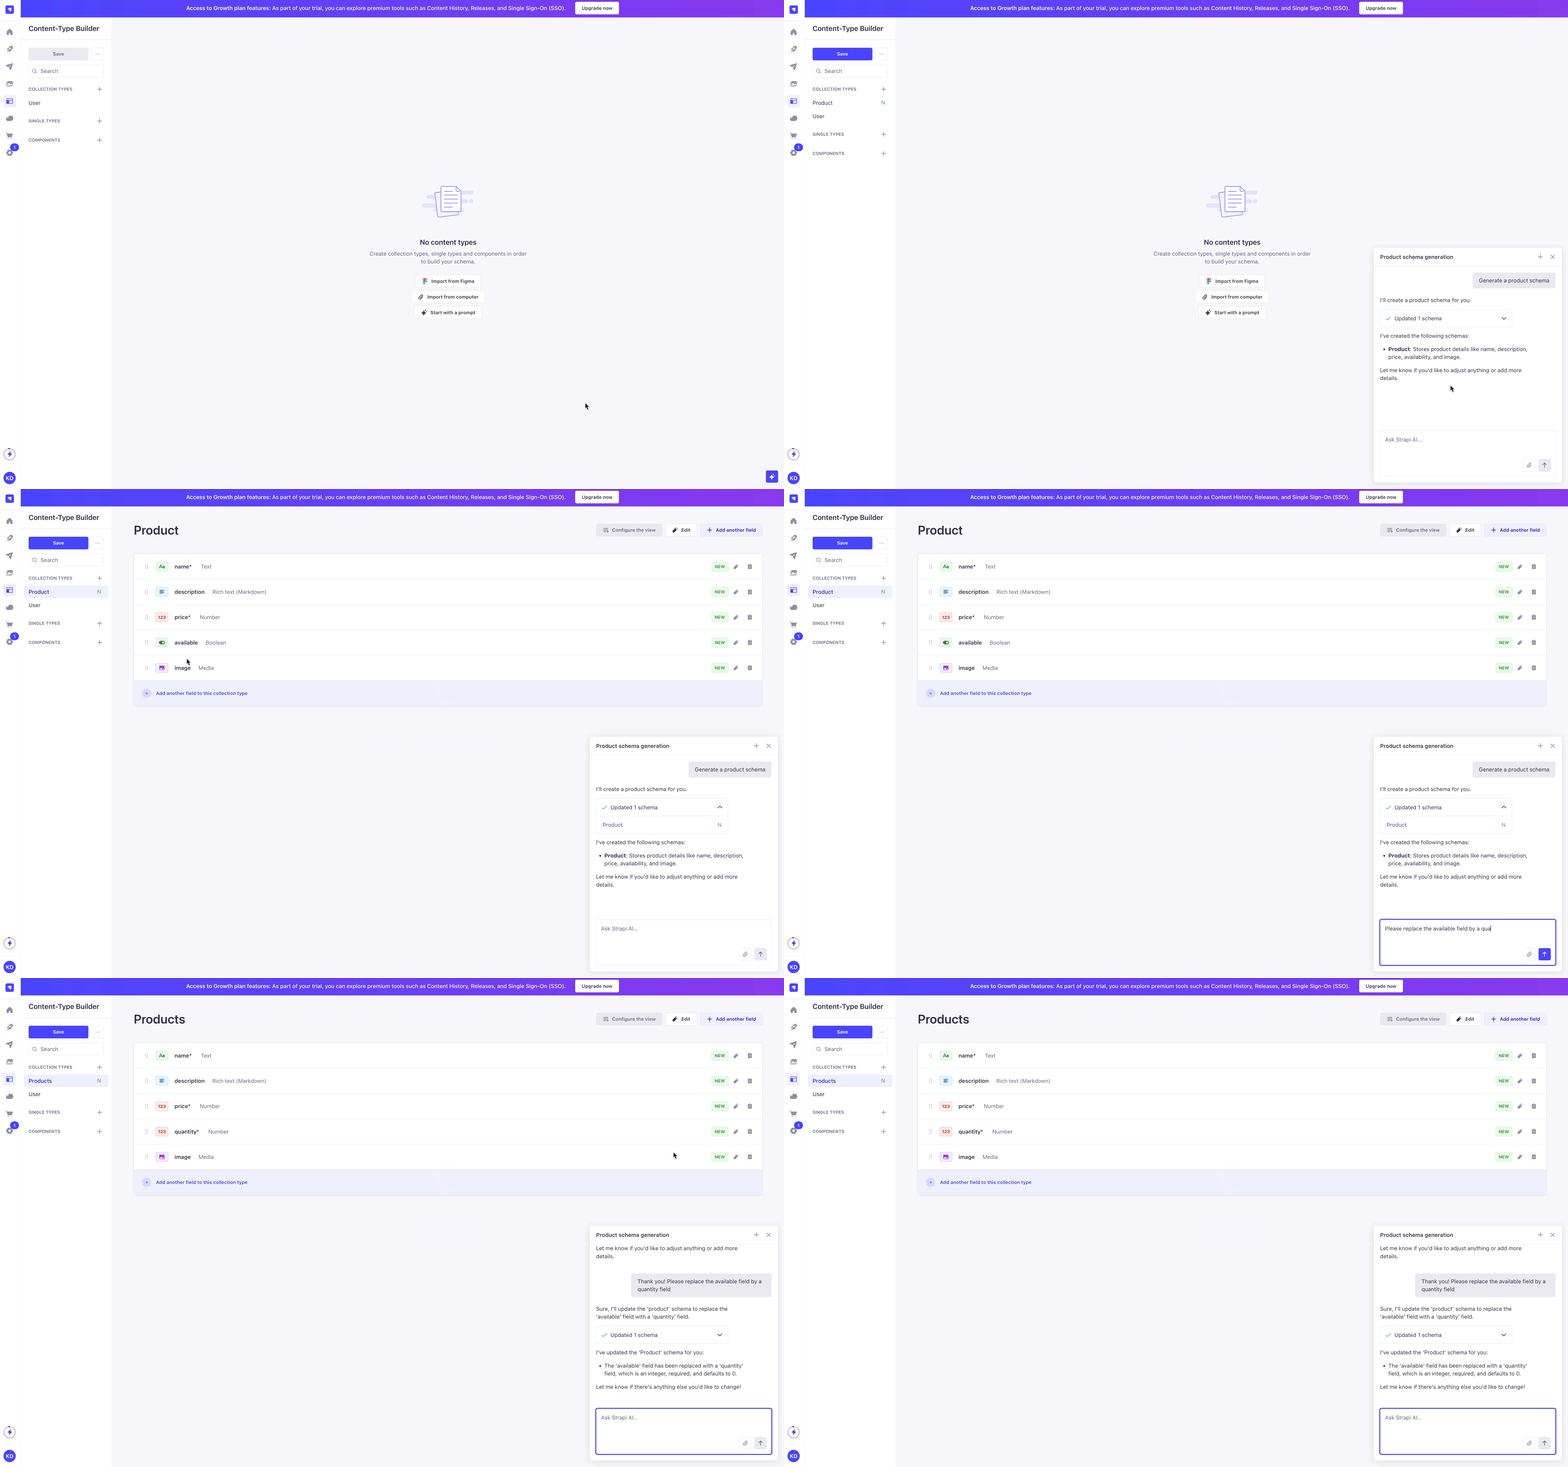
You can also use the button at the bottom of the chat window to import code from an existing Strapi or front-end application, import a Figma project, or attach an image to extract the content structure from a design.
The more precise your prompts, the more accurate your created schemas are likely to be.
For example, the following prompt example works well when creating relations: Could you please generate a collection of dogs then also generate an owner collection and add relationship to dogs? An owner can have multiple dogs, but a dog can only have one owner.
Strapi AI includes 1,000 credits per month on the Growth plan, and 10 free credits during the free trial. Strapi AI is not available on Enterprise plans.
Lightweight actions use fewer credits, while more complex ones use more.
You can check your credit usage in the Settings Overview of the admin panel. Notifications are sent when your usage reaches 80%, 90%, and 100% of your monthly allowance. Overages apply.
Credits are shared across all users within the same project instance.
When your credits run out, you can keep using Strapi AI, with overages billed monthly. For more information about Strapi AI, please refer to the dedicated support article.
Creating content-types manually
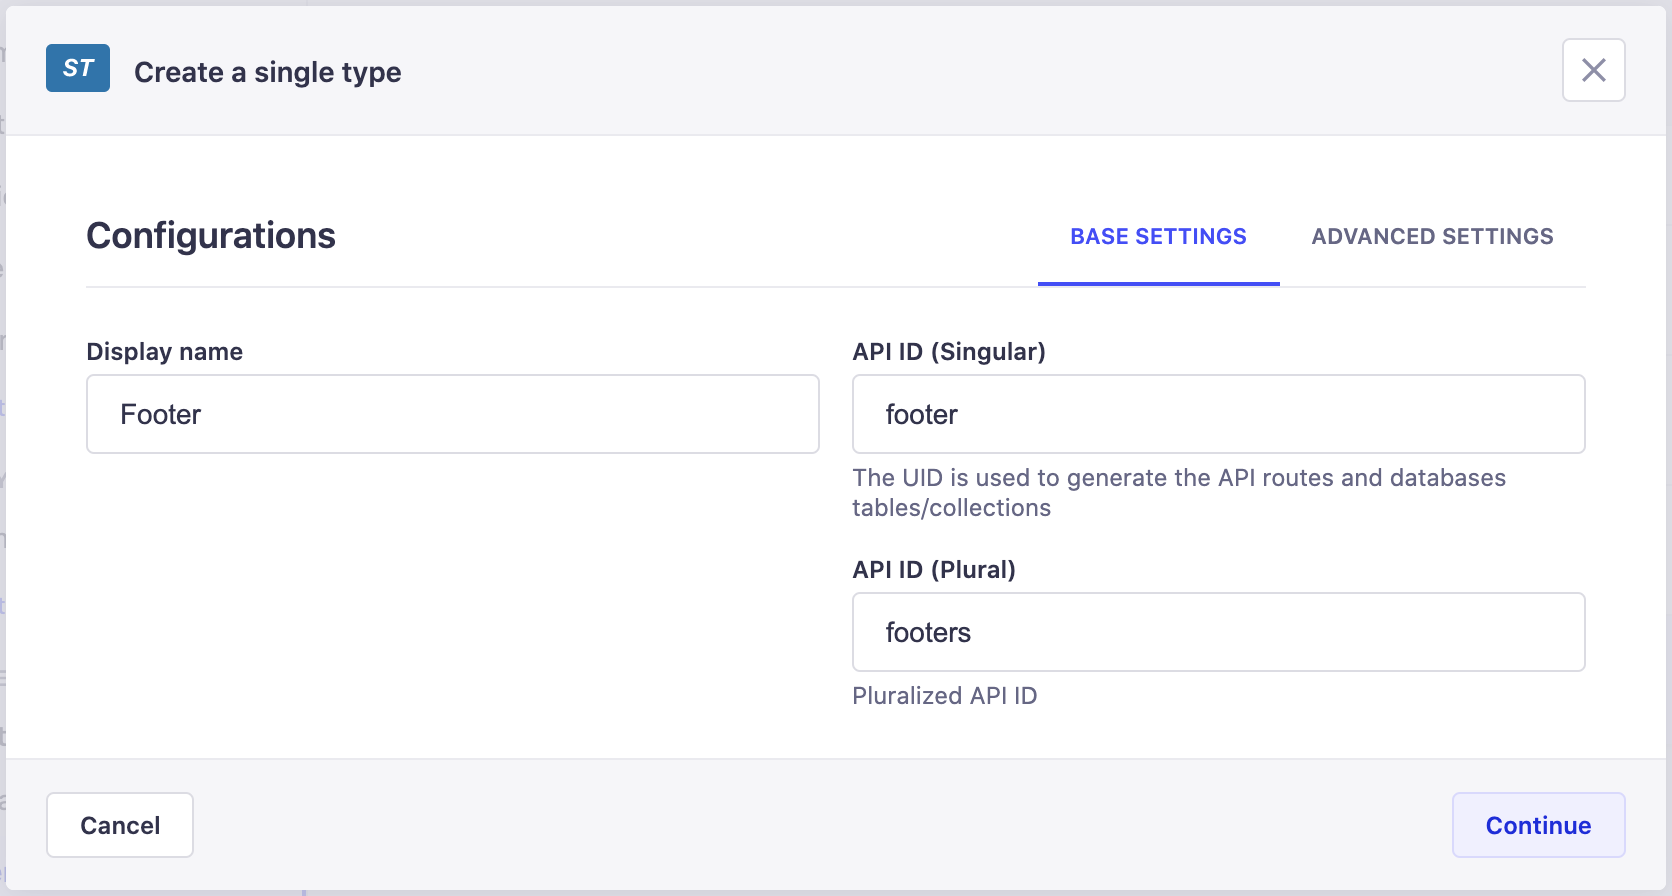
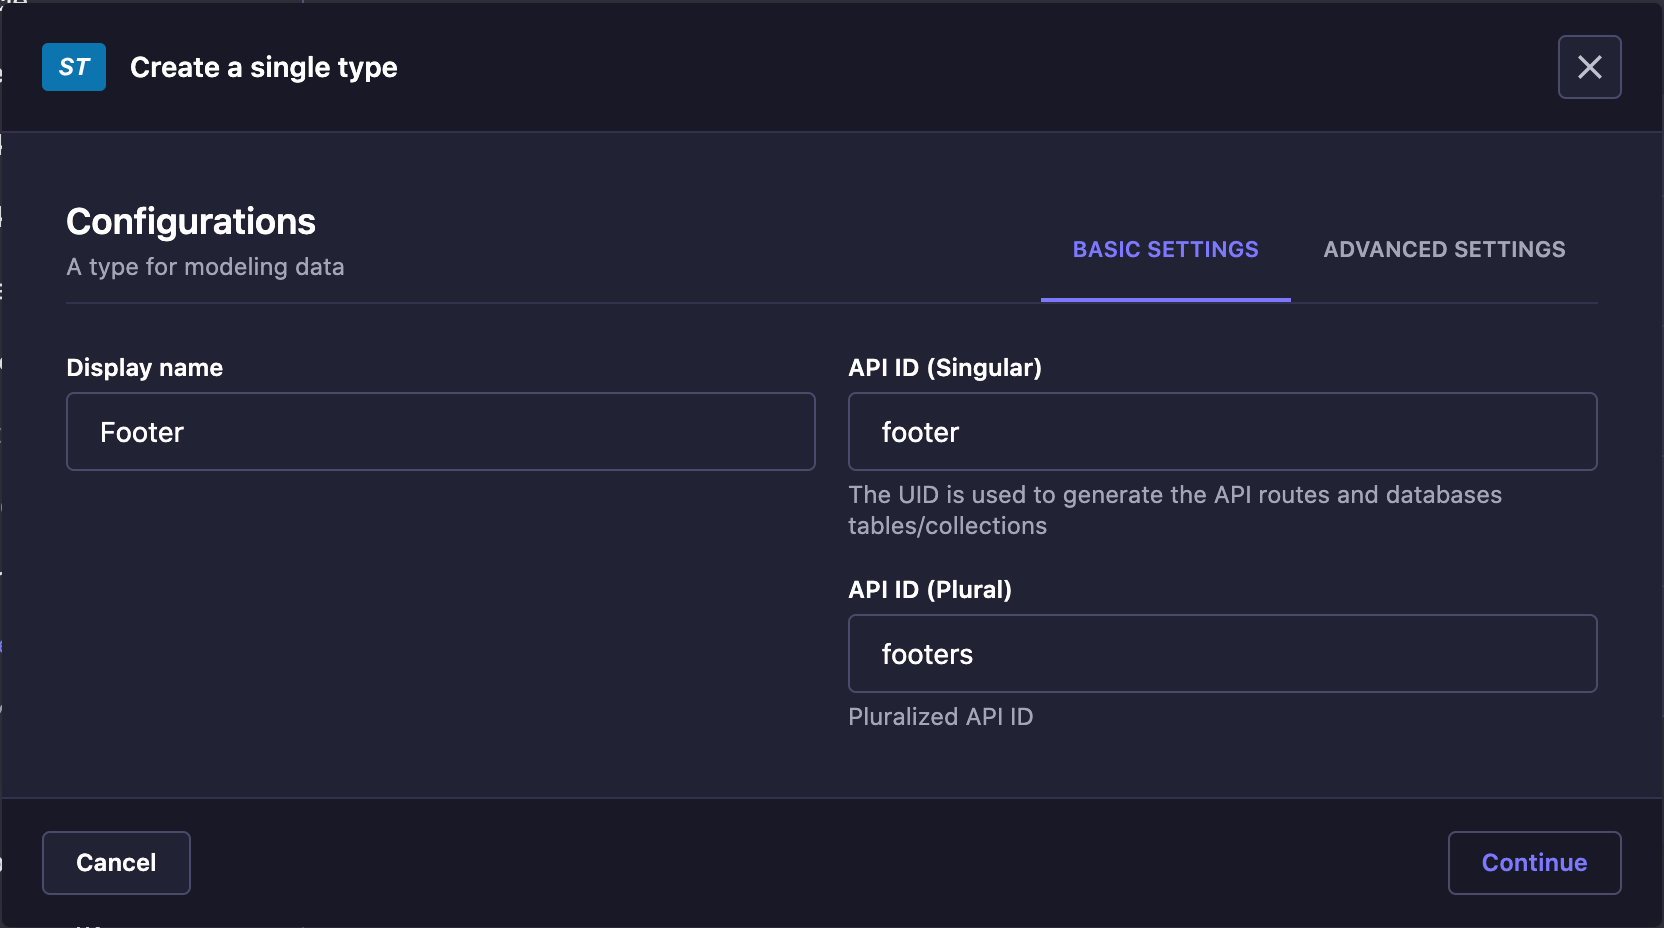
- Choose whether you want to create a collection type or a single type.
- In the Content-type Builder's category of the content-type you want to create, click on Create new collection/single type.
- In the content-type creation window, write the name of the new content-type in the Display name textbox.
- Check the API ID to make sure the automatically pre-filled values are correct. Collection type names are indeed automatically pluralized when displayed in the Content Manager. It is recommended to opt for singular names, but the API ID field allows you to fix any pluralization mistake.
- (optional) In the Select a folder or enter a value to create a new one field, select the folder in which the content-type should be displayed, or type a name to create a new folder (see Organizing content-types with folders).
- (optional) In the Advanced Settings tab, configure the available settings for the new content-type:
Setting name Instructions Draft & publish Tick the checkbox to allow entries of the content-type to be managed as draft versions, before they are published (see Draft & Publish). Internationalization Tick the checkbox to allow entries of the content-type to be translated into other locales. - Click on the Continue button.
- Add and configure chosen fields for your content-type (see Configuring fields for content-types).
- Click on the Save button.
New content-types are only considered created once they have been saved. Saving is only possible if at least one field has been added and properly configured. If these steps have not been done, a content-type cannot be created, listed in its category in the Content-type Builder, and cannot be used in the Content Manager.
New component
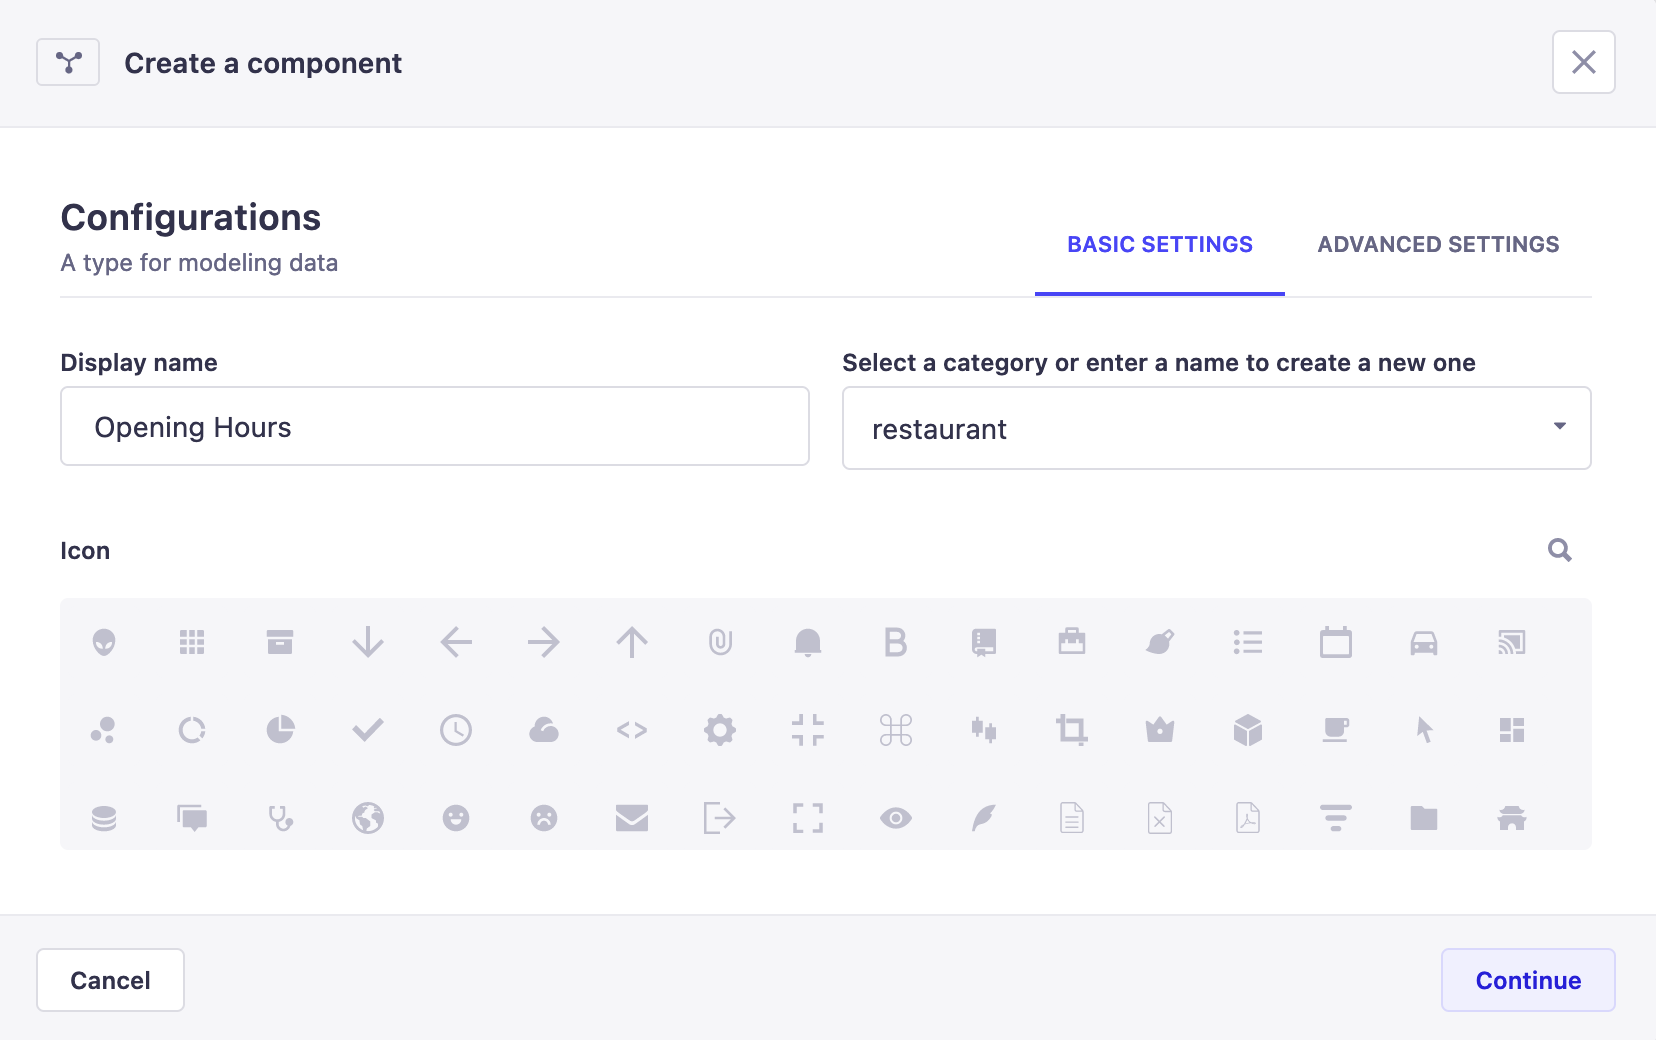
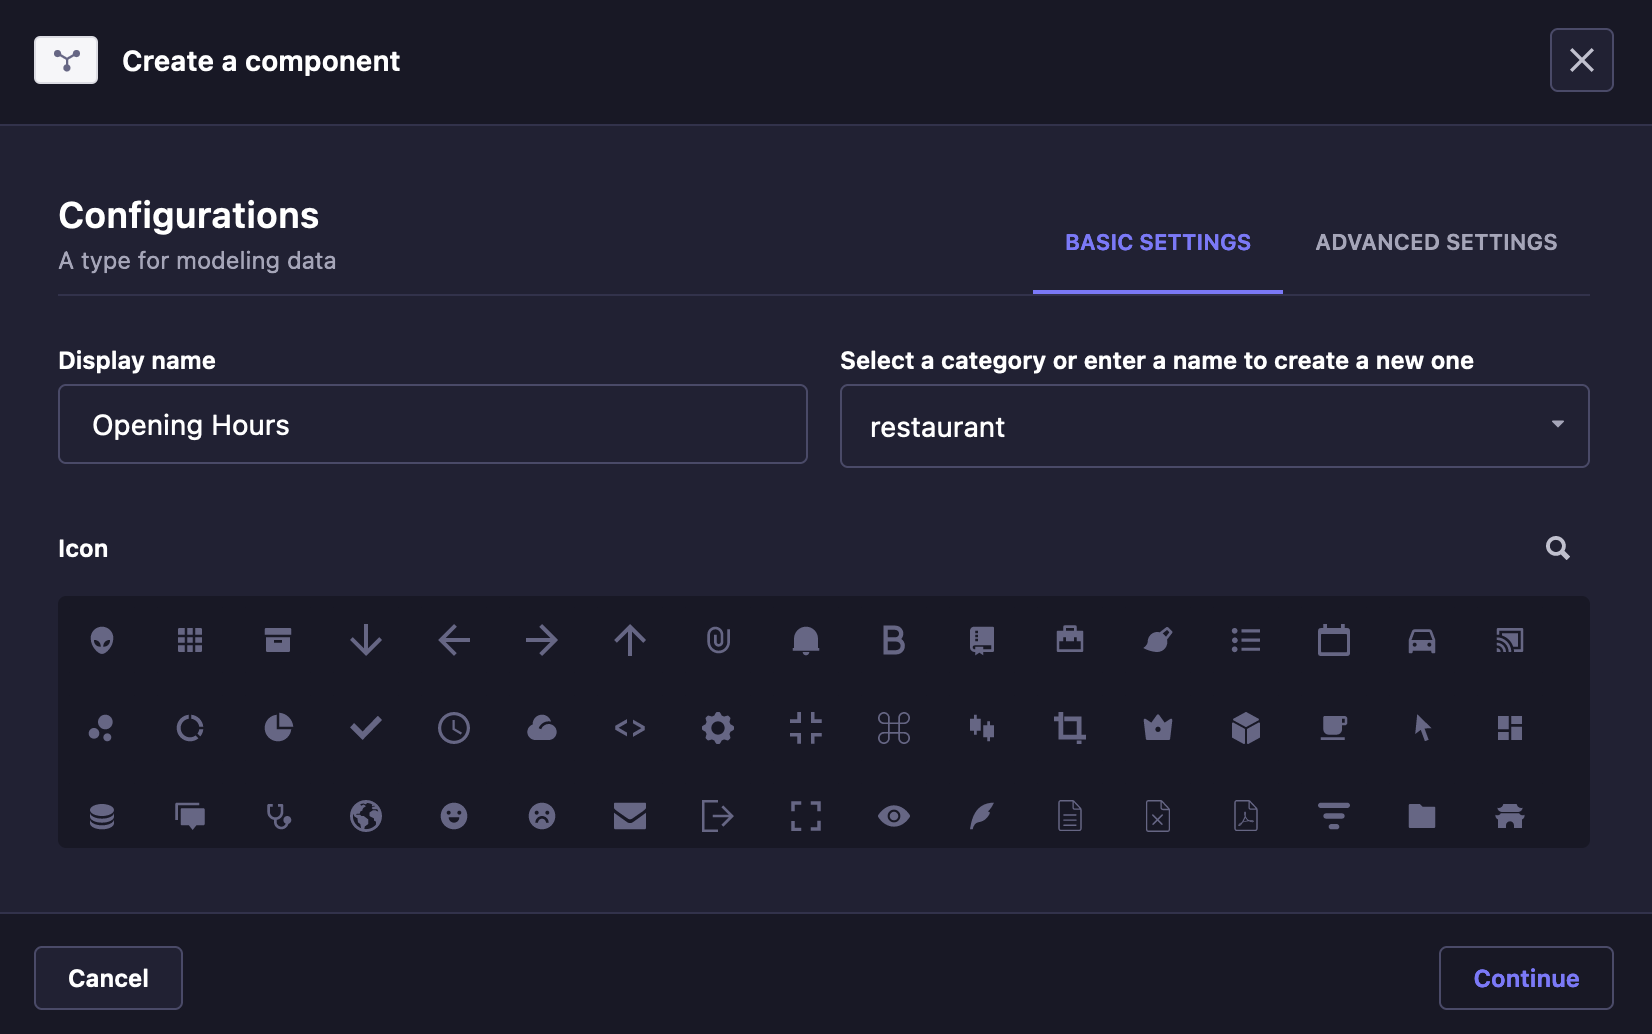
- In the Components category of the Content-type Builder sub navigation, click on Create new component.
- In the component creation window, configure the basic settings of the new component:
- Write the name of the component in the Display name textbox.
- Select an available category, or enter in the textbox a new category name to create one.
- (optional) Choose an icon representing the new component. You can use the search to find an icon instead of scrolling through the list.
- Click on the Continue button.
- Add and configure chosen fields for your component (see Configuring fields for content-types).
- Click on the Save button.
Editing content-types
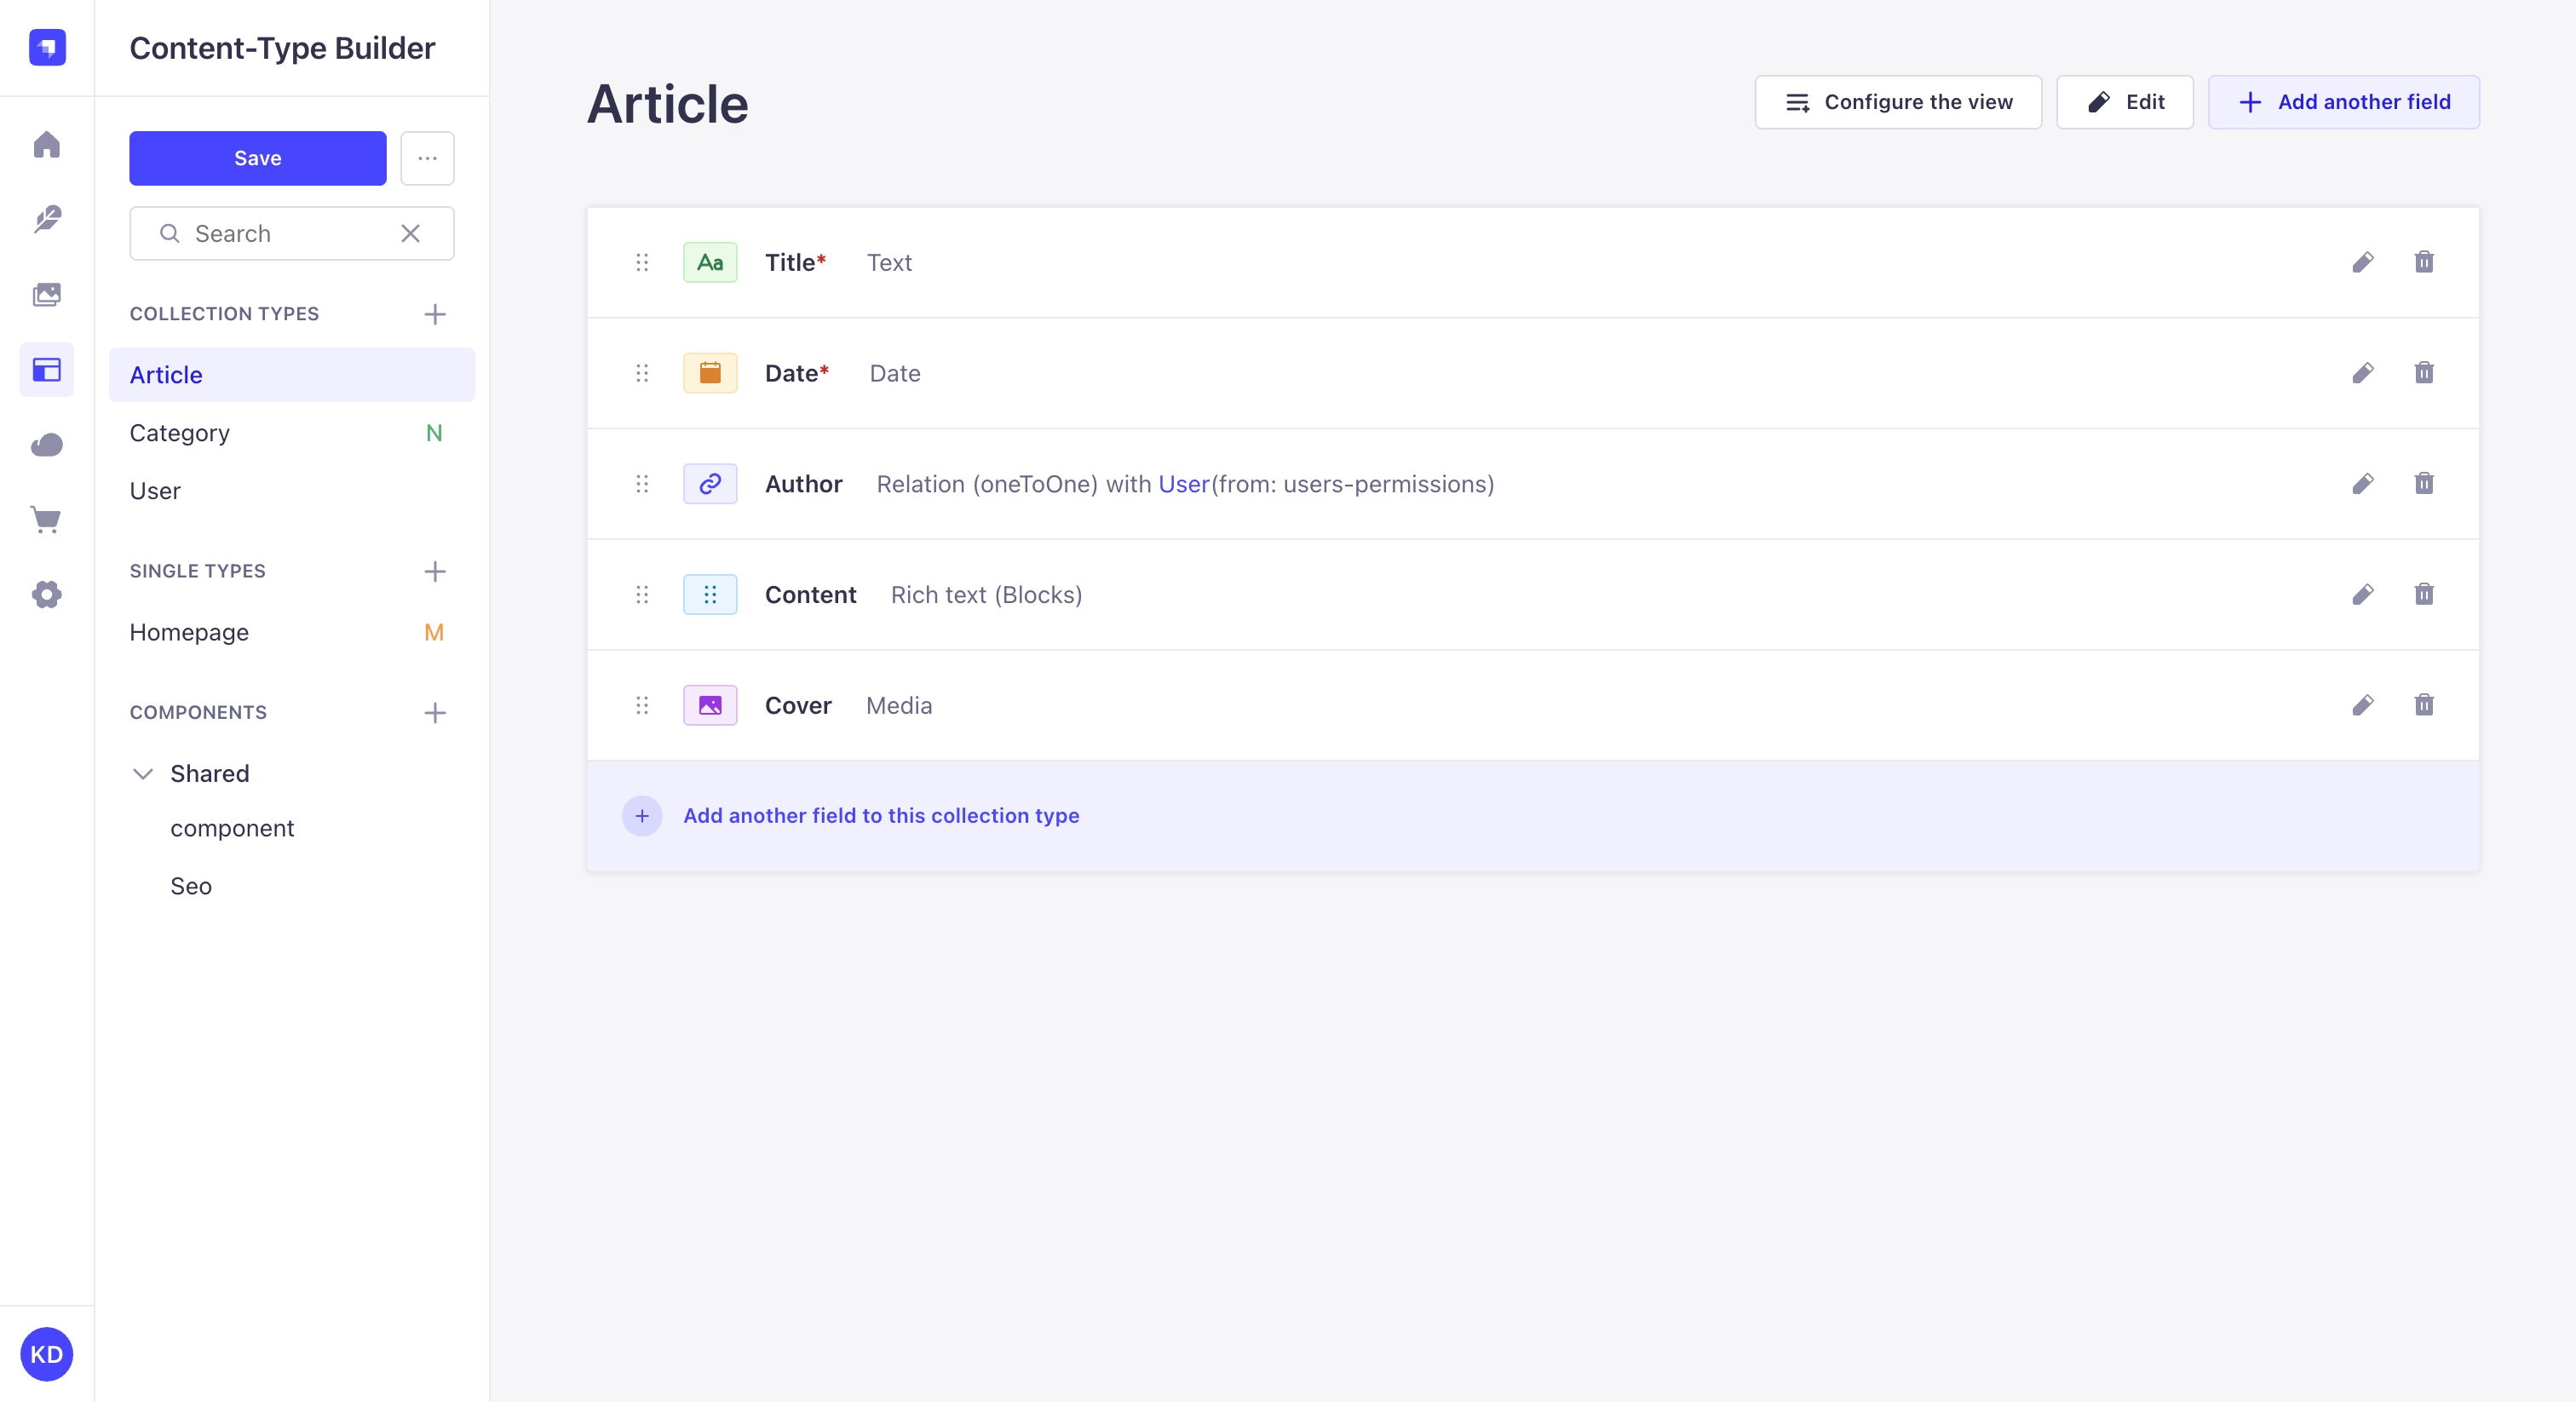
The Content-type Builder allows you to manage all existing content-types. For a chosen content-type or component to edit, the right side of the Content-type Builder interface displays all available editing and management options.
Settings
- Click on the Edit button of your content-type to access its settings.
- Edit the available settings of your choice:
- Basic settings
- Advanced settings
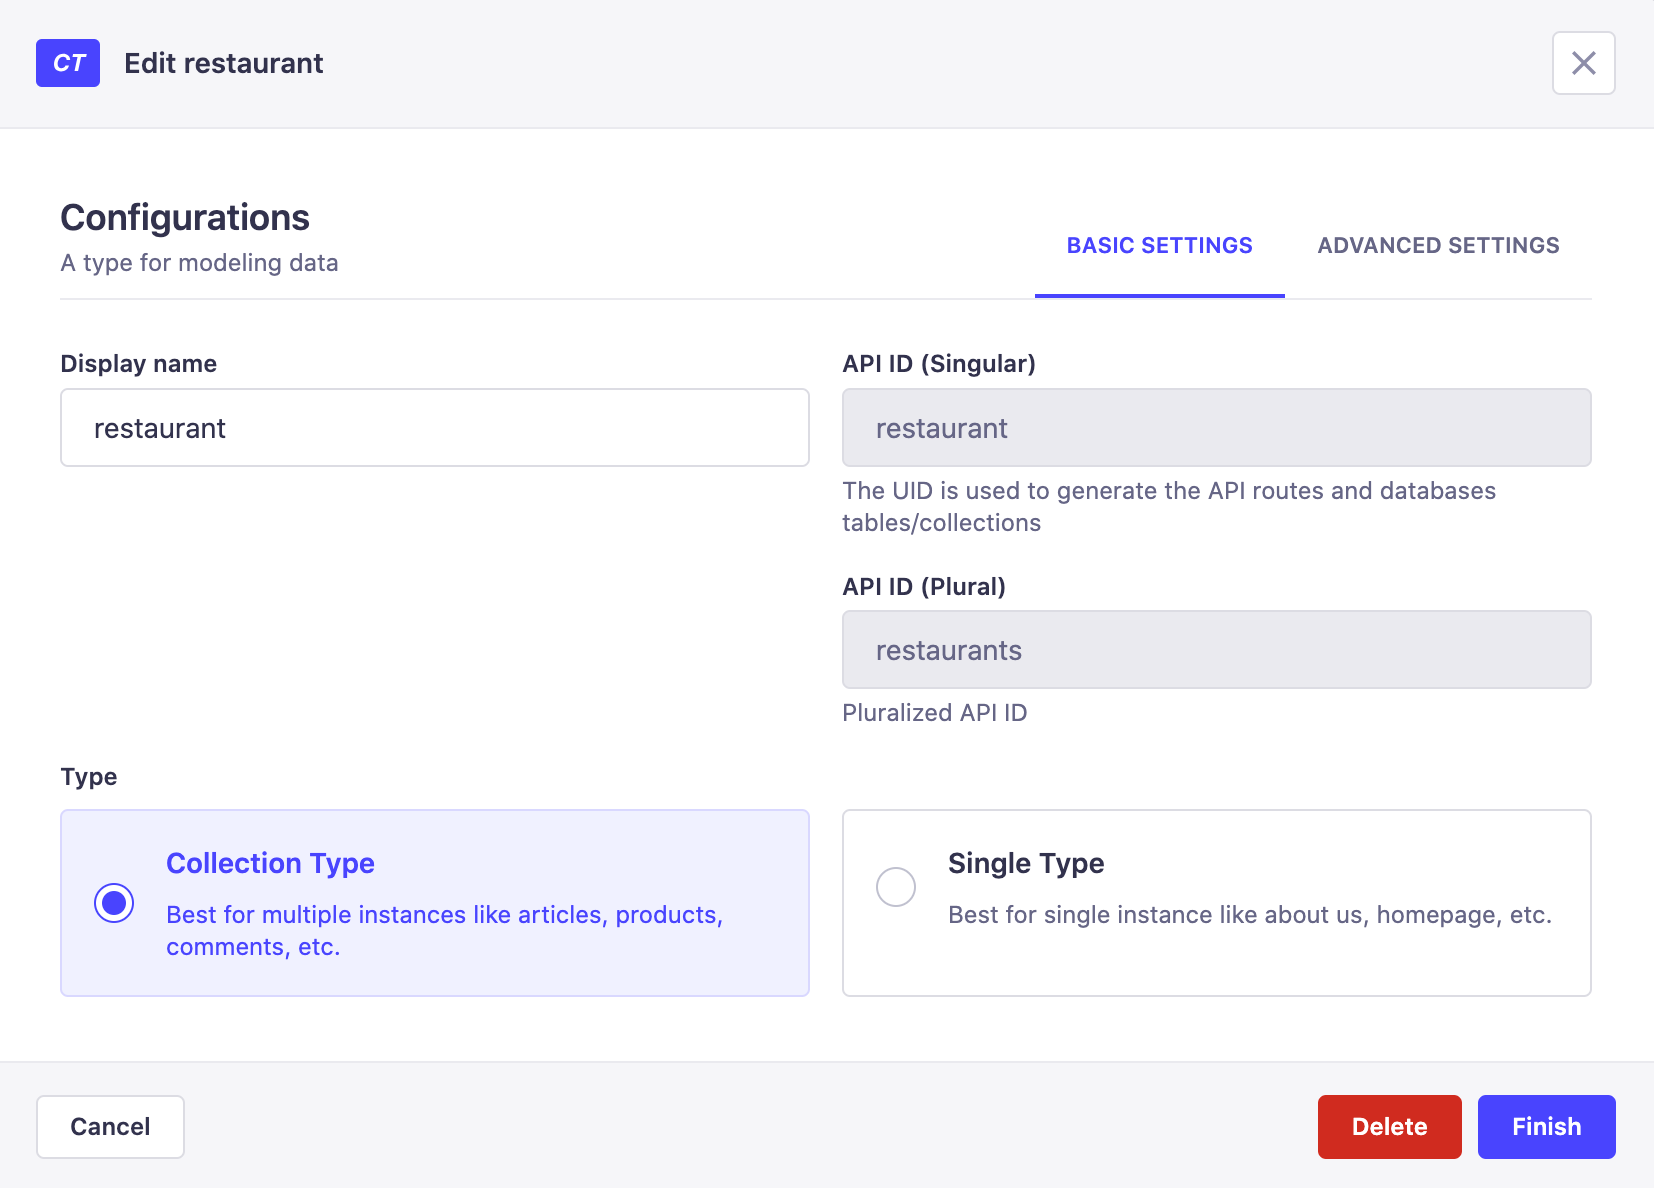
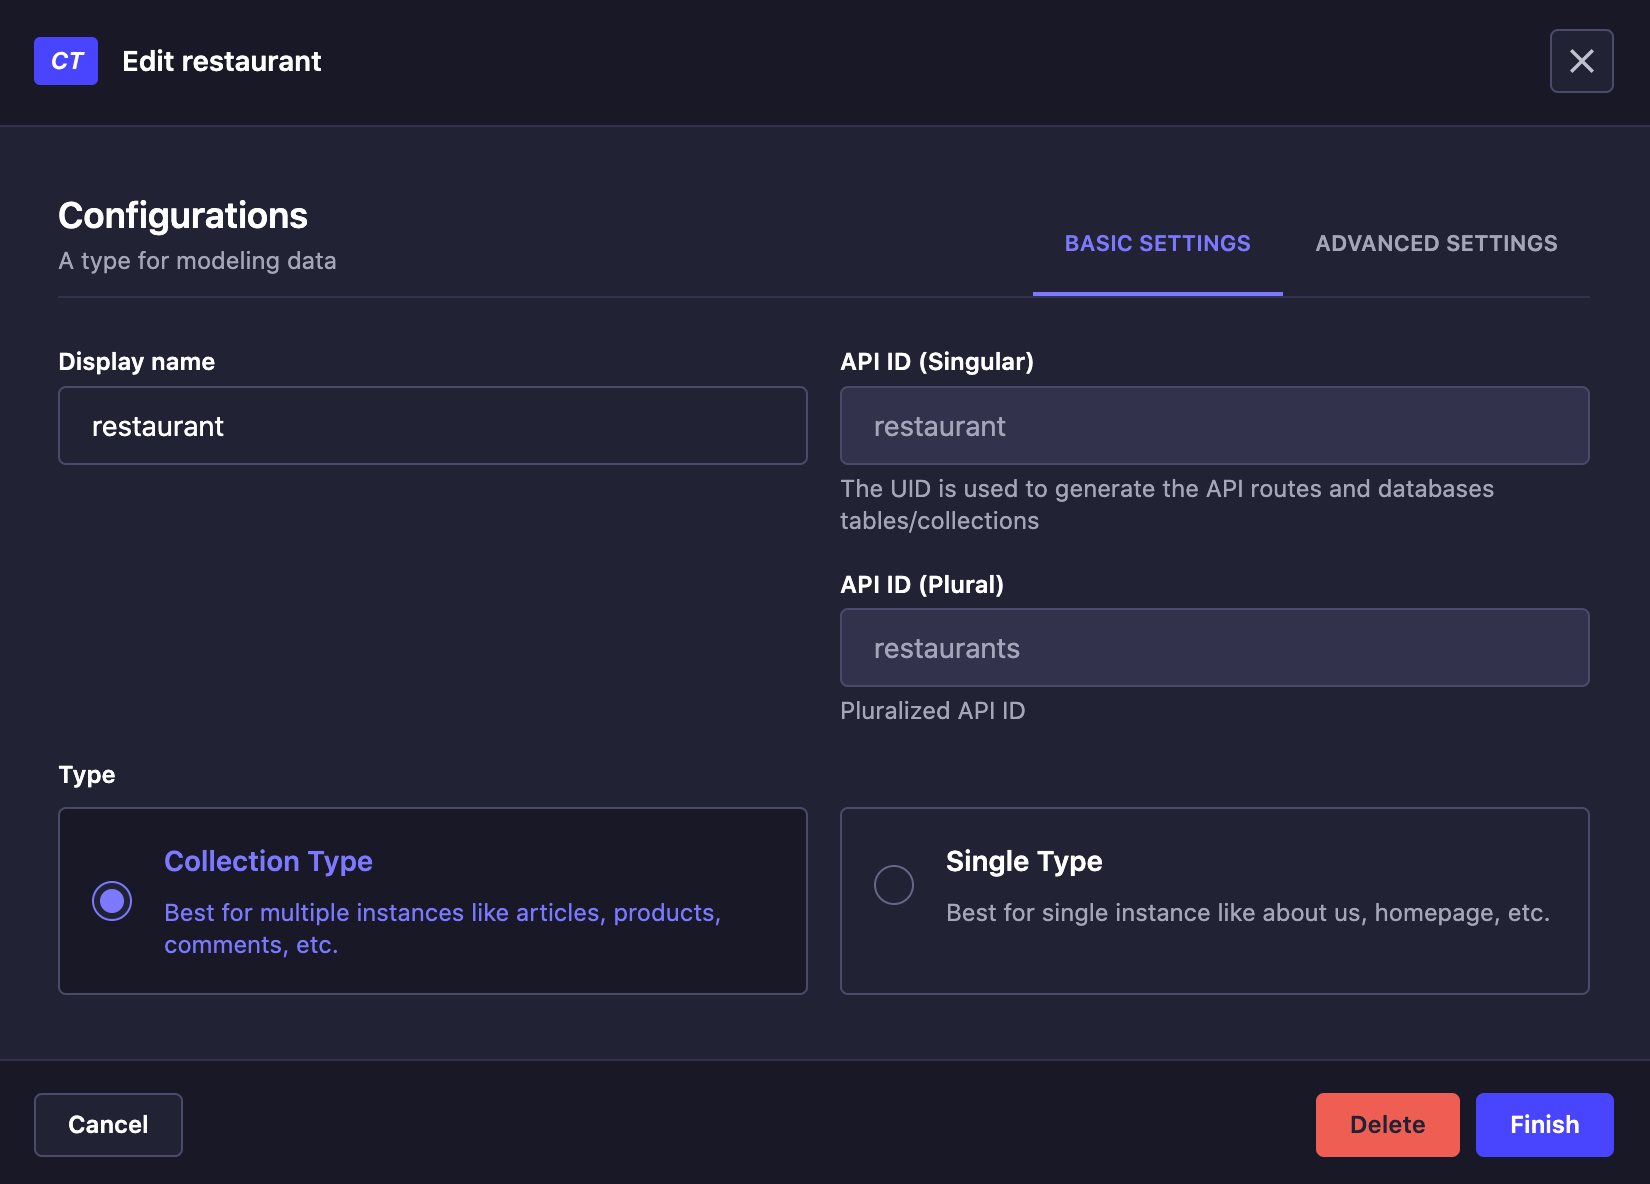
- Display name: Name of the content-type or component as it will be displayed in the admin panel.
- API ID (singular): Name of the content-type or component as it will be used in the API. It is automatically generated from the display name, but can be edited.
- API ID (plural): Plural name of the content-type or component as it will be used in the API. It is automatically generated from the display name, but can be edited.
- Type: Type of the content-type or component. It can be either a Collection type or a Single type.
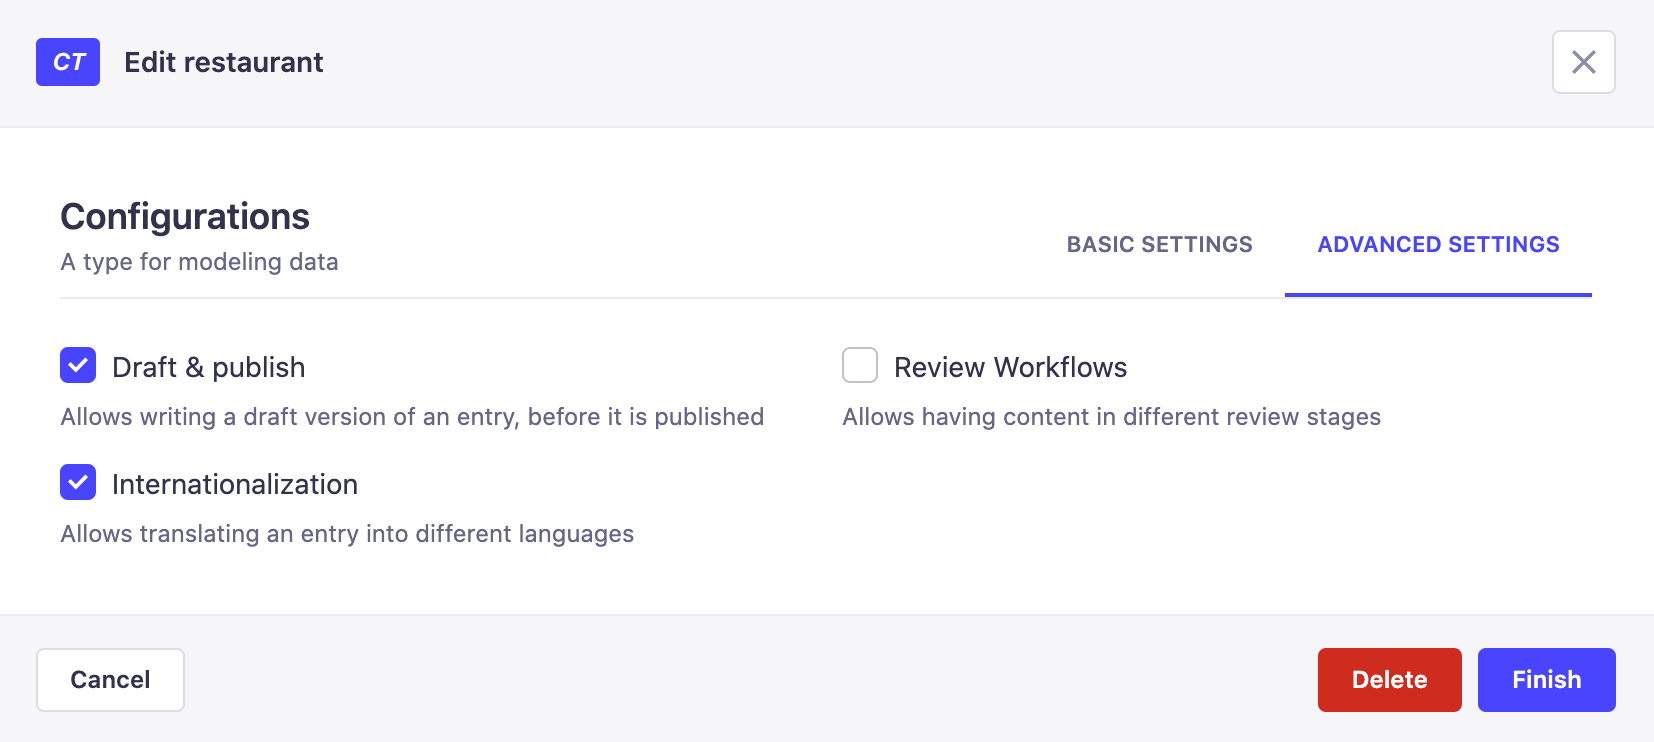
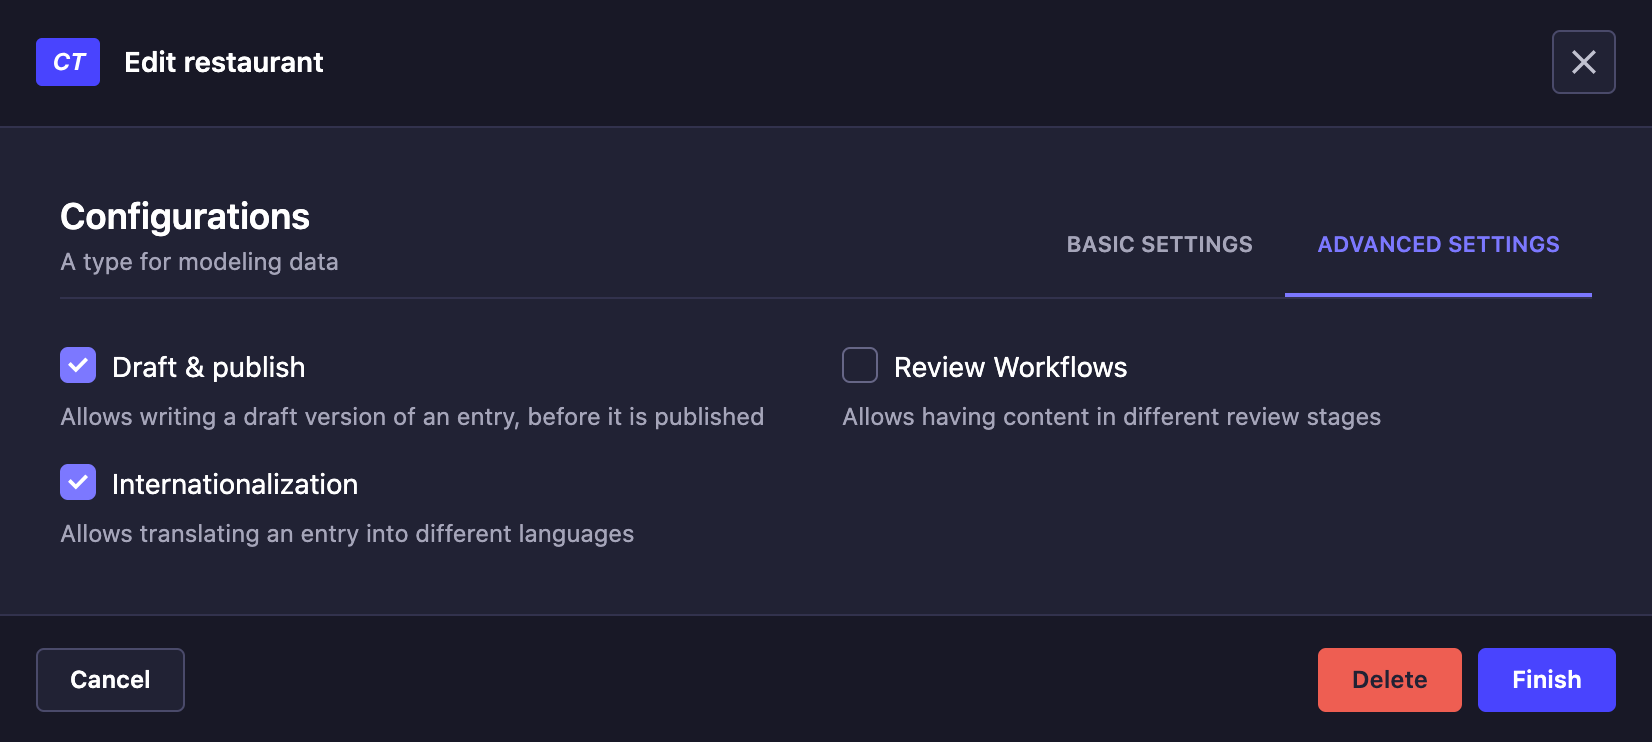
- Draft & Publish: Enable the Draft & Publish feature for the content-type or component. It is disabled by default.
- Internationalization: Enable the Internationalization feature for the content-type or component. It is disabled by default.
- Click the Finish button in the dialog.
- Click the Save button in the Content-Type Builder navigation.
Fields
From the table that lists the fields of your content-type, you can:
- Click on the button to access a field's basic and advanced settings to edit them
- Click on the Add another field buttons to create a new field for the selected content-type
- Click on the button and drag and drop any field to reorder the content-type's fields
- Click on the button to delete a field
Editing a field allows renaming it. However, keep in mind that regarding the database, renaming a field means creating a whole new field and deleting the former one. Although nothing is deleted from the database, the data that was associated with the former field name will not be accessible from the admin panel of your application anymore.
Configuring content-types fields
Content-types are composed of one or several fields. Each field is designed to contain specific kind of data, filled up in the Content Manager (see Creating & Writing content).
In the Content-type Builder, fields can be added at the creation of a new content-type or component, or afterward when a content-type or component is edited or updated.
Depending on what content-type or component is being created or edited, not all fields -including components and dynamic zones- are always available.
When you mark a field as Private field, newly created private fields are automatically set to be non-searchable (searchable: false). This prevents private content from appearing in query results when using the _q search parameter. Existing private fields retain their current searchability settings unless you explicitly change them. If you need a private field to be searchable, you can enable it in the field's advanced settings.
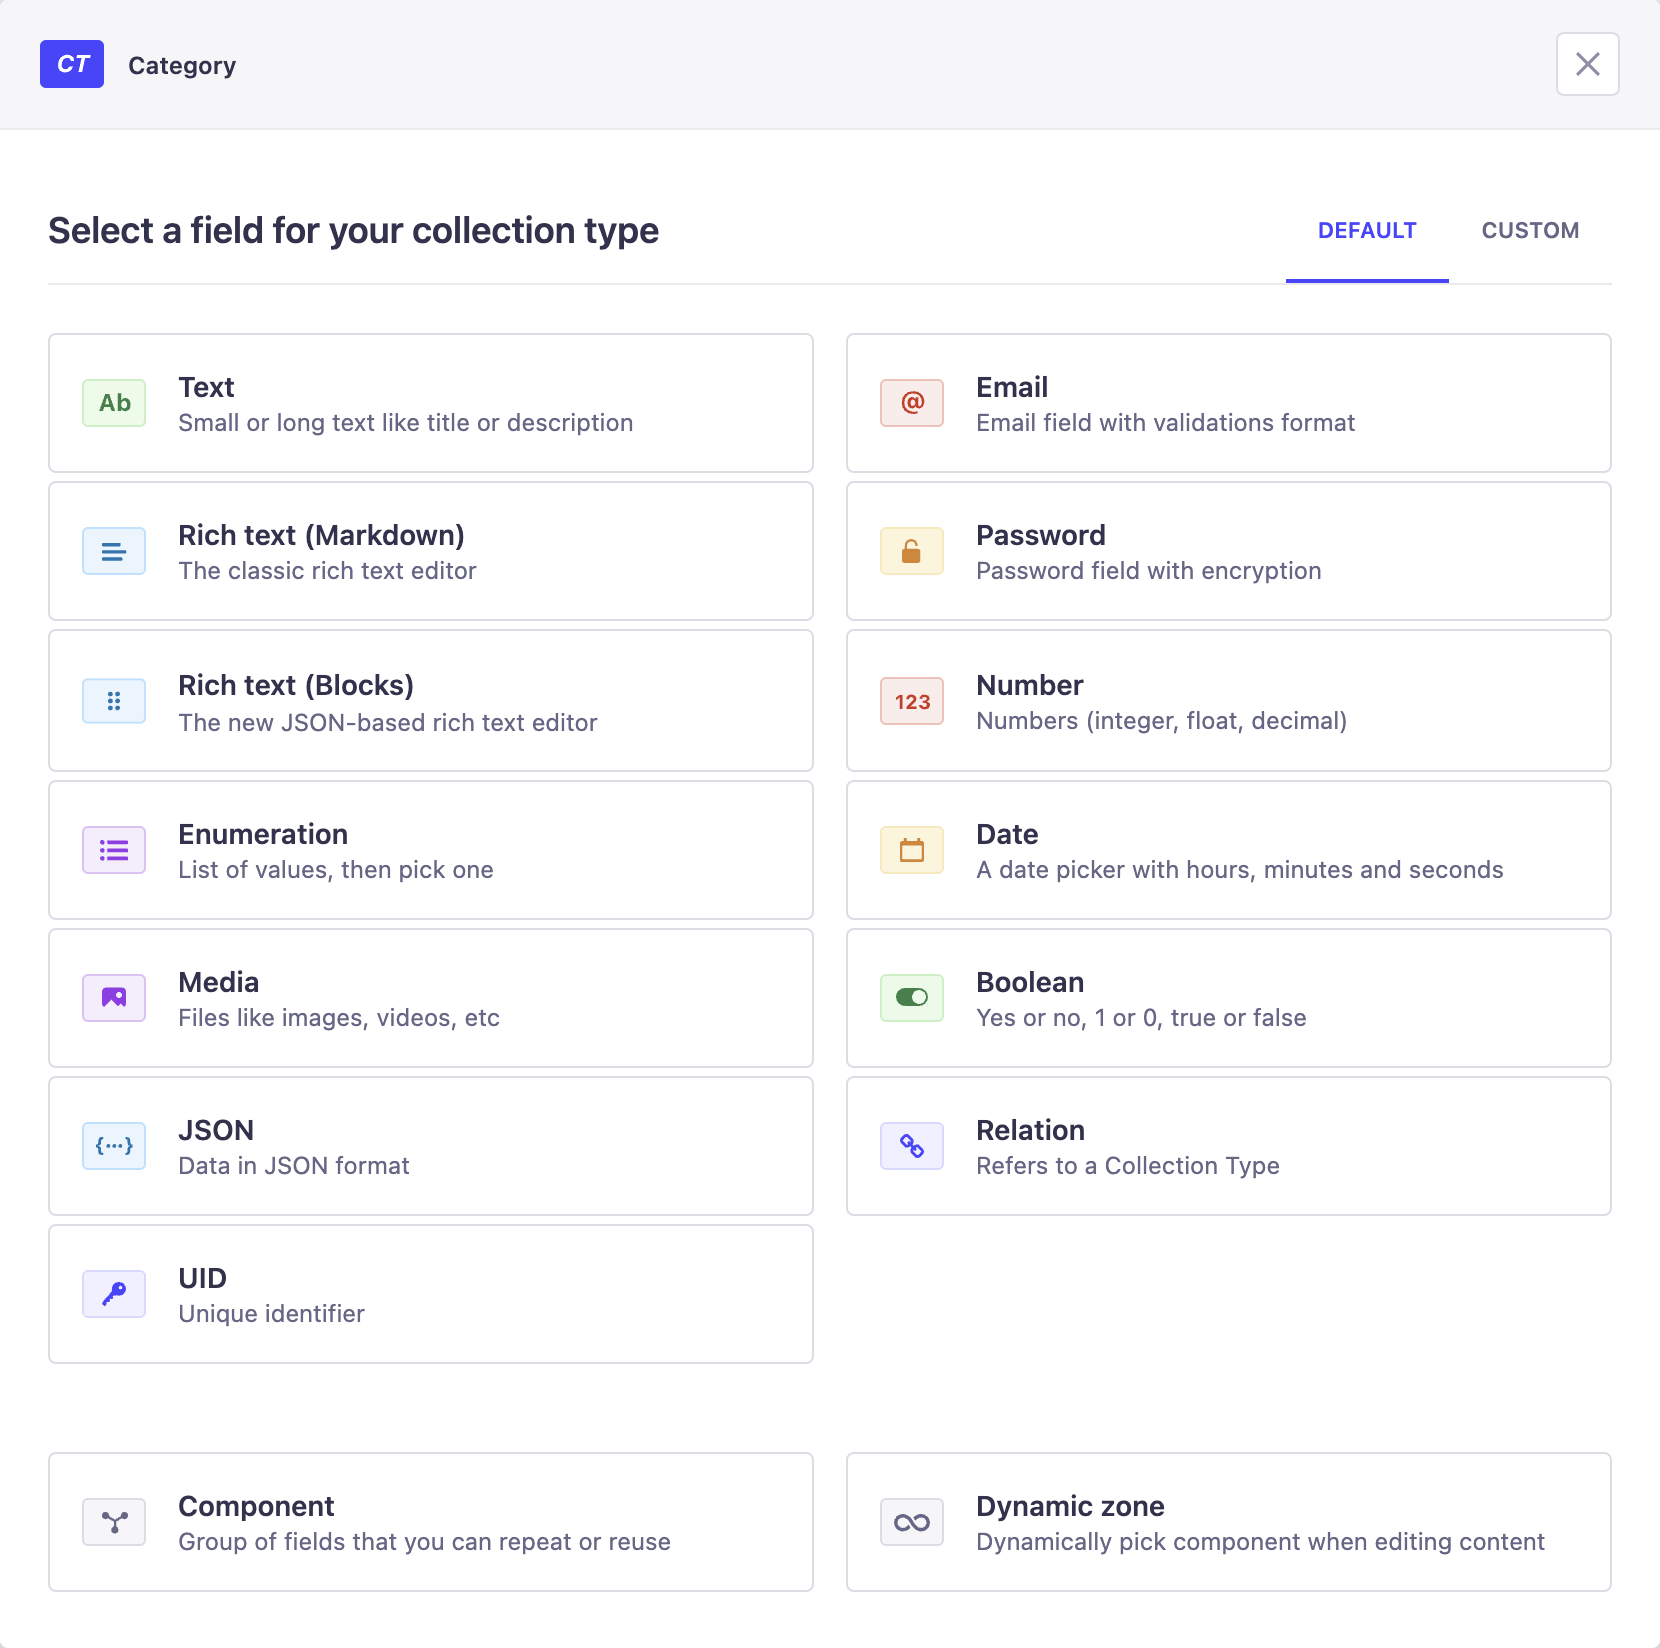
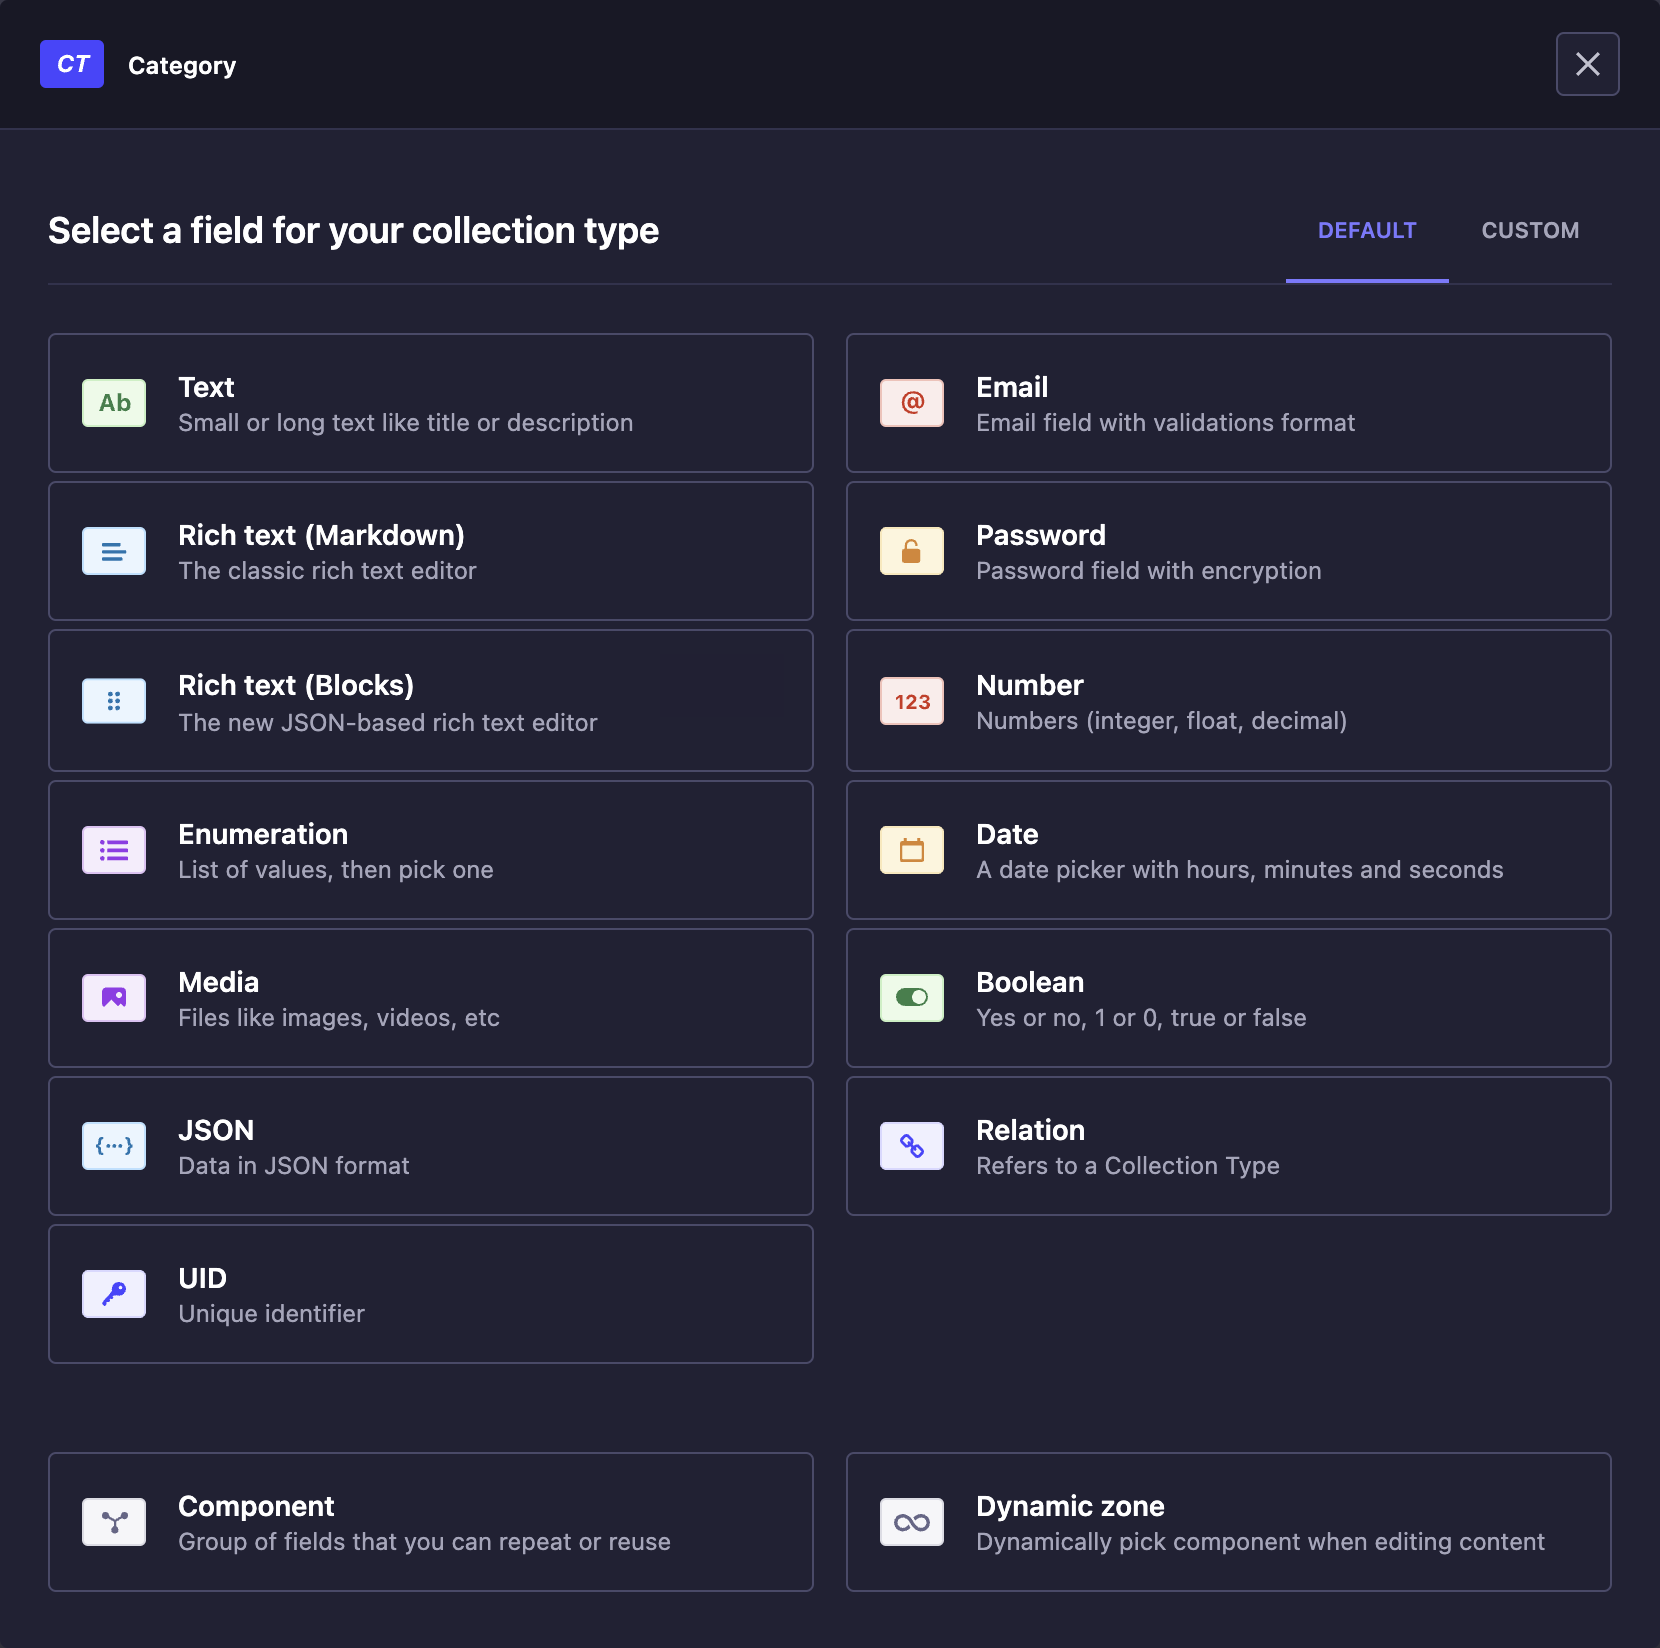
 Text
Text
The Text field displays a textbox that can contain small text. This field can be used for titles, descriptions, etc.
- Basic settings
- Advanced settings
- Condition
| Setting name | Instructions |
|---|---|
| Name | Write the name of the Text field. |
| Type | Choose between Short text (255 characters maximum) and Long text, to allow more or less space to fill up the Text field. |
| Setting name | Instructions |
|---|---|
| Default value | Write the default value of the Text field. |
| RegExp pattern | Write a regular expression to make sure the value of the Text field matches a specific format. |
| Private field | Tick to make the field private and prevent it from being found via the API. |
| Enable localization for this field | (if Internationalization is enabled for the content-type) Allow the field to have a different value per locale. |
| Required field | Tick to prevent creating or saving an entry if the field is not filled in. |
| Unique field | Tick to prevent another field to be identical to this one. |
| Maximum length | Tick to define a maximum number of characters allowed. |
| Minimum length | Tick to define a minimum number of characters allowed. |
- Click the Apply condition button.
- Define the if part of the condition, based on a Boolean or Enumeration field of the same content-type (e.g. if
boolean_fieldistrue). - Define the then part of the condition by choosing whether to hide or show the field you are configuring (e.g. then
show carousel_media).
 Rich Text (Blocks)
The Rich Text (Blocks) field displays an editor with live rendering and various options to manage rich text. This field can be used for long written content, even including images and code.
- Basic settings
- Advanced settings
- Condition
| Setting name | Instructions |
|---|---|
| Name | Write the name of the Rich Text (Blocks) field. |
| Setting name | Instructions |
|---|---|
| Private field | Tick to make the field private and prevent it from being found via the API. |
| Required field | Tick to prevent creating or saving an entry if the field is not filled in. |
| Enable localization for this field | (if Internationalization is enabled for the content-type) Allow the field to have a different value per locale. |
- Click the Apply condition button.
- Define the if part of the condition, based on a Boolean or Enumeration field of the same content-type (e.g. if
boolean_fieldistrue). - Define the then part of the condition by choosing whether to hide or show the field you are configuring (e.g. then
show carousel_media).
If using the Blocks editor, we recommend that you also use the Strapi Blocks React Renderer to easily render the content in a React frontend.
 Number
The Number field displays a field for any kind of number: integer, decimal and float.
- Basic settings
- Advanced settings
- Condition
| Setting name | Instructions |
|---|---|
| Name | Write the name of the Number field. |
| Number format | Choose between integer, big integer, decimal and float. |
| Setting name | Instructions |
|---|---|
| Default value | Write the default value of the Number field. |
| Private field | Tick to make the field private and prevent it from being found via the API. |
| Enable localization for this field | (if Internationalization is enabled for the content-type) Allow the field to have a different value per locale. |
| Required field | Tick to prevent creating or saving an entry if the field is not filled in. |
| Unique field | Tick to prevent another field to be identical to this one. |
| Maximum value | Tick to define a maximum value allowed. |
| Minimum value | Tick to define a minimum value allowed. |
- Click the Apply condition button.
- Define the if part of the condition, based on a Boolean or Enumeration field of the same content-type (e.g. if
boolean_fieldistrue). - Define the then part of the condition by choosing whether to hide or show the field you are configuring (e.g. then
show carousel_media).
 Date
Date
The Date field can display a date (year, month, day), time (hour, minute, second) or datetime (year, month, day, hour, minute, and second) picker.
- Basic settings
- Advanced settings
- Condition
| Setting name | Instructions |
|---|---|
| Name | Write the name of the Date field. |
| Type | Choose between date, datetime and time |
| Setting name | Instructions |
|---|---|
| Default value | Write the default value of the Date field. |
| Private field | Tick to make the field private and prevent it from being found via the API. |
| Enable localization for this field | (if Internationalization is enabled for the content-type) Allow the field to have a different value per locale. |
| Required field | Tick to prevent creating or saving an entry if the field is not filled in. |
| Unique field | Tick to prevent another field to be identical to this one. |
- Click the Apply condition button.
- Define the if part of the condition, based on a Boolean or Enumeration field of the same content-type (e.g. if
boolean_fieldistrue). - Define the then part of the condition by choosing whether to hide or show the field you are configuring (e.g. then
show carousel_media).
 Password
The Password field displays a password field that is encrypted.
- Basic settings
- Advanced settings
- Condition
| Setting name | Instructions |
|---|---|
| Name | Write the name of the Password field. |
| Setting name | Instructions |
|---|---|
| Default value | Write the default value of the Password field. |
| Private field | Tick to make the field private and prevent it from being found via the API. |
| Enable localization for this field | (if Internationalization is enabled for the content-type) Allow the field to have a different value per locale. |
| Required field | Tick to prevent creating or saving an entry if the field is not filled in. |
| Maximum length | Tick to define a maximum number of characters allowed. |
| Minimum length | Tick to define a minimum number of characters allowed. |
- Click the Apply condition button.
- Define the if part of the condition, based on a Boolean or Enumeration field of the same content-type (e.g. if
boolean_fieldistrue). - Define the then part of the condition by choosing whether to hide or show the field you are configuring (e.g. then
show carousel_media).
 Media
Media
The Media field allows you to choose one or more media files (e.g. image, video) from those uploaded in the Media Library of the application.
- Basic settings
- Advanced settings
- Condition
| Setting name | Instructions |
|---|---|
| Name | Write the name of the Media field. |
| Type | Choose between Multiple media to allow multiple media uploads, and Single media to only allow one media upload. |
| Setting name | Instructions |
|---|---|
| Select allowed types of media | Click on the drop-down list to untick media types not allowed for this field. |
| Private field | Tick to make the field private and prevent it from being found via the API. |
| Enable localization for this field | (if Internationalization is enabled for the content-type) Allow the field to have a different value per locale. |
| Required field | Tick to prevent creating or saving an entry if the field is not filled in. |
| Unique field | Tick to prevent another field to be identical to this one. |
- Click the Apply condition button.
- Define the if part of the condition, based on a Boolean or Enumeration field of the same content-type (e.g. if
boolean_fieldistrue). - Define the then part of the condition by choosing whether to hide or show the field you are configuring (e.g. then
show carousel_media).
 Relation
The Relation field allows you to establish a relation with another content-type, that must be a collection type.
There are 6 different types of relations:
 One way: Content-type A has one Content-type B
 One-to-one: Content-type A has and belong to one Content-type B
 One-to-many: Content-type A belongs to many Content-type B
 Many-to-one: Content-type B has many Content-type A
 Many-to-many: Content-type A has and belongs to many Content-type B
 Many way: Content-type A has many Content-type B
Relations where at least one side can reference several entries are called multi relations. In the Content-type Builder, this includes one-to-many, many-to-one, many-to-many, and many-way relations. These relations appear as multi-select fields in the Content Manager and return arrays from the REST, GraphQL, and Document Service APIs; while single relations (one-way and one-to-one relations) return a single linked entry (see Managing relations with API requests for more information).
- Basic settings
- Advanced settings
- Condition
Configuring the basic settings of the Relation field consists in choosing with which existing content-type the relation should be established and the kind of relation. The edition window of the Relation field displays 2 grey boxes, each representing one of the content-types in relation. Between the grey boxes are displayed all possible relation types.
- Click on the 2nd grey box to define the content-type B. It must be an already created collection type.
- Click on the icon representing the relation to establish between the content-types.
- Choose the Field name of the content-type A, meaning the name that will be used for the field in the content-type A.
- (optional if disabled by the relation type) Choose the Field name of the content-type B.
| Setting name | Instructions |
|---|---|
| Private field | Tick to make the field private and prevent it from being found via the API. |
- Click the Apply condition button.
- Define the if part of the condition, based on a Boolean or Enumeration field of the same content-type (e.g. if
boolean_fieldistrue). - Define the then part of the condition by choosing whether to hide or show the field you are configuring (e.g. then
show carousel_media).
To model a navigable tree of pages:
- Add a
Pagecollection type with a "Slug" (UID) and (optionally) an "Order" (Integer) field to control sibling ordering. - Create a Relation field from
PagetoPageand choose Many-to-one so each page can set its "Parent page". Strapi automatically provides the inverse "Children pages" relation. - When reading data, populate
childrenrecursively to load the tree. Keep the recursion depth small to avoid large responses.
Example
{
  populate: {
    children: {
      fields: ['title', 'slug'],
      populate: {
        children: {
          fields: ['title', 'slug'],
        },
      },
    },
  },
}
The same populate pattern works with GraphQL or the Document Service API (see Understanding populate guide).
 Boolean
The Boolean field displays a toggle button to manage boolean values (e.g. Yes or No, 1 or 0, True or False).
- Basic settings
- Advanced settings
- Condition
| Setting name | Instructions |
|---|---|
| Name | Write the name of the Boolean field. |
| Setting name | Instructions |
|---|---|
| Default value | Choose the default value of the Boolean field: true, null or false. |
| Private field | Tick to make the field private and prevent it from being found via the API. |
| Enable localization for this field | (if Internationalization is enabled for the content-type) Allow the field to have a different value per locale. |
| Required field | Tick to prevent creating or saving an entry if the field is not filled in. |
| Unique field | Tick to prevent another field to be identical to this one. |
- Click the Apply condition button.
- Define the if part of the condition, based on a Boolean or Enumeration field of the same content-type (e.g. if
boolean_fieldistrue). - Define the then part of the condition by choosing whether to hide or show the field you are configuring (e.g. then
show carousel_media).
 JSON
JSON
The JSON field allows you to configure data in a JSON format, to store JSON objects or arrays.
- Basic settings
- Advanced settings
- Condition
| Setting name | Instructions |
|---|---|
| Name | Write the name of the JSON field. |
| Setting name | Instructions |
|---|---|
| Private field | Tick to make the field private and prevent it from being found via the API. |
| Enable localization for this field | (if Internationalization is enabled for the content-type) Allow the field to have a different value per locale. |
| Required field | Tick to prevent creating or saving an entry if the field is not filled in. |
- Click the Apply condition button.
- Define the if part of the condition, based on a Boolean or Enumeration field of the same content-type (e.g. if
boolean_fieldistrue). - Define the then part of the condition by choosing whether to hide or show the field you are configuring (e.g. then
show carousel_media).
 Email
Email
The Email field displays an email address field with format validation to ensure the email address is valid.
- Basic settings
- Advanced settings
- Condition
| Setting name | Instructions |
|---|---|
| Name | Write the name of the Email field. |
| Setting name | Instructions |
|---|---|
| Default value | Write the default value of the Email field. |
| Private field | Tick to make the field private and prevent it from being found via the API. |
| Enable localization for this field | (if Internationalization is enabled for the content-type) Allow the field to have a different value per locale. |
| Required field | Tick to prevent creating or saving an entry if the field is not filled in. |
| Unique field | Tick to prevent another field to be identical to this one. |
| Maximum length | Tick to define a maximum number of characters allowed. |
| Minimum length | Tick to define a minimum number of characters allowed. |
- Click the Apply condition button.
- Define the if part of the condition, based on a Boolean or Enumeration field of the same content-type (e.g. if
boolean_fieldistrue). - Define the then part of the condition by choosing whether to hide or show the field you are configuring (e.g. then
show carousel_media).
Password
The Password field displays a password field that is encrypted.
- Basic settings
- Advanced settings
- Condition
| Setting name | Instructions |
|---|---|
| Name | Write the name of the Password field. |
| Setting name | Instructions |
|---|---|
| Default value | Write the default value of the Password field. |
| Private field | Tick to make the field private and prevent it from being found via the API. |
| Enable localization for this field | (if Internationalization is enabled for the content-type) Allow the field to have a different value per locale. |
| Required field | Tick to prevent creating or saving an entry if the field is not filled in. |
| Maximum length | Tick to define a maximum number of characters allowed. |
| Minimum length | Tick to define a minimum number of characters allowed. |
- Click the Apply condition button.
- Define the if part of the condition, based on a Boolean or Enumeration field of the same content-type (e.g. if
boolean_fieldistrue). - Define the then part of the condition by choosing whether to hide or show the field you are configuring (e.g. then
show carousel_media).
 Enumeration
The Enumeration field allows you to configure a list of values displayed in a drop-down list.
- Basic settings
- Advanced settings
- Condition
| Setting name | Instructions |
|---|---|
| Name | Write the name of the Enumeration field. |
| Values | Write the values of the enumeration, one per line. |
| Setting name | Instructions |
|---|---|
| Default value | Choose the default value of the Enumeration field. |
| Name override for GraphQL | Write a custom GraphQL schema type to override the default one for the field. |
| Private field | Tick to make the field private and prevent it from being found via the API. |
| Enable localization for this field | (if Internationalization is enabled for the content-type) Allow the field to have a different value per locale. |
| Required field | Tick to prevent creating or saving an entry if the field is not filled in. |
- Click the Apply condition button.
- Define the if part of the condition, based on a Boolean or Enumeration field of the same content-type (e.g. if
boolean_fieldistrue). - Define the then part of the condition by choosing whether to hide or show the field you are configuring (e.g. then
show carousel_media).
Enumeration values should always have an alphabetical character preceding any number as it could otherwise cause the server to crash without notice when the GraphQL plugin is installed.
 UID
UID
The UID field displays a field that sets a unique identifier, optionally based on an existing other field from the same content-type.
- Basic settings
- Advanced settings
- Condition
| Setting name | Instructions |
|---|---|
| Name | Write the name of the UID field. It must not contain special characters or spaces. |
| Attached field | Choose what existing field to attach to the UID field. Choose None to not attach any specific field. |
| Setting name | Instructions |
|---|---|
| Default value | Write the default value of the UID field. |
| Private field | Tick to make the field private and prevent it from being found via the API. |
| Required field | Tick to prevent creating or saving an entry if the field is not filled in. |
| Maximum length | Tick to define a maximum number of characters allowed. |
| Minimum length | Tick to define a minimum number of characters allowed. |
- Click the Apply condition button.
- Define the if part of the condition, based on a Boolean or Enumeration field of the same content-type (e.g. if
boolean_fieldistrue). - Define the then part of the condition by choosing whether to hide or show the field you are configuring (e.g. then
show carousel_media).
The UID field can be used to create a slug based on the Attached field.
 Rich Text (Markdown)
The Rich Text (Markdown) field displays an editor with basic formatting options to manage rich text written in Markdown. This field can be used for long written content.
- Basic settings
- Advanced settings
- Condition
| Setting name | Instructions |
|---|---|
| Name | Write the name of the Rich Text (Markdown) field. |
| Setting name | Instructions |
|---|---|
| Default value | Write the default value of the Rich Text field. |
| Private field | Tick to make the field private and prevent it from being found via the API. |
| Enable localization for this field | (if Internationalization plugin is enabled for the content-type) Allow the field to have a different value per locale. |
| Required field | Tick to prevent creating or saving an entry if the field is not filled in. |
| Maximum length | Tick to define a maximum number of characters allowed. |
| Minimum length | Tick to define a minimum number of characters allowed. |
- Click the Apply condition button.
- Define the if part of the condition, based on a Boolean or Enumeration field of the same content-type (e.g. if
boolean_fieldistrue). - Define the then part of the condition by choosing whether to hide or show the field you are configuring (e.g. then
show carousel_media).
 Components
Components are a combination of several fields. Components allow you to create reusable sets of fields, that can be quickly added to content-types, dynamic zones but also nested into other components.
When configuring a component through the Content-type Builder, it is possible to either:
- create a new component by clicking on Create a new component (see Creating a new component),
- or use an existing one by clicking on Use an existing component.
- Basic settings
- Advanced settings
- Condition
| Setting name | Instructions |
|---|---|
| Name | Write the name of the component for the content-type. |
| Select a component | When using an existing component only - Select from the drop-down list an existing component. |
| Type | Choose between Repeatable component to be able to use several times the component for the content-type, or Single component to limit to only one time the use of the component. |
| Setting name | Instructions |
|---|---|
| Required field | Tick to prevent creating or saving an entry if the field is not filled in. |
| Private field | Tick to make the field private and prevent it from being found via the API. |
| Maximum value | For repeatable components only - Tick to define a maximum number of characters allowed. |
| Minimum value | For repeatable components only - Tick to define a minimum number of characters allowed. |
| Enable localization for this field | (if Internationalization is enabled for the content-type) Allow the component to be translated per available locale. |
- Click the Apply condition button.
- Define the if part of the condition, based on a Boolean or Enumeration field of the same content-type (e.g. if
boolean_fieldistrue). - Define the then part of the condition by choosing whether to hide or show the field you are configuring (e.g. then
show carousel_media).
 Dynamic zones
Dynamic zones are a combination of components that can be added to content-types. They allow a flexible content structure as once in the Content Manager, administrators have the choice of composing and rearranging the components of the dynamic zone how they want.
- Basic settings
- Advanced settings
- Condition
| Setting name | Instructions |
|---|---|
| Name | Write the name of the dynamic zone for the content-type. |
| Setting name | Instructions |
|---|---|
| Required field | Tick to prevent creating or saving an entry if the field is not filled in. |
| Maximum value | Tick to define a maximum number of characters allowed. |
| Minimum value | Tick to define a minimum number of characters allowed. |
| Enable localization for this field | (if Internationalization is enabled for the content-type) Allow the dynamic zone to be translated per available locale. |
- Click the Apply condition button.
- Define the if part of the condition, based on a Boolean or Enumeration field of the same content-type (e.g. if
boolean_fieldistrue). - Define the then part of the condition by choosing whether to hide or show the field you are configuring (e.g. then
show carousel_media).
After configuring the settings of the dynamic zone, its components must be configured as well. It is possible to either choose an existing component or create a new one.
When using dynamic zones, different components cannot have the same field name with different types (or with enumeration fields, different values).
Custom fields
Custom fields are a way to extend Strapi’s capabilities by adding new types of fields to content-types or components. Once installed (see Marketplace documentation), custom fields are listed in the Custom tab when selecting a field for a content-type.
Each custom field type can have basic and advanced settings. The Marketplace lists available custom fields, and hosts dedicated documentation for each custom field, including specific settings.
Deleting content-types
Content types and components can be deleted through the Content-type Builder. Deleting a content-type automatically deletes all entries from the Content Manager that were based on that content-type. The same goes for the deletion of a component, which is automatically deleted from every content-type or entry where it was used.
- In the Content-type Builder sub navigation, click on the name of the content-type or component to delete.
- In the edition interface of the chosen content-type or component, click on the Edit button on the right side of the content-type's or component's name.
- In the edition window, click on the Delete button.
- In the confirmation window, confirm the deletion.
- Click on the Save button in the Content-type Builder sub navigation.
Deleting a content-type only deletes what was created and available from the Content-type Builder, and by extent from the admin panel of your Strapi application. All the data that was created based on that content-type is however kept in the database. For more information, please refer to the related GitHub issue.
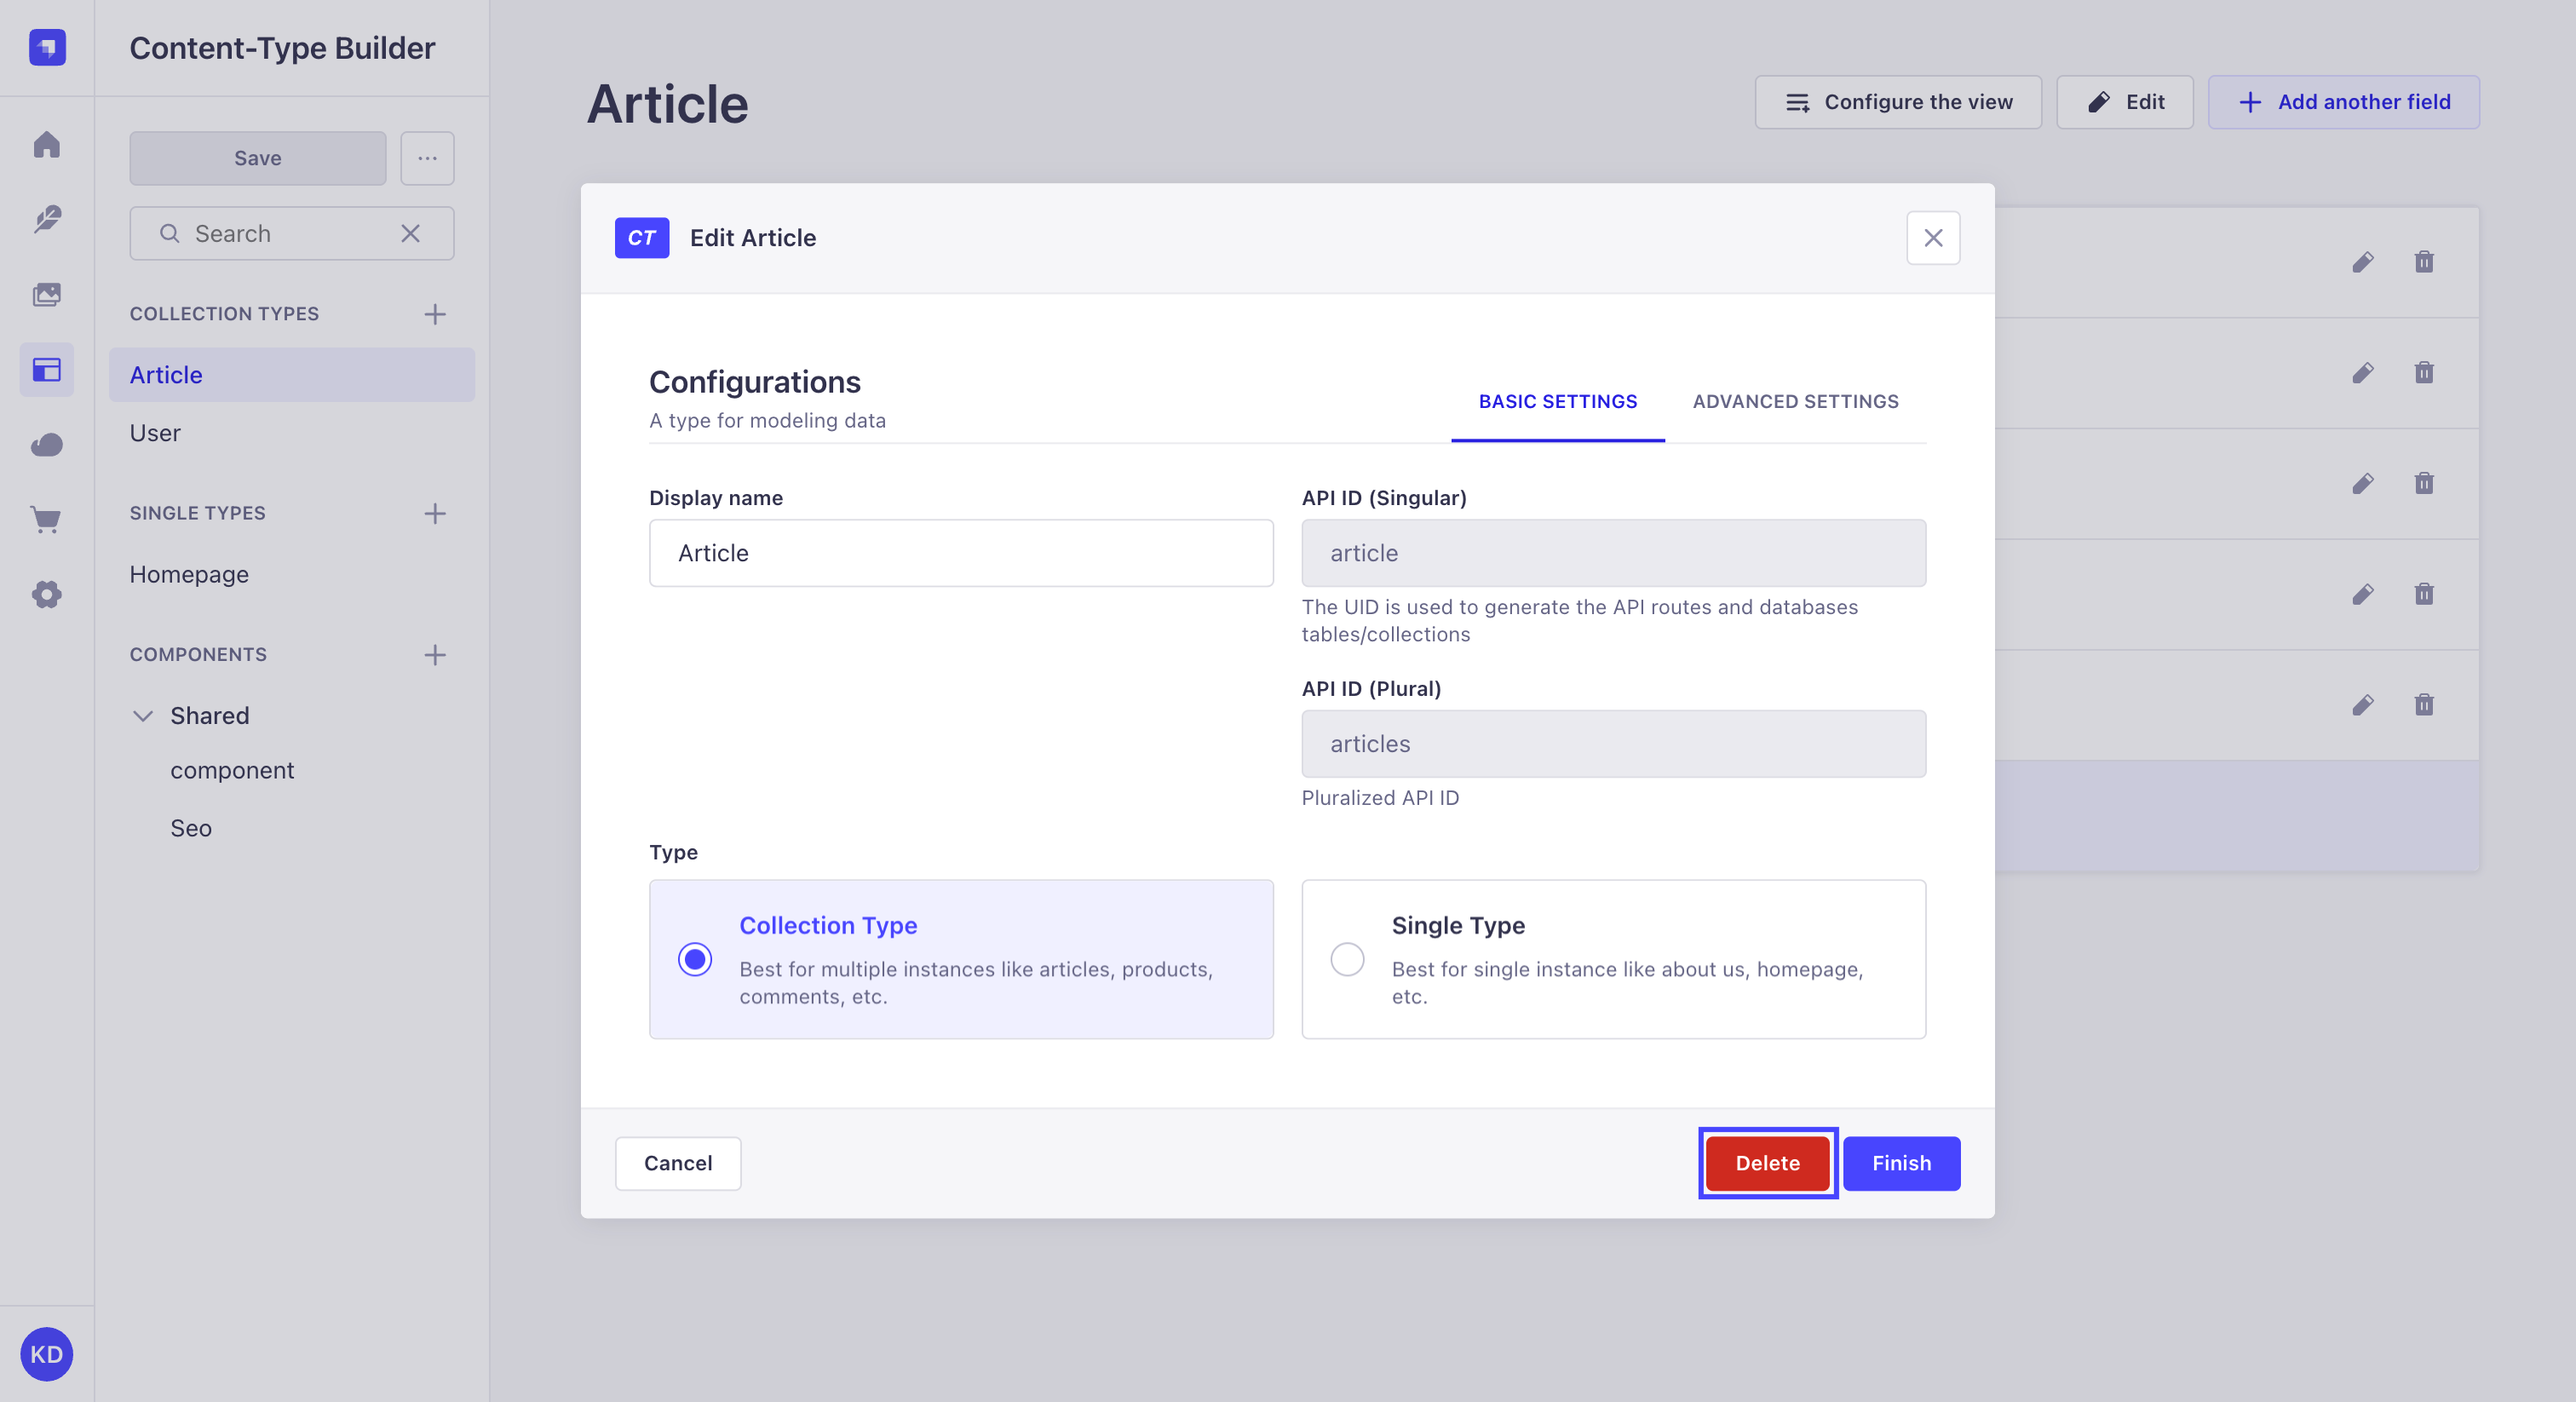
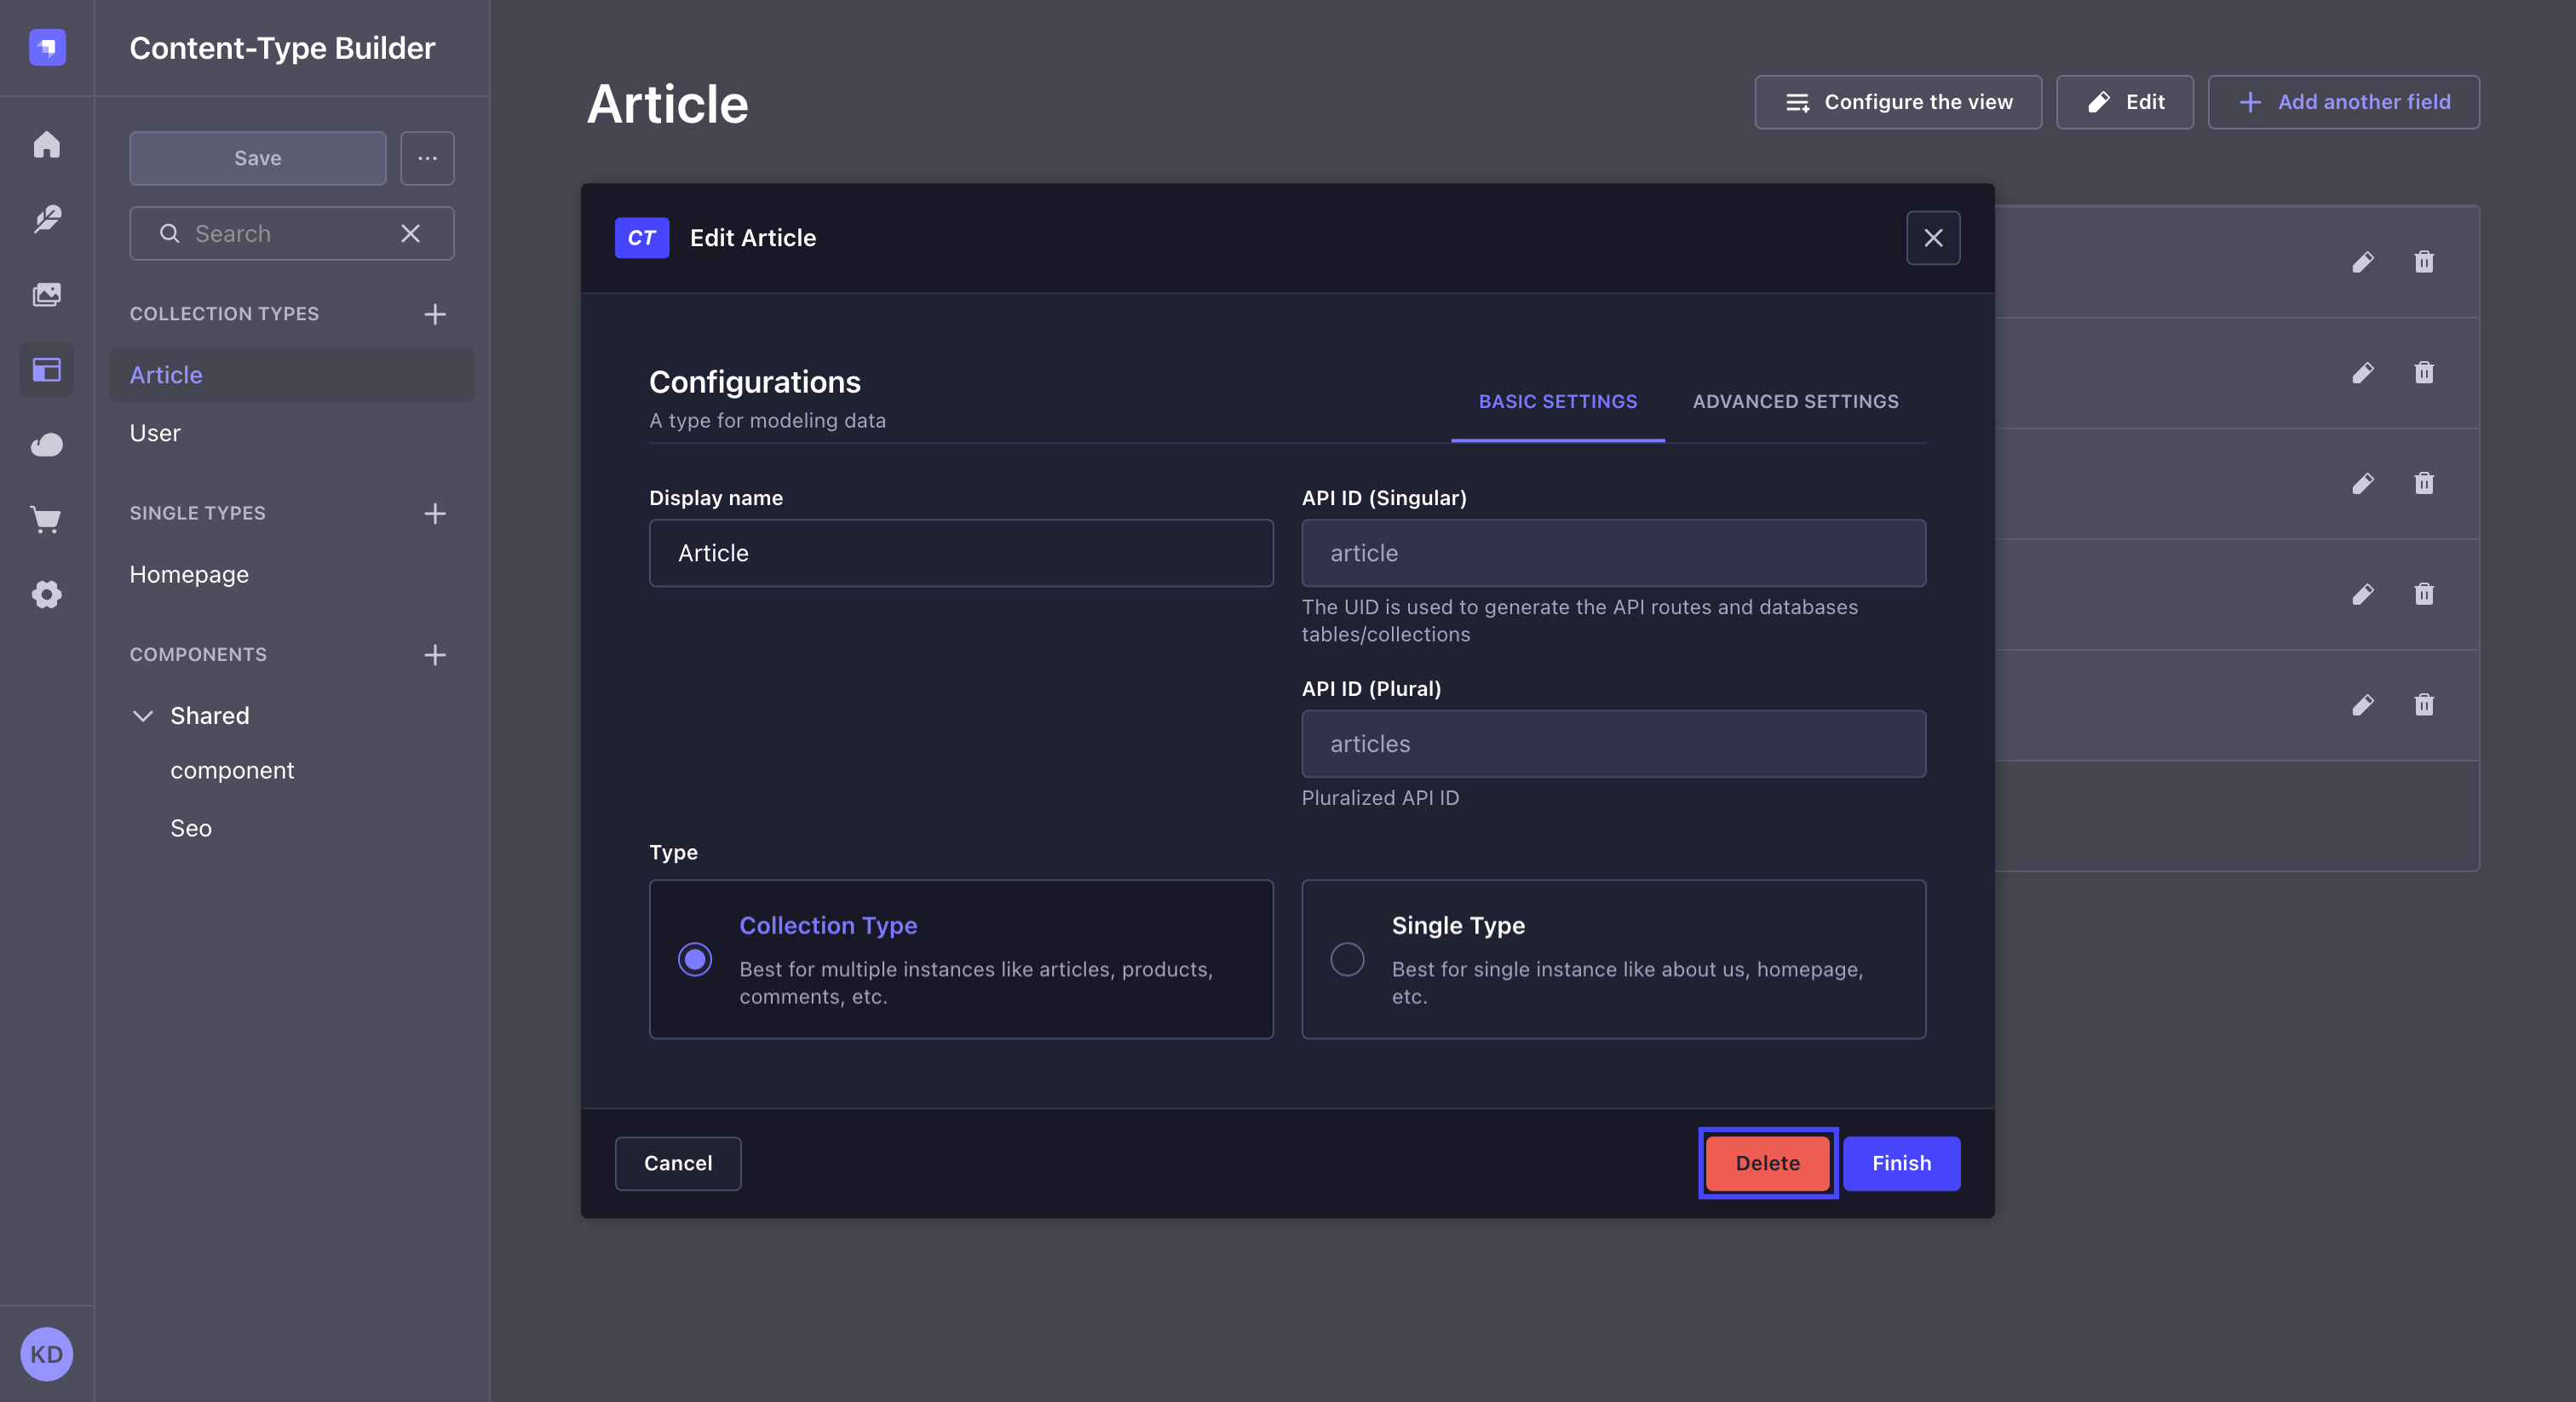
Organizing content-types with folders NewThis content is new.
Collection types and single types can be grouped into folders, and folders can be nested up to 3 levels deep. Folders are displayed in the Content-type Builder sub navigation.
They are also displayed in the Content Manager, where they help content managers find content-types more quickly.
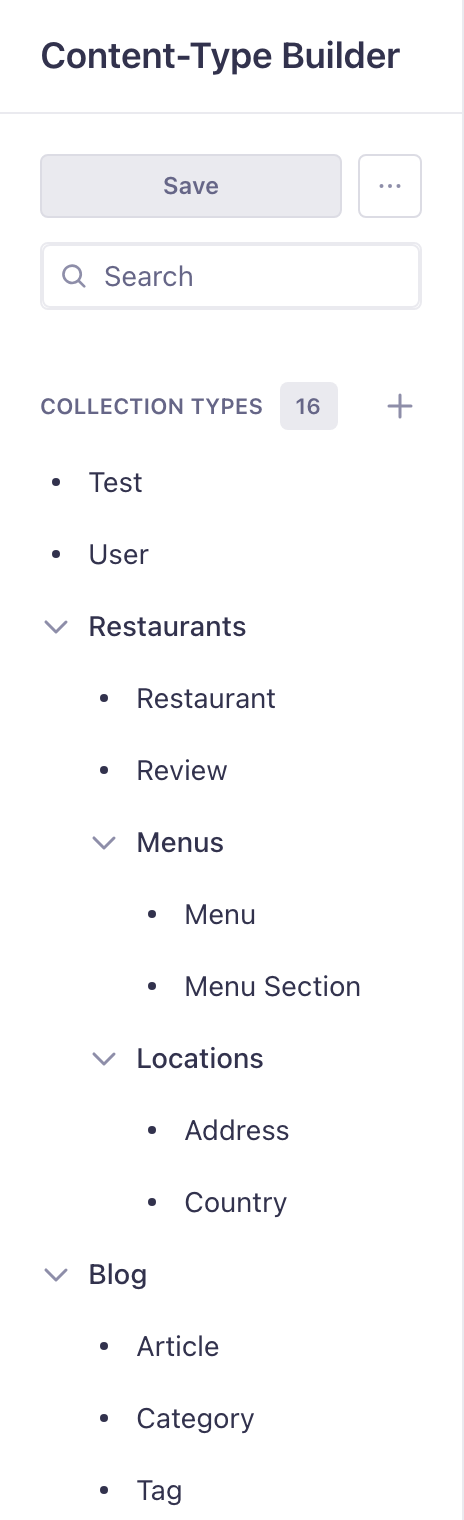
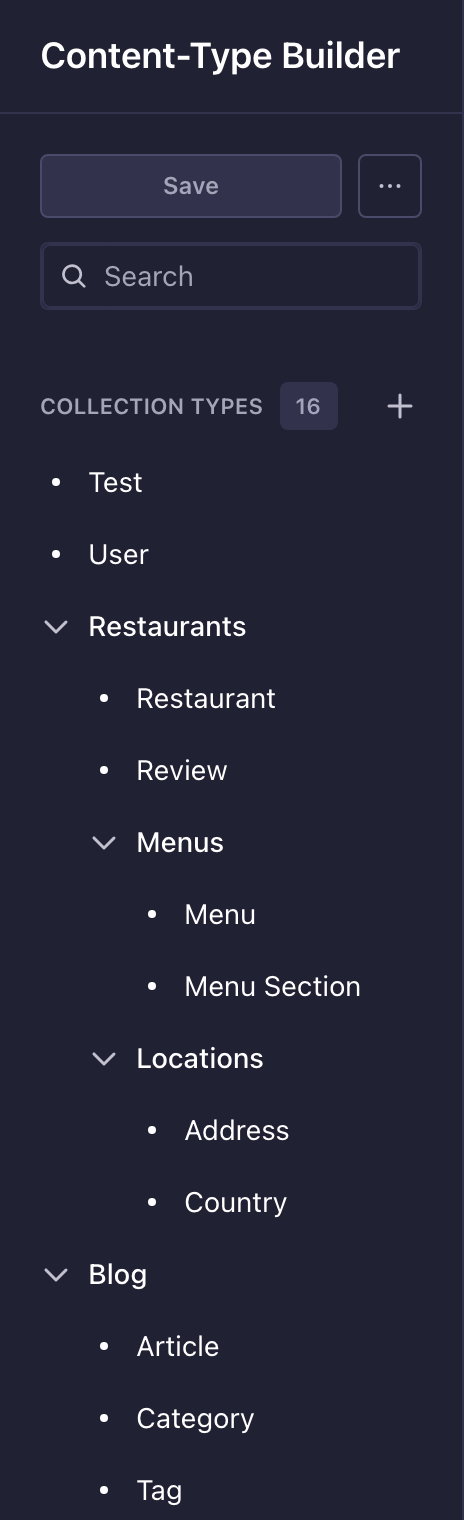
Folders are stored in the content structure file of your project. As for any other change made in the Content-type Builder, folder changes are applied only after clicking Save.
Creating folders
- In the Content-type Builder sub navigation, open the creation menu of the Collection types or Single types category and click on New folder.
- Write the name of the folder and press
Enter. - Click on the Save button.
Folders are created at the root of their category, and can then be moved into another folder.
2 folders that share the same parent folder cannot have the same name.
Moving content-types and folders
Content-types and folders are moved by drag and drop in the Content-type Builder sub navigation.
Drag an item onto a folder to put it inside, drag it out of a folder to take it back to the root of its category, or drag it up and down to reorder it.
A content-type can only belong to one folder at a time, and the nesting of folders is limited to 3 levels.
Once the content-types and folders are organized as you want, click on the Save button.
Renaming folders
- In the Content-type Builder sub navigation, click on the button of the folder to rename.
- Click on Rename.
- Write the new name of the folder and press
Enter. - Click on the Save button.
Deleting folders
- In the Content-type Builder sub navigation, click on the button of the folder to delete.
- Click on one of the following options:
- Delete folder to only delete the folder. The content-types and folders it contains are moved to the parent folder, or to the root of the category if the folder was not nested.
- Delete folder and contents to delete the folder along with the content-types and folders it contains. This option is only available if the folder is not empty.
- In the confirmation window, which indicates how many content-types and folders are affected, click on Yes, delete.
- Click on the Save button.
Delete folder is unavailable when moving the subfolders out of the folder would give 2 folders the same name in their destination, whatever their case.
The confirmation window then lists the conflicting names, and Yes, delete stays disabled until one of these folders is renamed.
Delete folder and contents deletes the folder, its subfolders, and the content-types created for your application, with the same consequences as deleting these content-types one by one (see Deleting content-types).
Content-types that the Content-type Builder does not manage, such as the ones coming from plugins, are kept and moved out of the folders, and the confirmation window indicates how many of them are preserved.
To keep all the content-types, use Delete folder instead.