Role-Based Access Control (RBAC)
Page summary:Role-Based Access Control (RBAC) manages administrator roles and granular permissions in the admin panel. This documentation covers creating roles, assigning rights, and securing administrative workflows.
The Role-Based Access Control (RBAC) feature allows the management of the administrators, who are the users of the admin panel. More specifically, RBAC manages the administrators' accounts and roles.
Configuration
Path to configure the feature: Settings > Administration panel > Roles
The Roles interface displays all created roles for the administrators of your Strapi application.
From this interface, it is possible to:
- create a new administrator role (see Creating a new role),
- delete an administrator role (see Deleting a role),
- or access information regarding an administrator role, and edit it (see Editing a role).
By default, 3 administrator roles are defined for any Strapi application:
- Author: to be able to create and manage their own content.
- Editor: to be able to create content, and manage and publish any content.
- Super Admin: to be able to access all features and settings. This is the role attributed by default to the first administrator at the creation of the Strapi application.
Creating a new role
On the top right side of the Administration panel > Roles interface, an Add new role button is displayed. Click on that Add new role button to create a new role for administrators of your Strapi application.
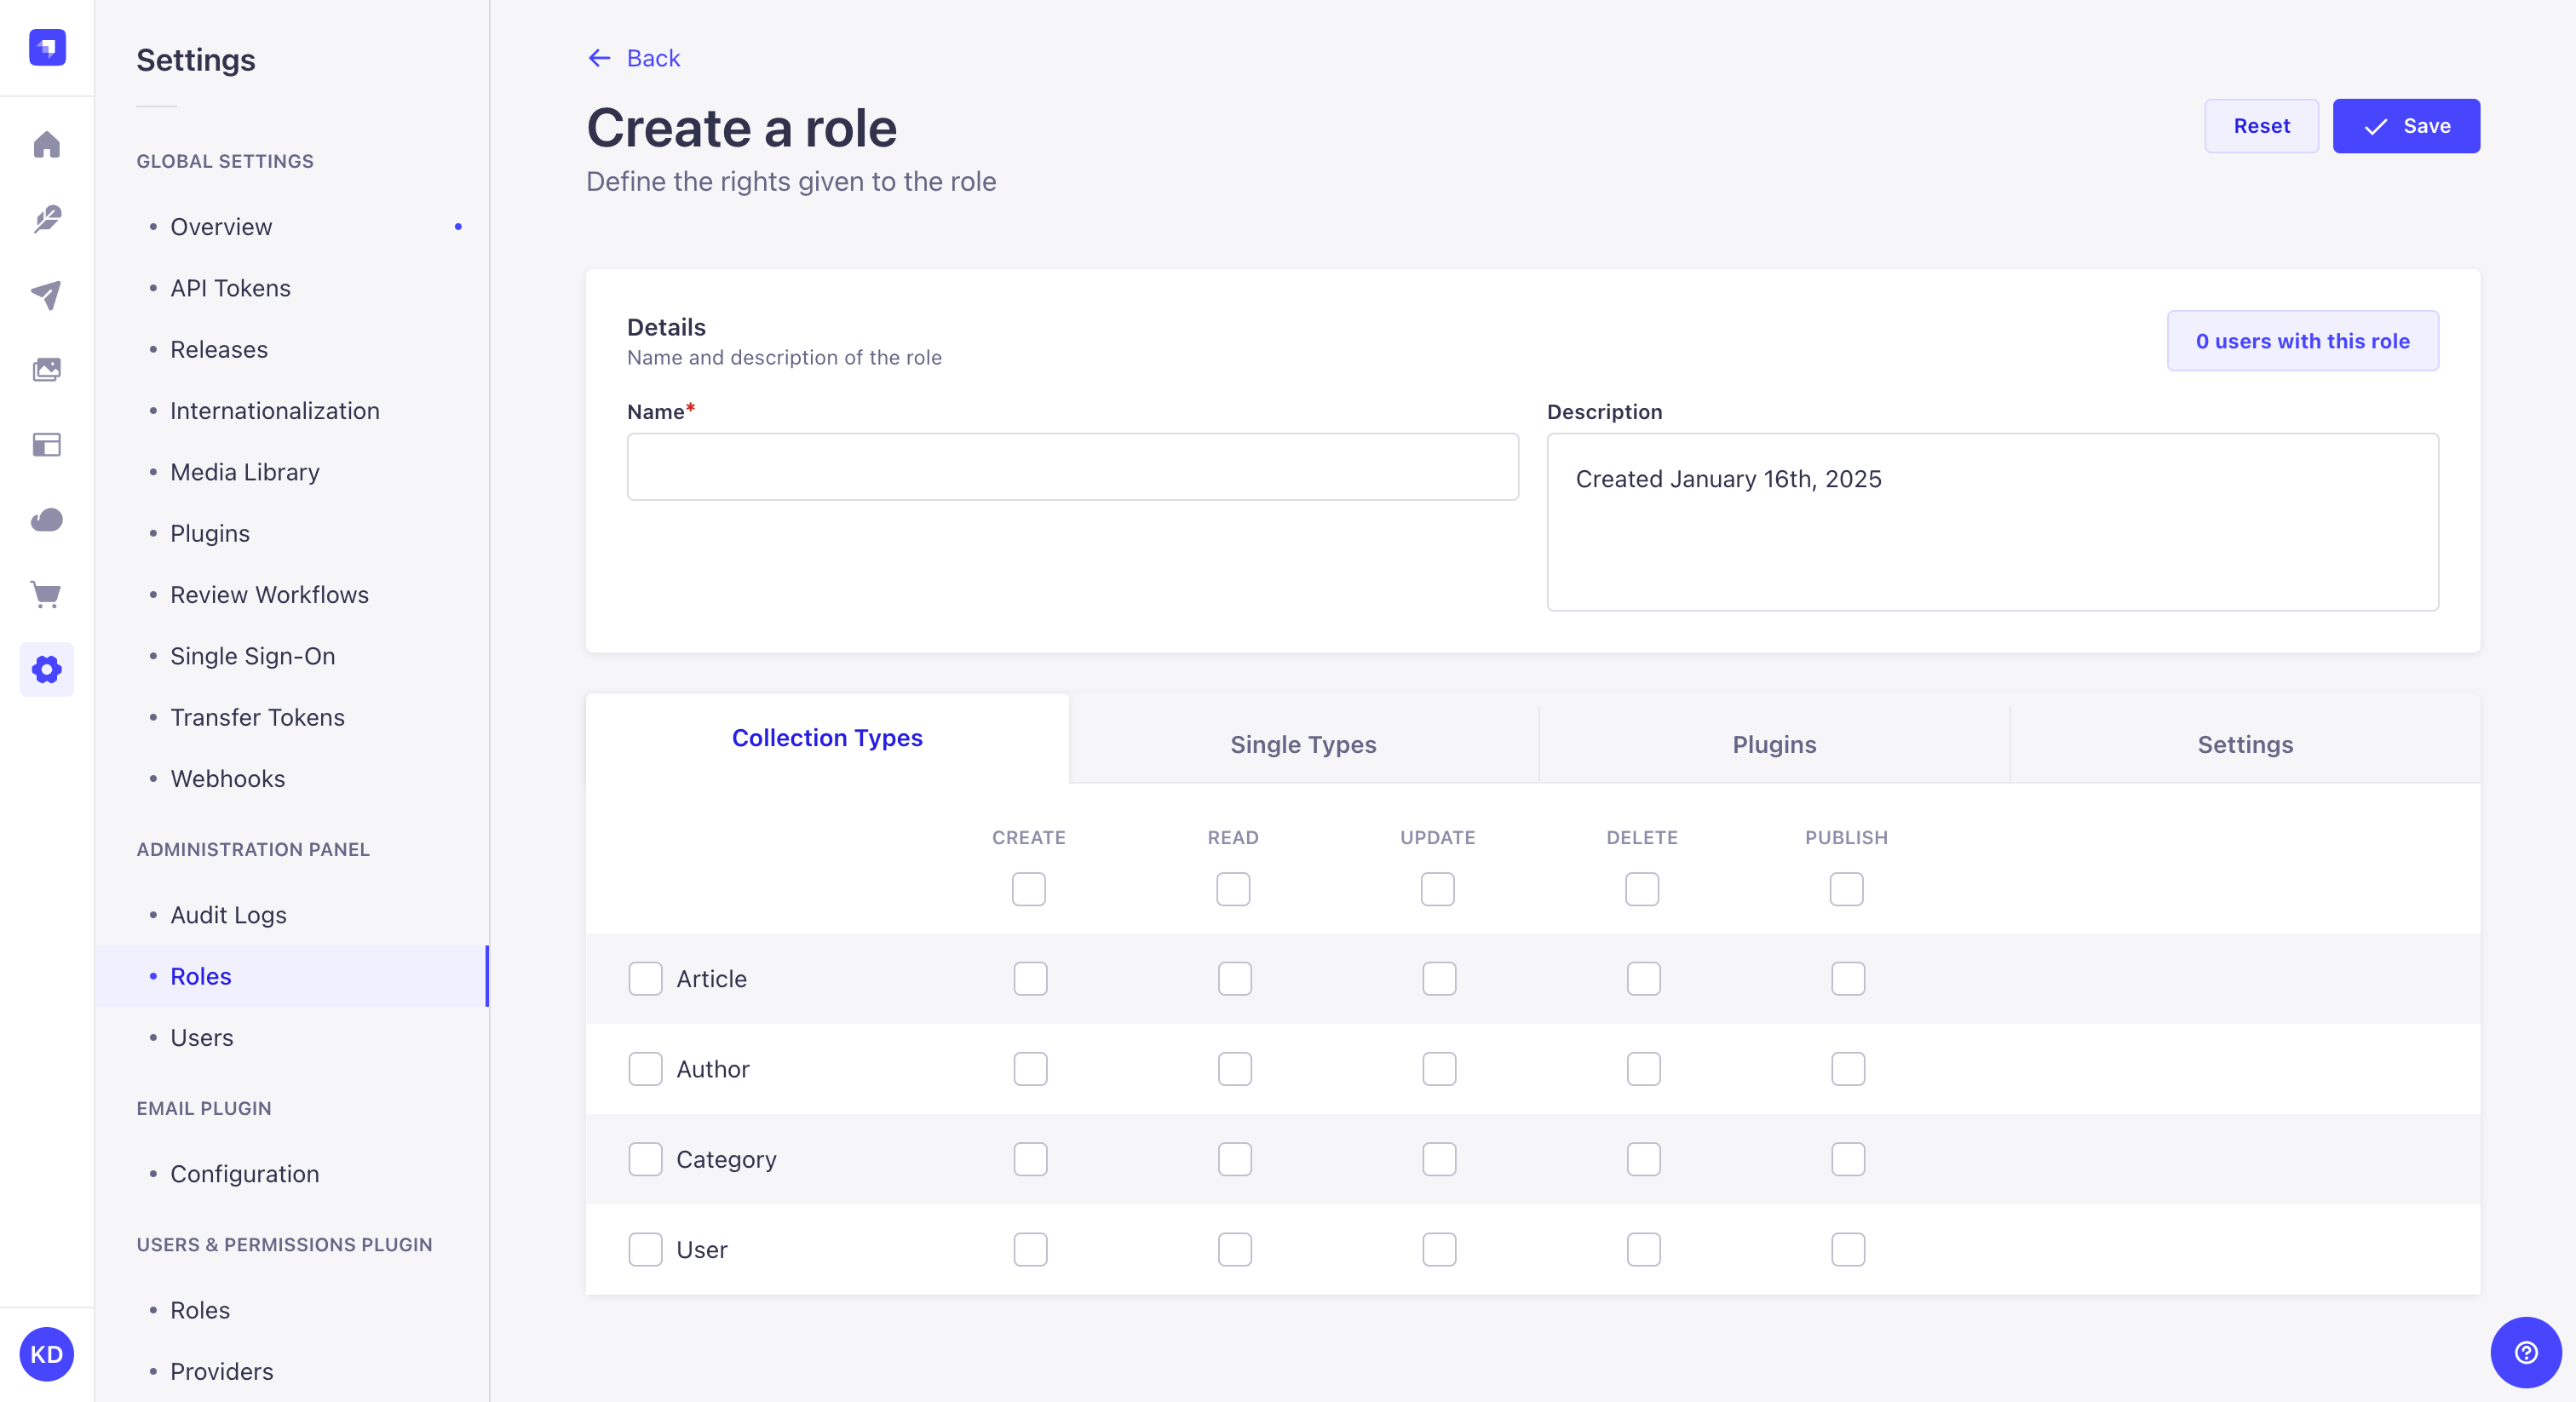
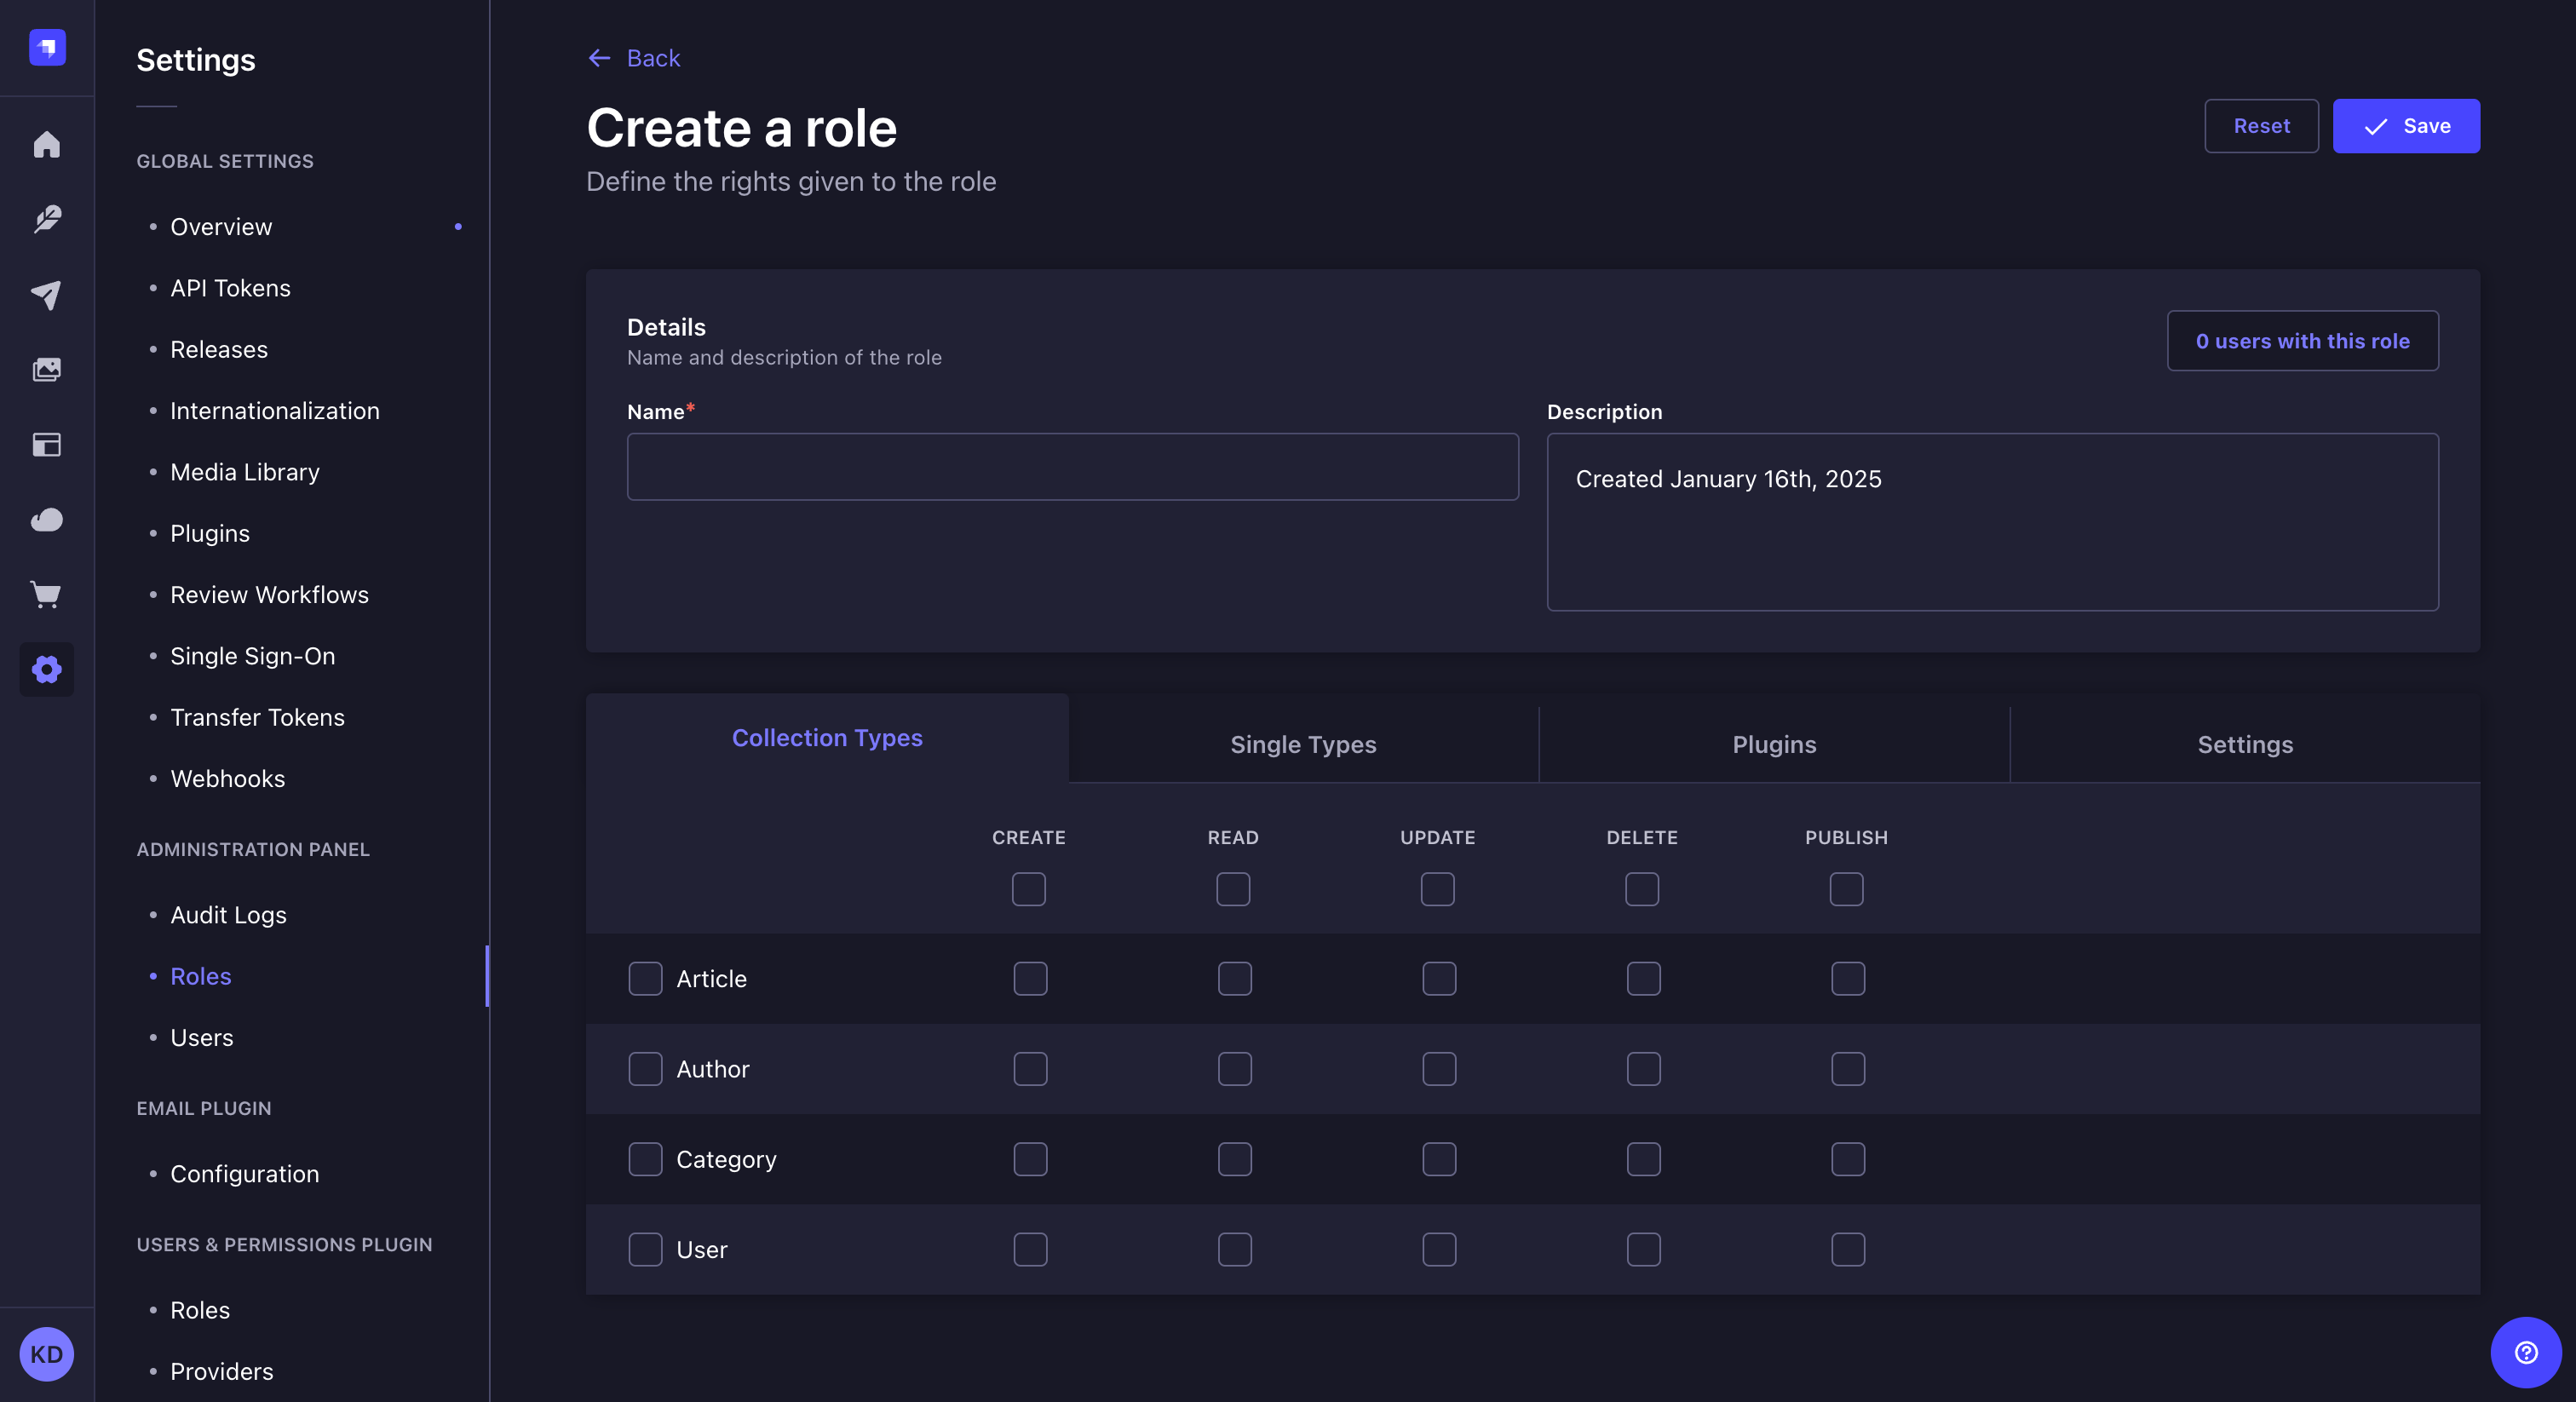
You will be redirected to the roles edition interface, where you will be able to edit the role's details and configure its permissions (see Editing a role).
In the Roles interface, from the table, you can click on the duplicate button to create a new role by duplicating an existing one.
Deleting a role
Administrator roles can be deleted from the Administration panel > Roles interface. However, they can only be deleted once they are no more attributed to any administrator of the Strapi application.
- Make sure the role you wish to delete is not attributed to any administrator anymore.
- Click on the delete button on the right side of the role's record.
- In the deletion window, click on the Confirm button to confirm the deletion.
Editing a role
The role edition interface allows to edit the details of an administrator role as well as configure in detail the permissions to all sections of your Strapi application.
It is accessible from Administration panel > Roles either after clicking on the edit button on the right side of a role's record, or after clicking on the Add new role button (see Creating a new role).
It isn't possible to edit the permissions of the Super Admin role. All configurations are in read-only mode.
Editing role's details
The details area of an administrator role editing interface allow to define the name of the role, and to give it a description that should help other administrators understand what the role gives access to.
| Role details | Instructions |
|---|---|
| Name | Write the new name of the role in the textbox. |
| Description | Write the description of the role in the textbox. |
In the top right corner, you can see a counter indicating how many administrators have been attributed the role.
Configuring role's permissions
The permissions area of an administrator role editing interface allows to configure in detail what actions an administrator can do for any part of the Strapi application.
It is displayed as a table, split into 4 categories: Collection types, Single types, Plugins and Settings.
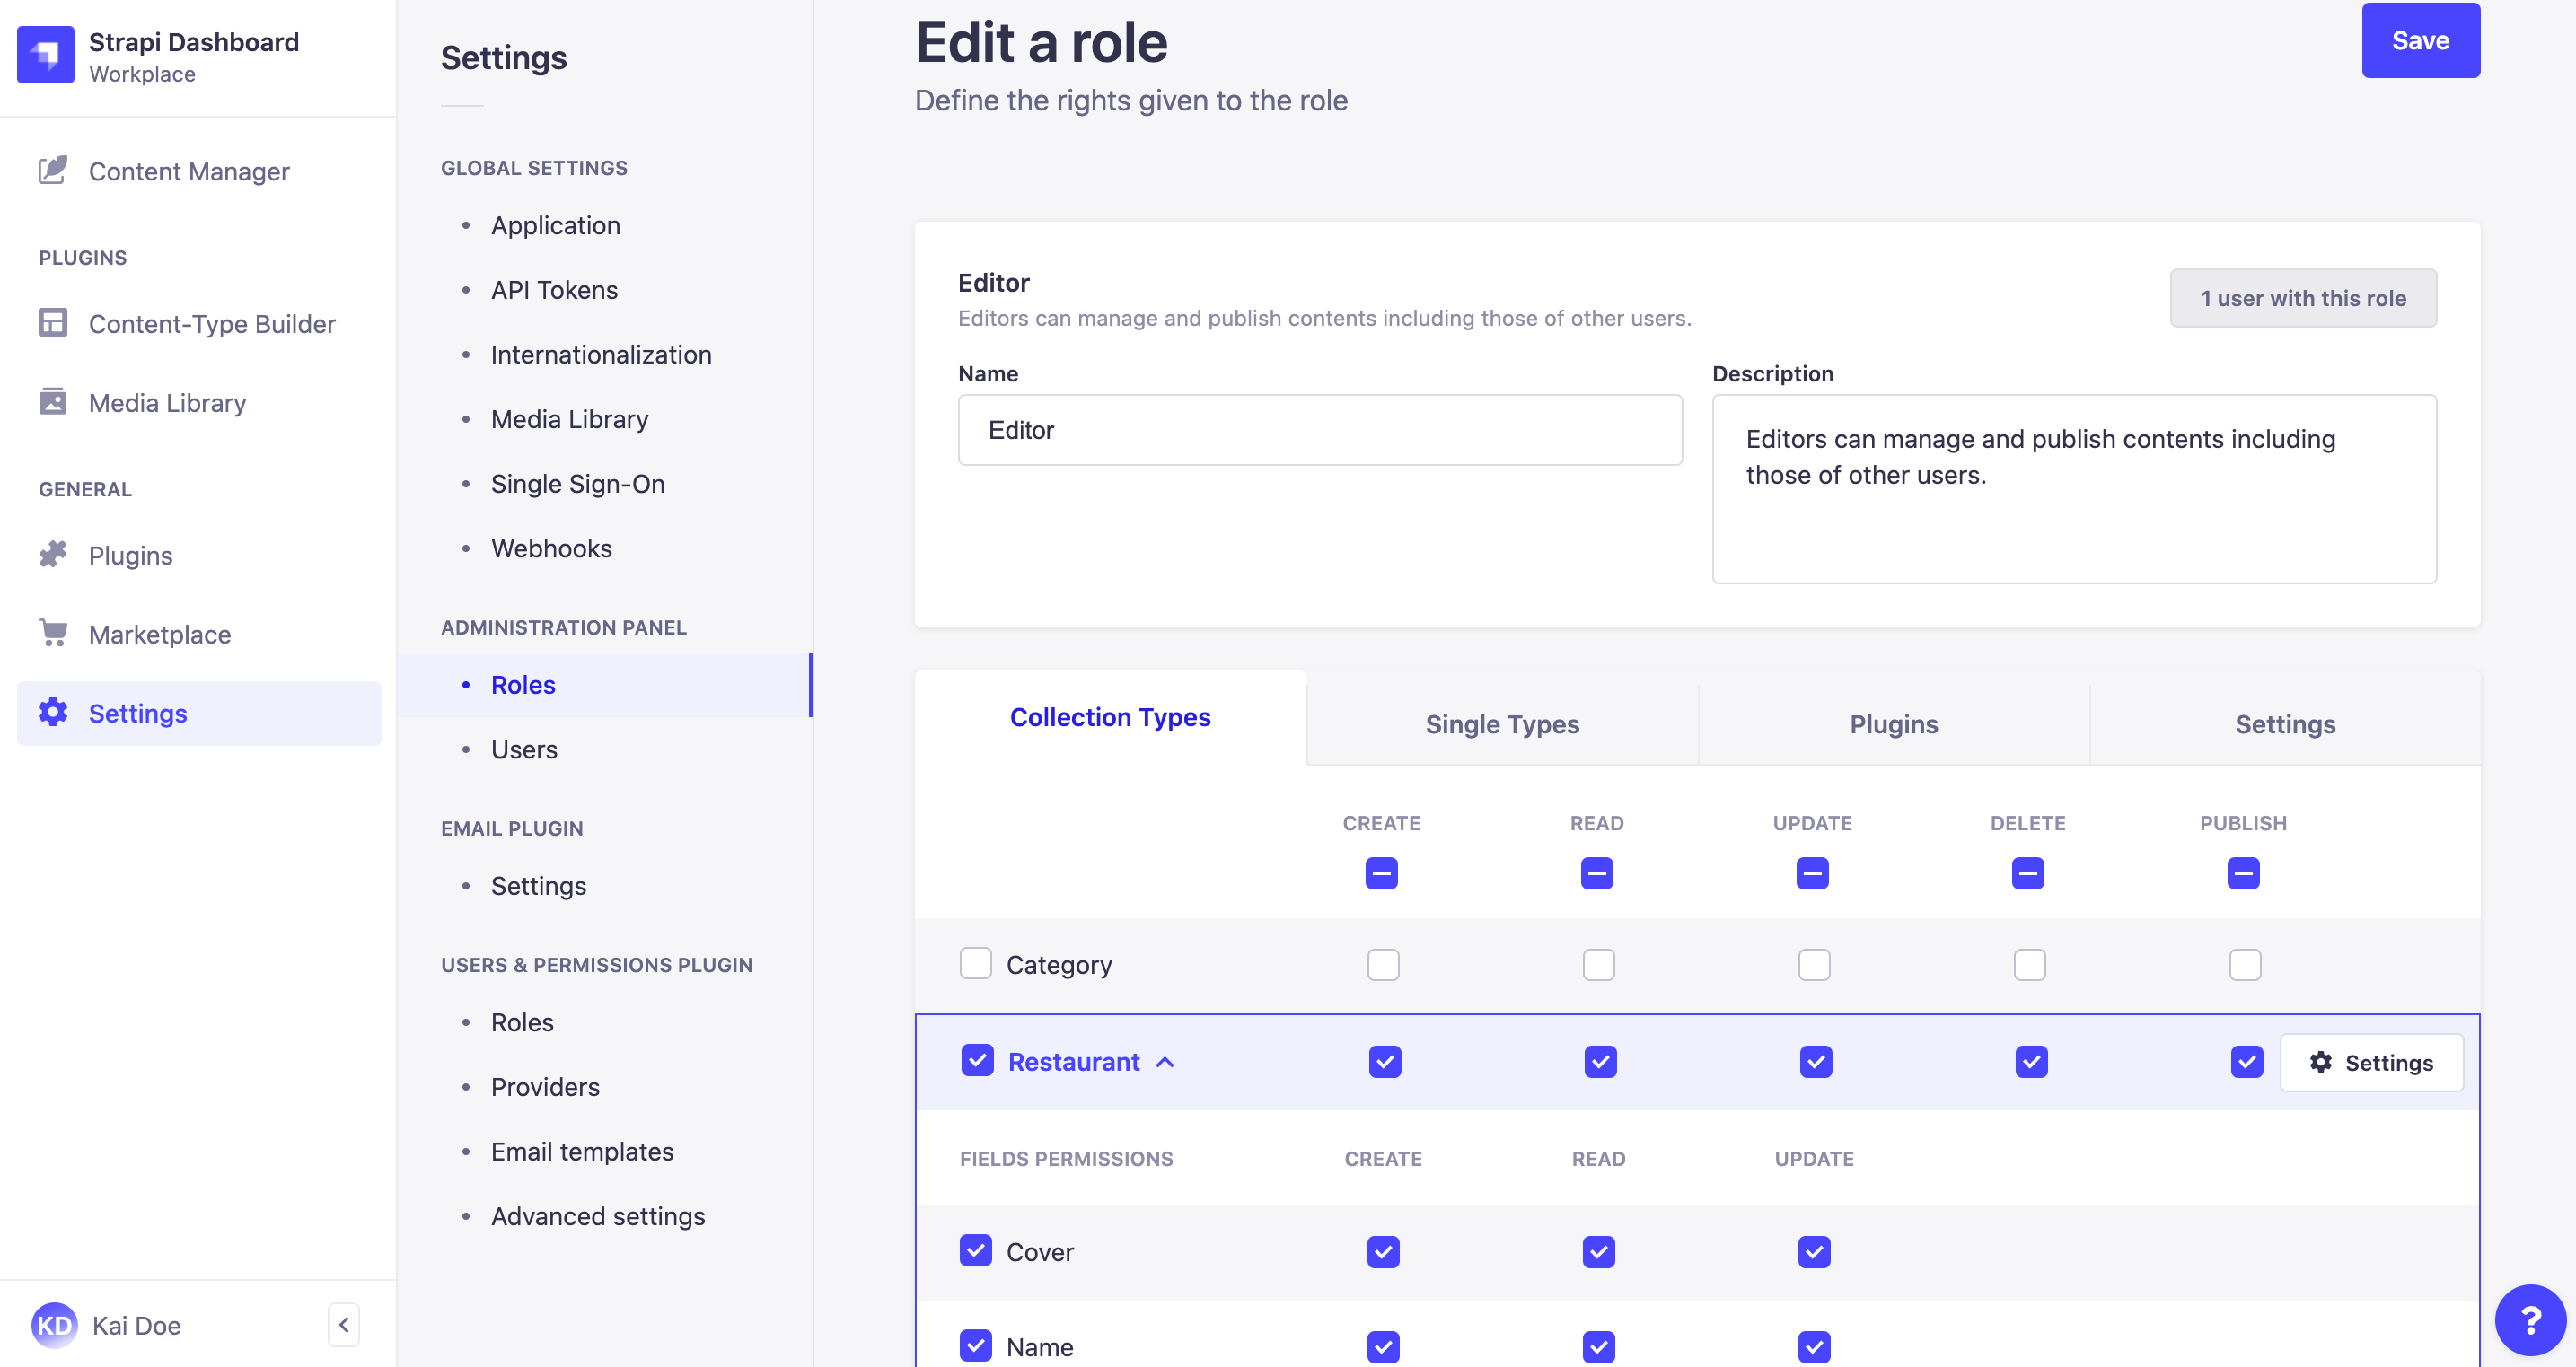
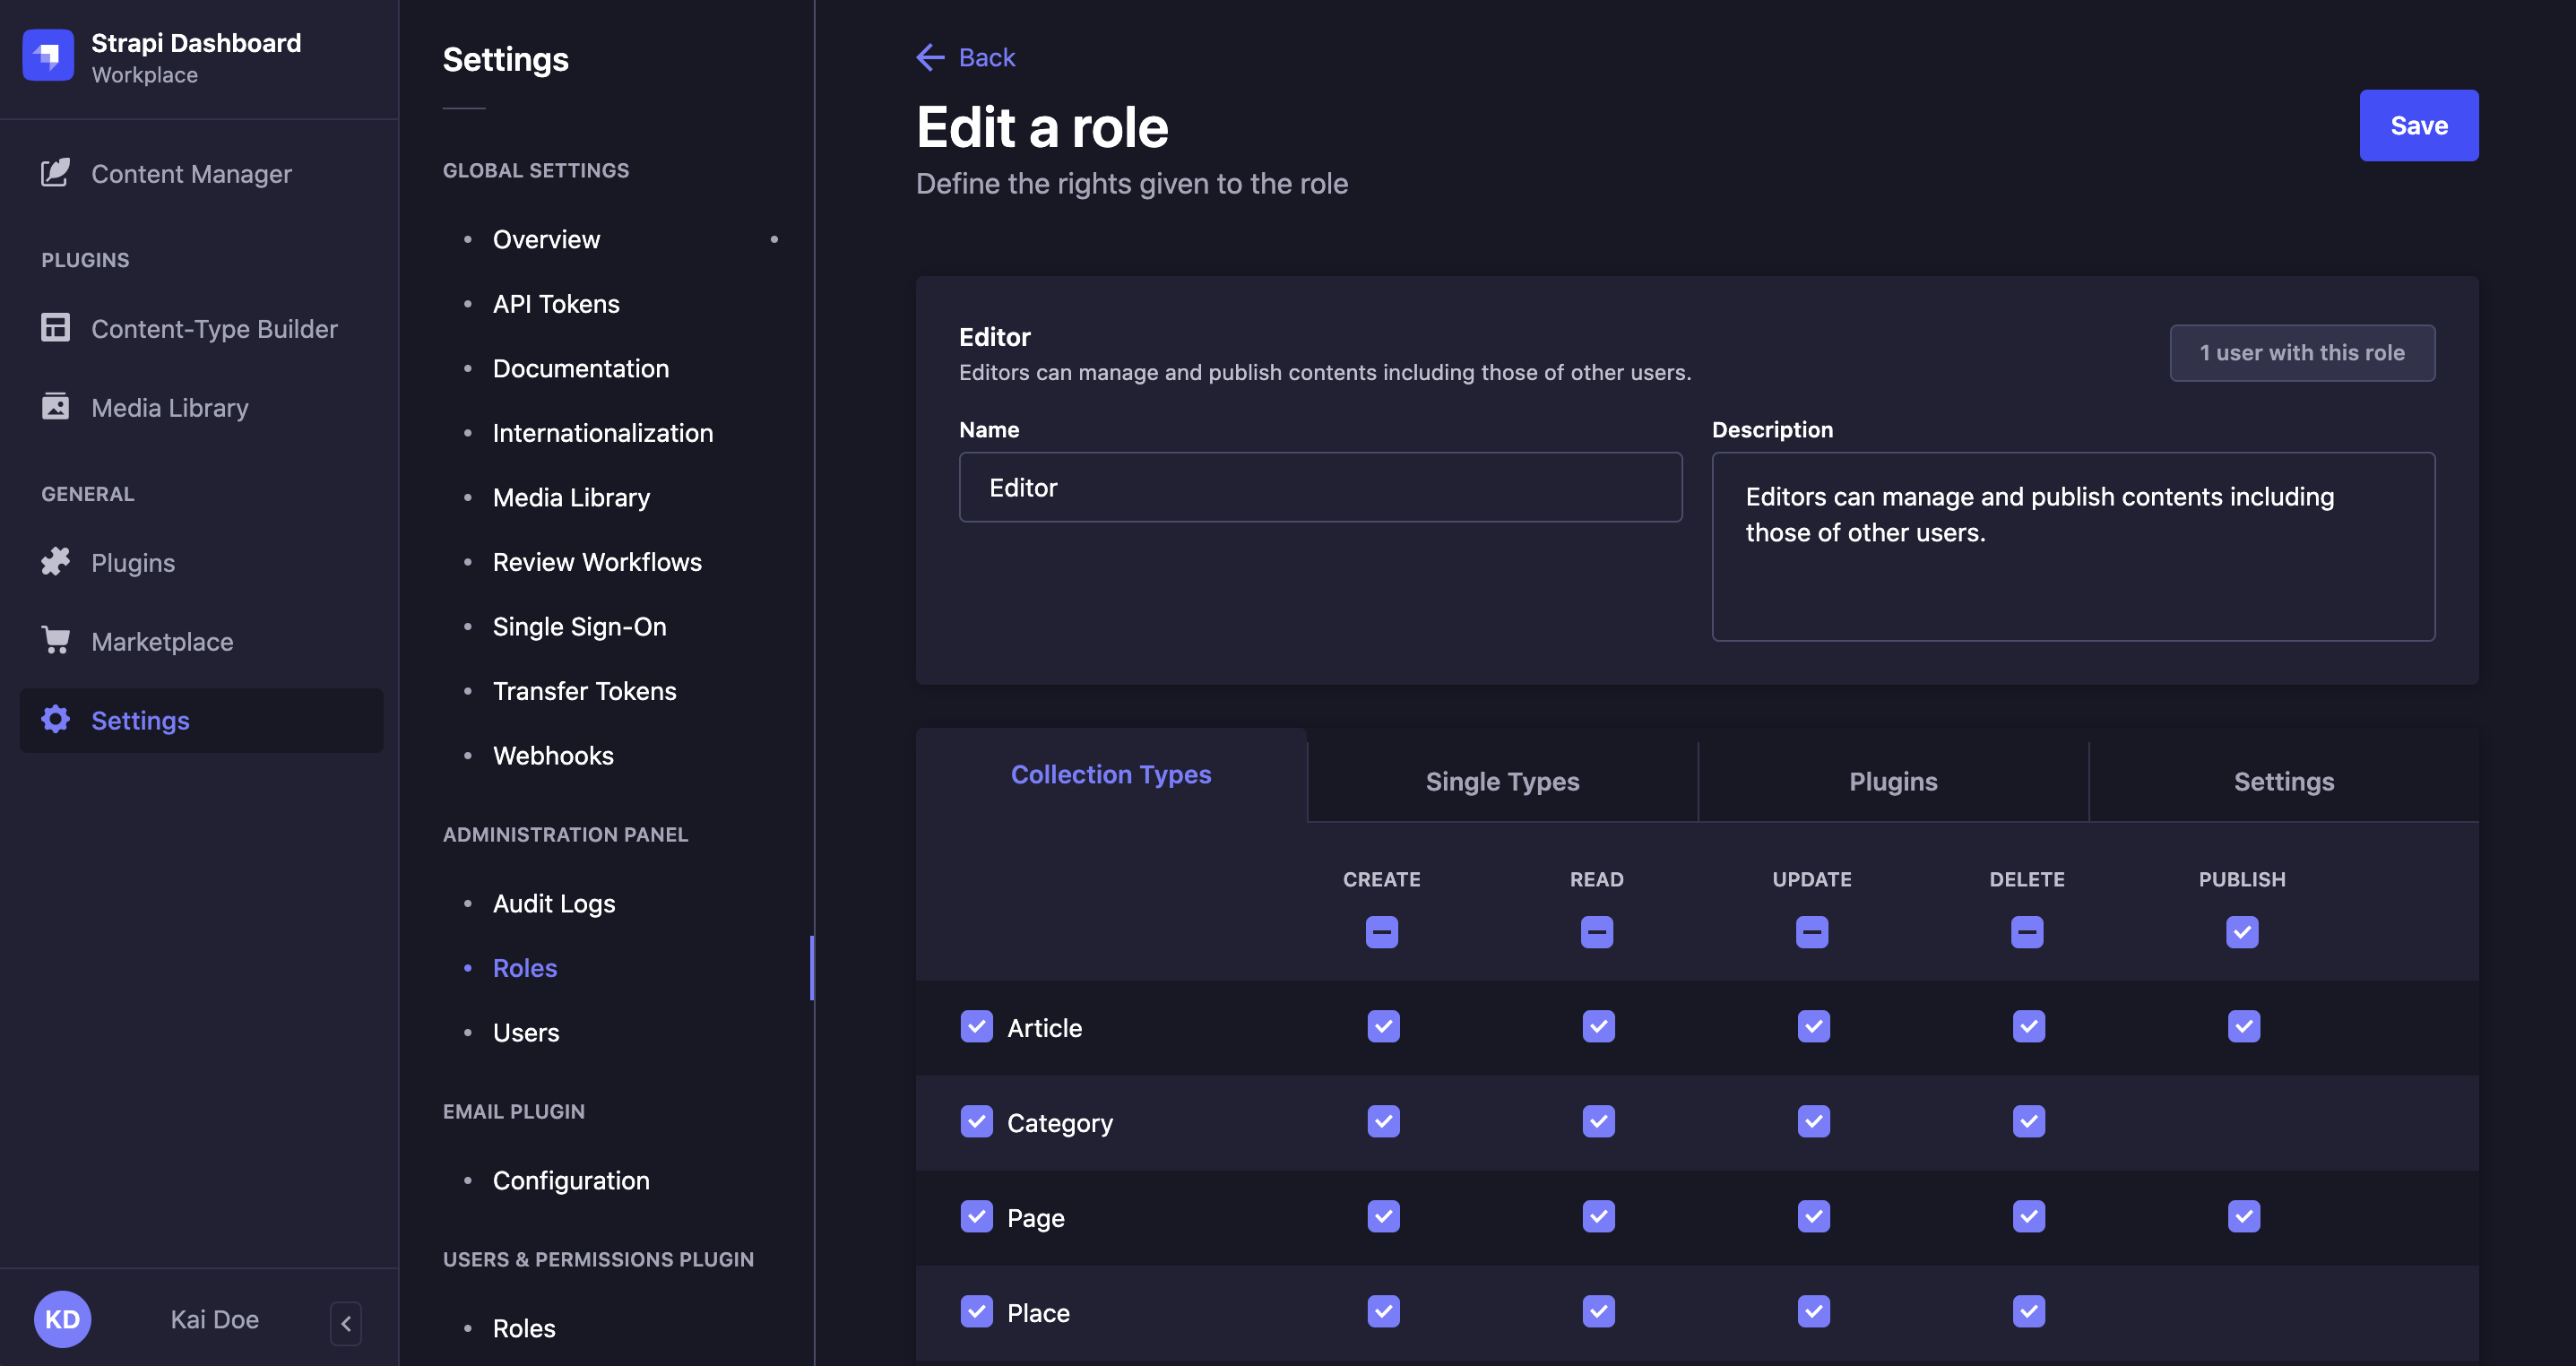
Collection and Single types
The Collection types and Single types categories respectively list all available collection and single types for the Strapi application.
For each content-type, the administrators can have the permission to perform the following actions: create, read, update, delete and publish.
- Go to the Collection types or Single types category of the permissions table.
- Tick the box on the left of the name of the content-type to give access to. By default, all actions can be performed for all fields of the content-type.
- (optional) Untick the action-related boxes to prevent actions of your choice.
- (optional) Click the name of the content-type to display its full list of fields. Untick the field and action-related boxes to prevent access and/or action for the fields of your choice. If the Internationalization feature is installed, define also what permissions should be granted for each available locale.
- Repeat steps 2 to 4 for each content-type available to which the role should give access.
- Click on the Save button on the top right corner.
Plugins and Settings
The Plugins and Settings categories both display a sub-category per available plugin or setting of the Strapi application. Each sub-category contains its own specific set of permissions.
- Go to the Plugins or Settings category of the permissions table.
- Click on the name of the sub-category which permissions to configure, to display all available permissions.
- Tick the boxes of the permissions the role should give access to. You can refer to the table below for more information and instructions.
- Plugins
- Settings
By default, packages permissions can be configured for the Content-type Builder, Upload (i.e. Media Library), the Content Manager, and Users & Permissions (i.e. the Users & Permissions feature allowing to manage end users). Each package has its own specific set of permissions.
| Package name | Permissions |
|---|---|
| Content-Releases (Releases) |
|
| Content-Manager |
|
| Content-Type-Builder |
|
| Upload (Media Library) |
|
| Users-Permissions |
General > Settings > Users & Permissions plugin |
Settings permissions can be configured for all settings accessible from General > Settings from the main navigation of the admin panel. They also allow to configure access to the Plugins and Marketplace sections of the admin panel. Each setting has its own specific set of permissions.
| Setting name | Permissions |
|---|---|
| Content Releases |
General > Settings > Global Settings - Releases |
General > Settings > Users & Permissions plugin - Email templates | |
| Media Library |
General > Settings > Global Settings - Media Library |
| Internationalization |
General > Settings > Global Settings - Internationalization |
| Review Workflows |
General > Settings > Global Settings - Review workflows |
| Single sign on |
General > Settings > Global Settings - Single Sign-On |
| Audit Logs |
General > Settings > Admin Panel - Audit Logs |
| Plugins and Marketplace |
|
| Webhooks |
General > Settings > Global Settings - Webhook |
| Users and Roles |
General > Settings > Administration Panel |
| API Tokens |
General > Settings > Global Settings - API Tokens |
| Admin Tokens |
General > Settings > Administration Panel - Admin Tokens |
| Project |
|
| Transfer Tokens |
General > Settings > Global Settings - Transfer Tokens |
- Click on the Save button on the top right corner.
To create admin permissions for your custom plugin, please refer to our dedicated guide.
Setting custom conditions for permissions
For each permission of each category, a Settings button is displayed. It allows to push the permission configuration further by defining additional conditions for the administrators to be granted the permission.
There are 2 default additional conditions:
- the administrator must be the creator,
- the administrator must have the same role as the creator.
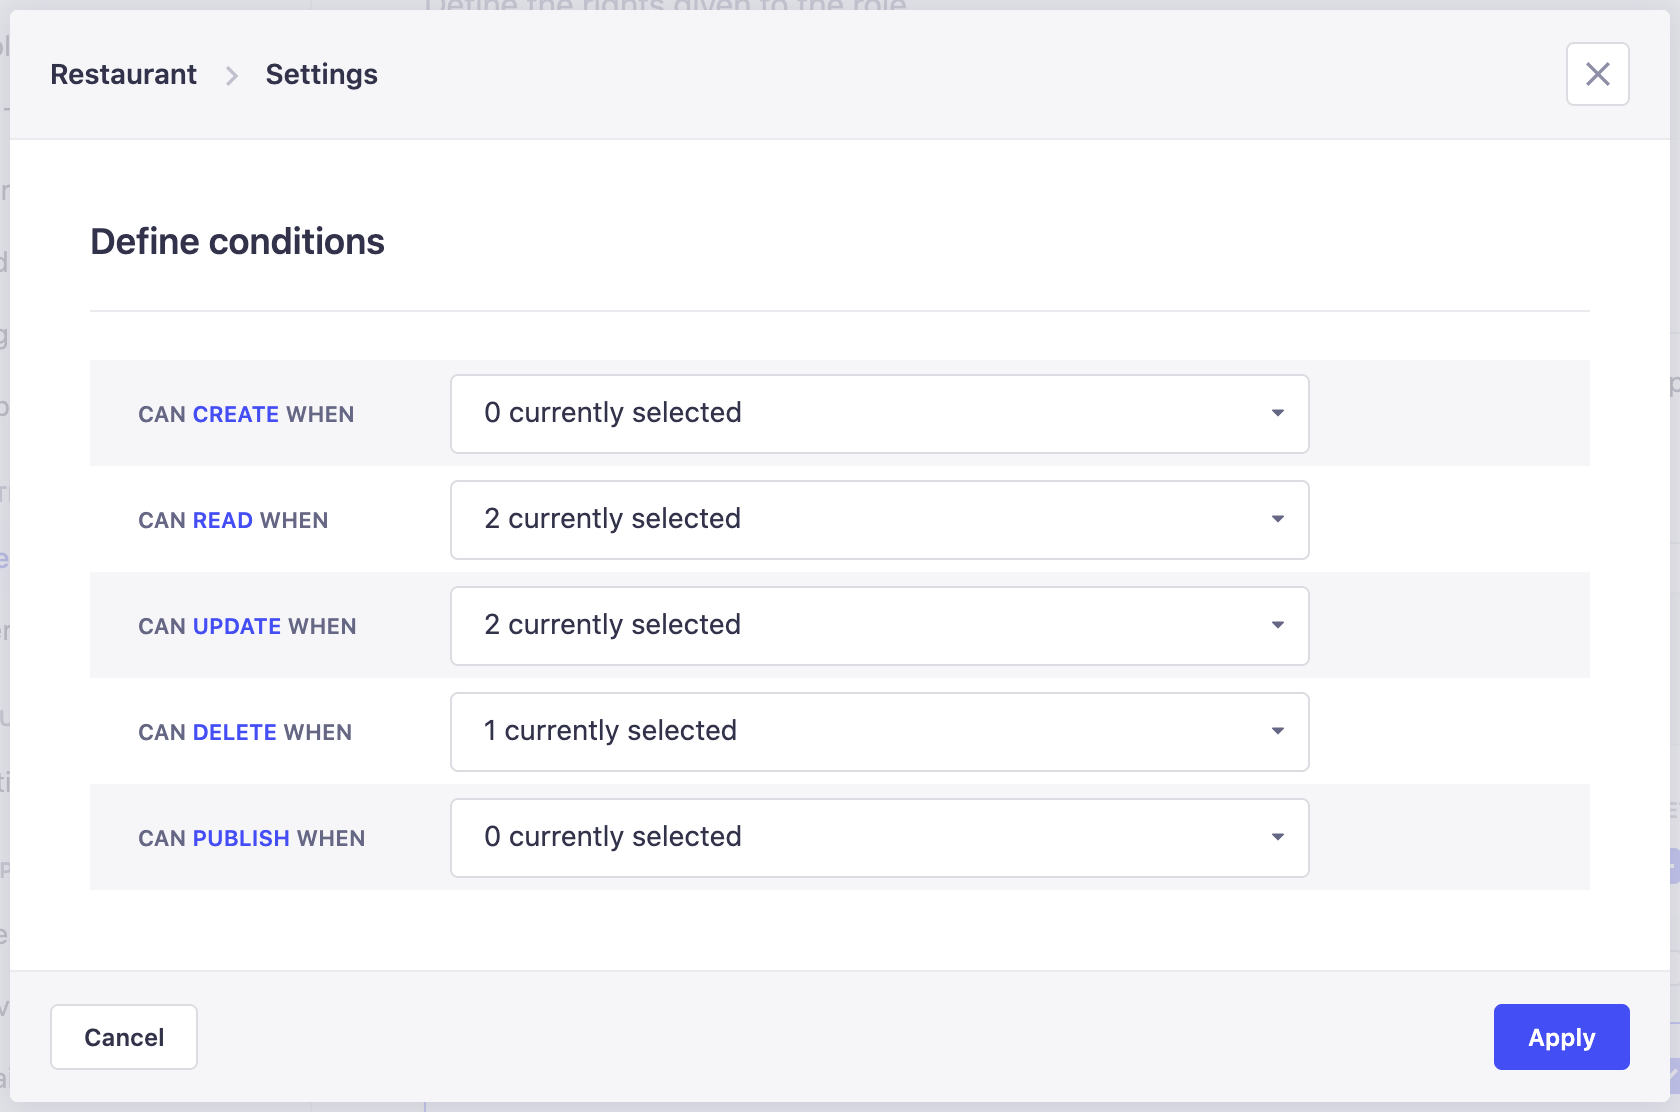
- Click on the Settings button of the permission already granted for the role.
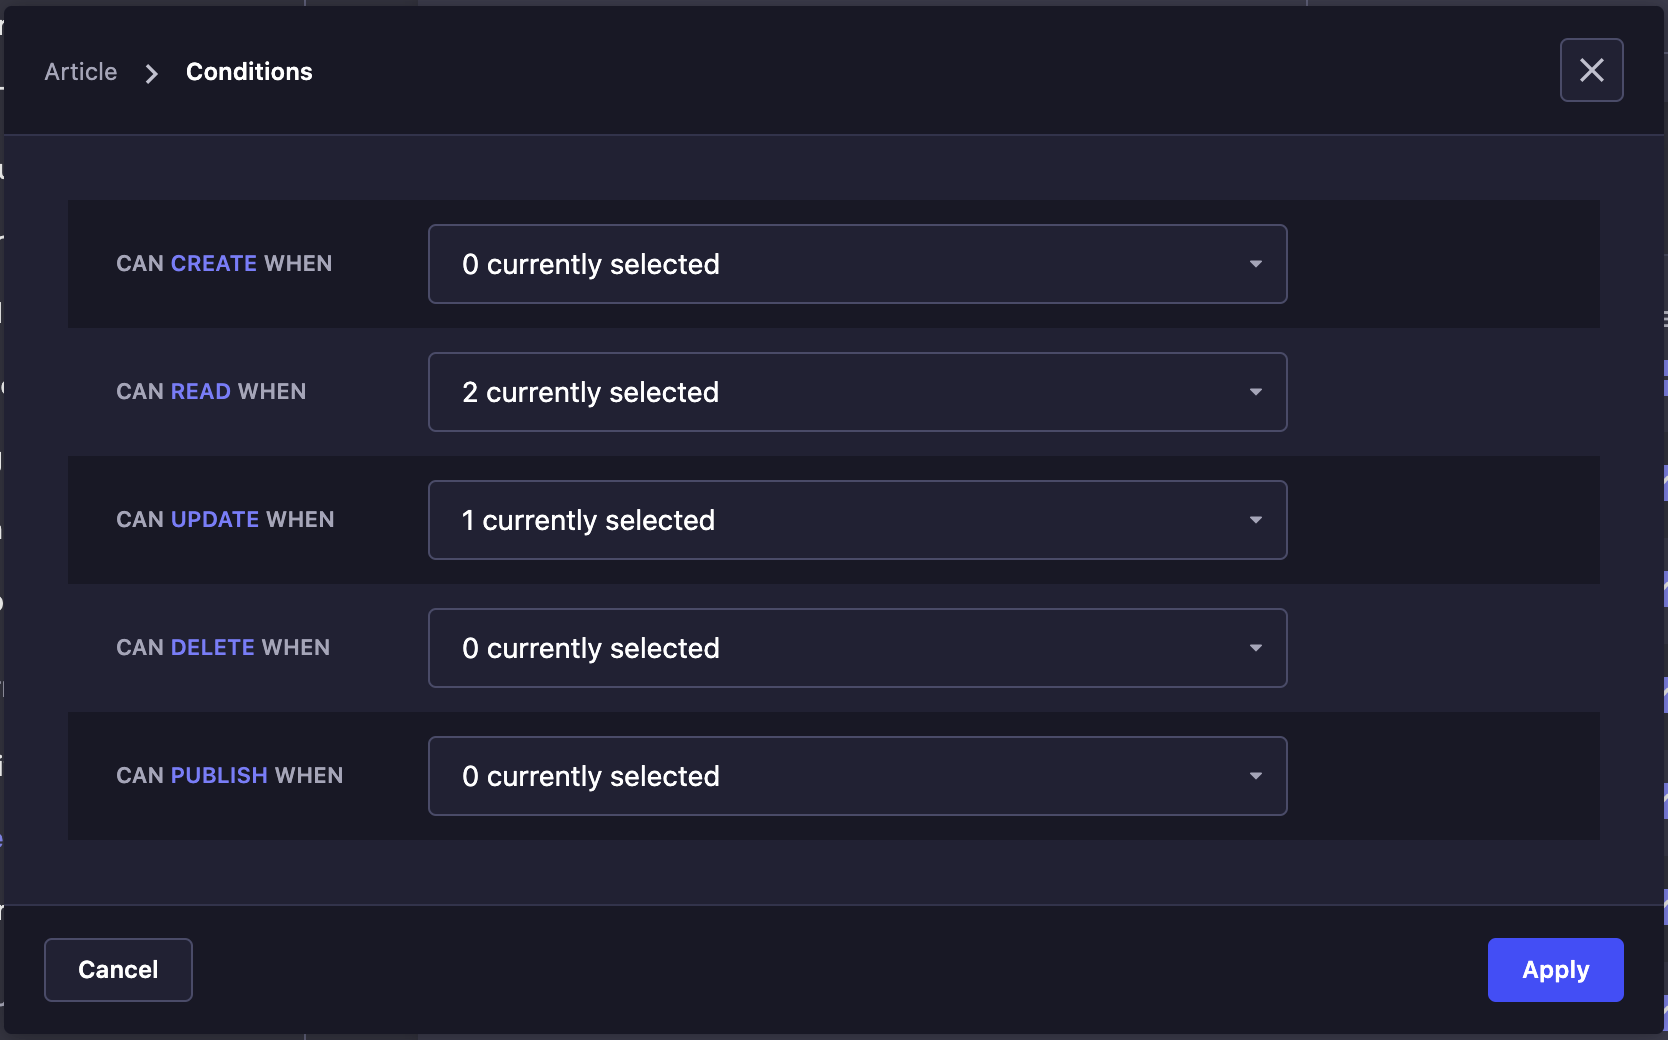
- In the Define conditions window, each available permission can be customized with a specific condition. Click on the drop-down list related to the permission you want to customize.
- Define the custom condition for the chosen permission. You can either:
- Tick the Default option for all available additional conditions to be applied.
- Click on the arrow button to see the available additional conditions and tick only the chosen one(s).
- Click on the Apply button.
Once a custom condition is set for a permission, a dot is displayed next to the permission's name and the Settings button.
Custom conditions can only be set for permissions that have been ticked to be granted for the role. If not, when clicking the Settings button, the window that opens will remain empty, as no custom condition option will be available.
Other custom conditions can be available if they have been created beforehand for your Strapi application. The following dedicated guide helps you create additional custom conditions:
Usage
Path to use the feature: Settings > Administration panel > Users
The Users interface displays a table listing all the administrators of your Strapi application. More specifically, for each administrator listed in the table, their main account information are displayed, including name, email and attributed role. The status of their account is also indicated: active or inactive, depending on whether the administrator has already logged in to activate the account or not.
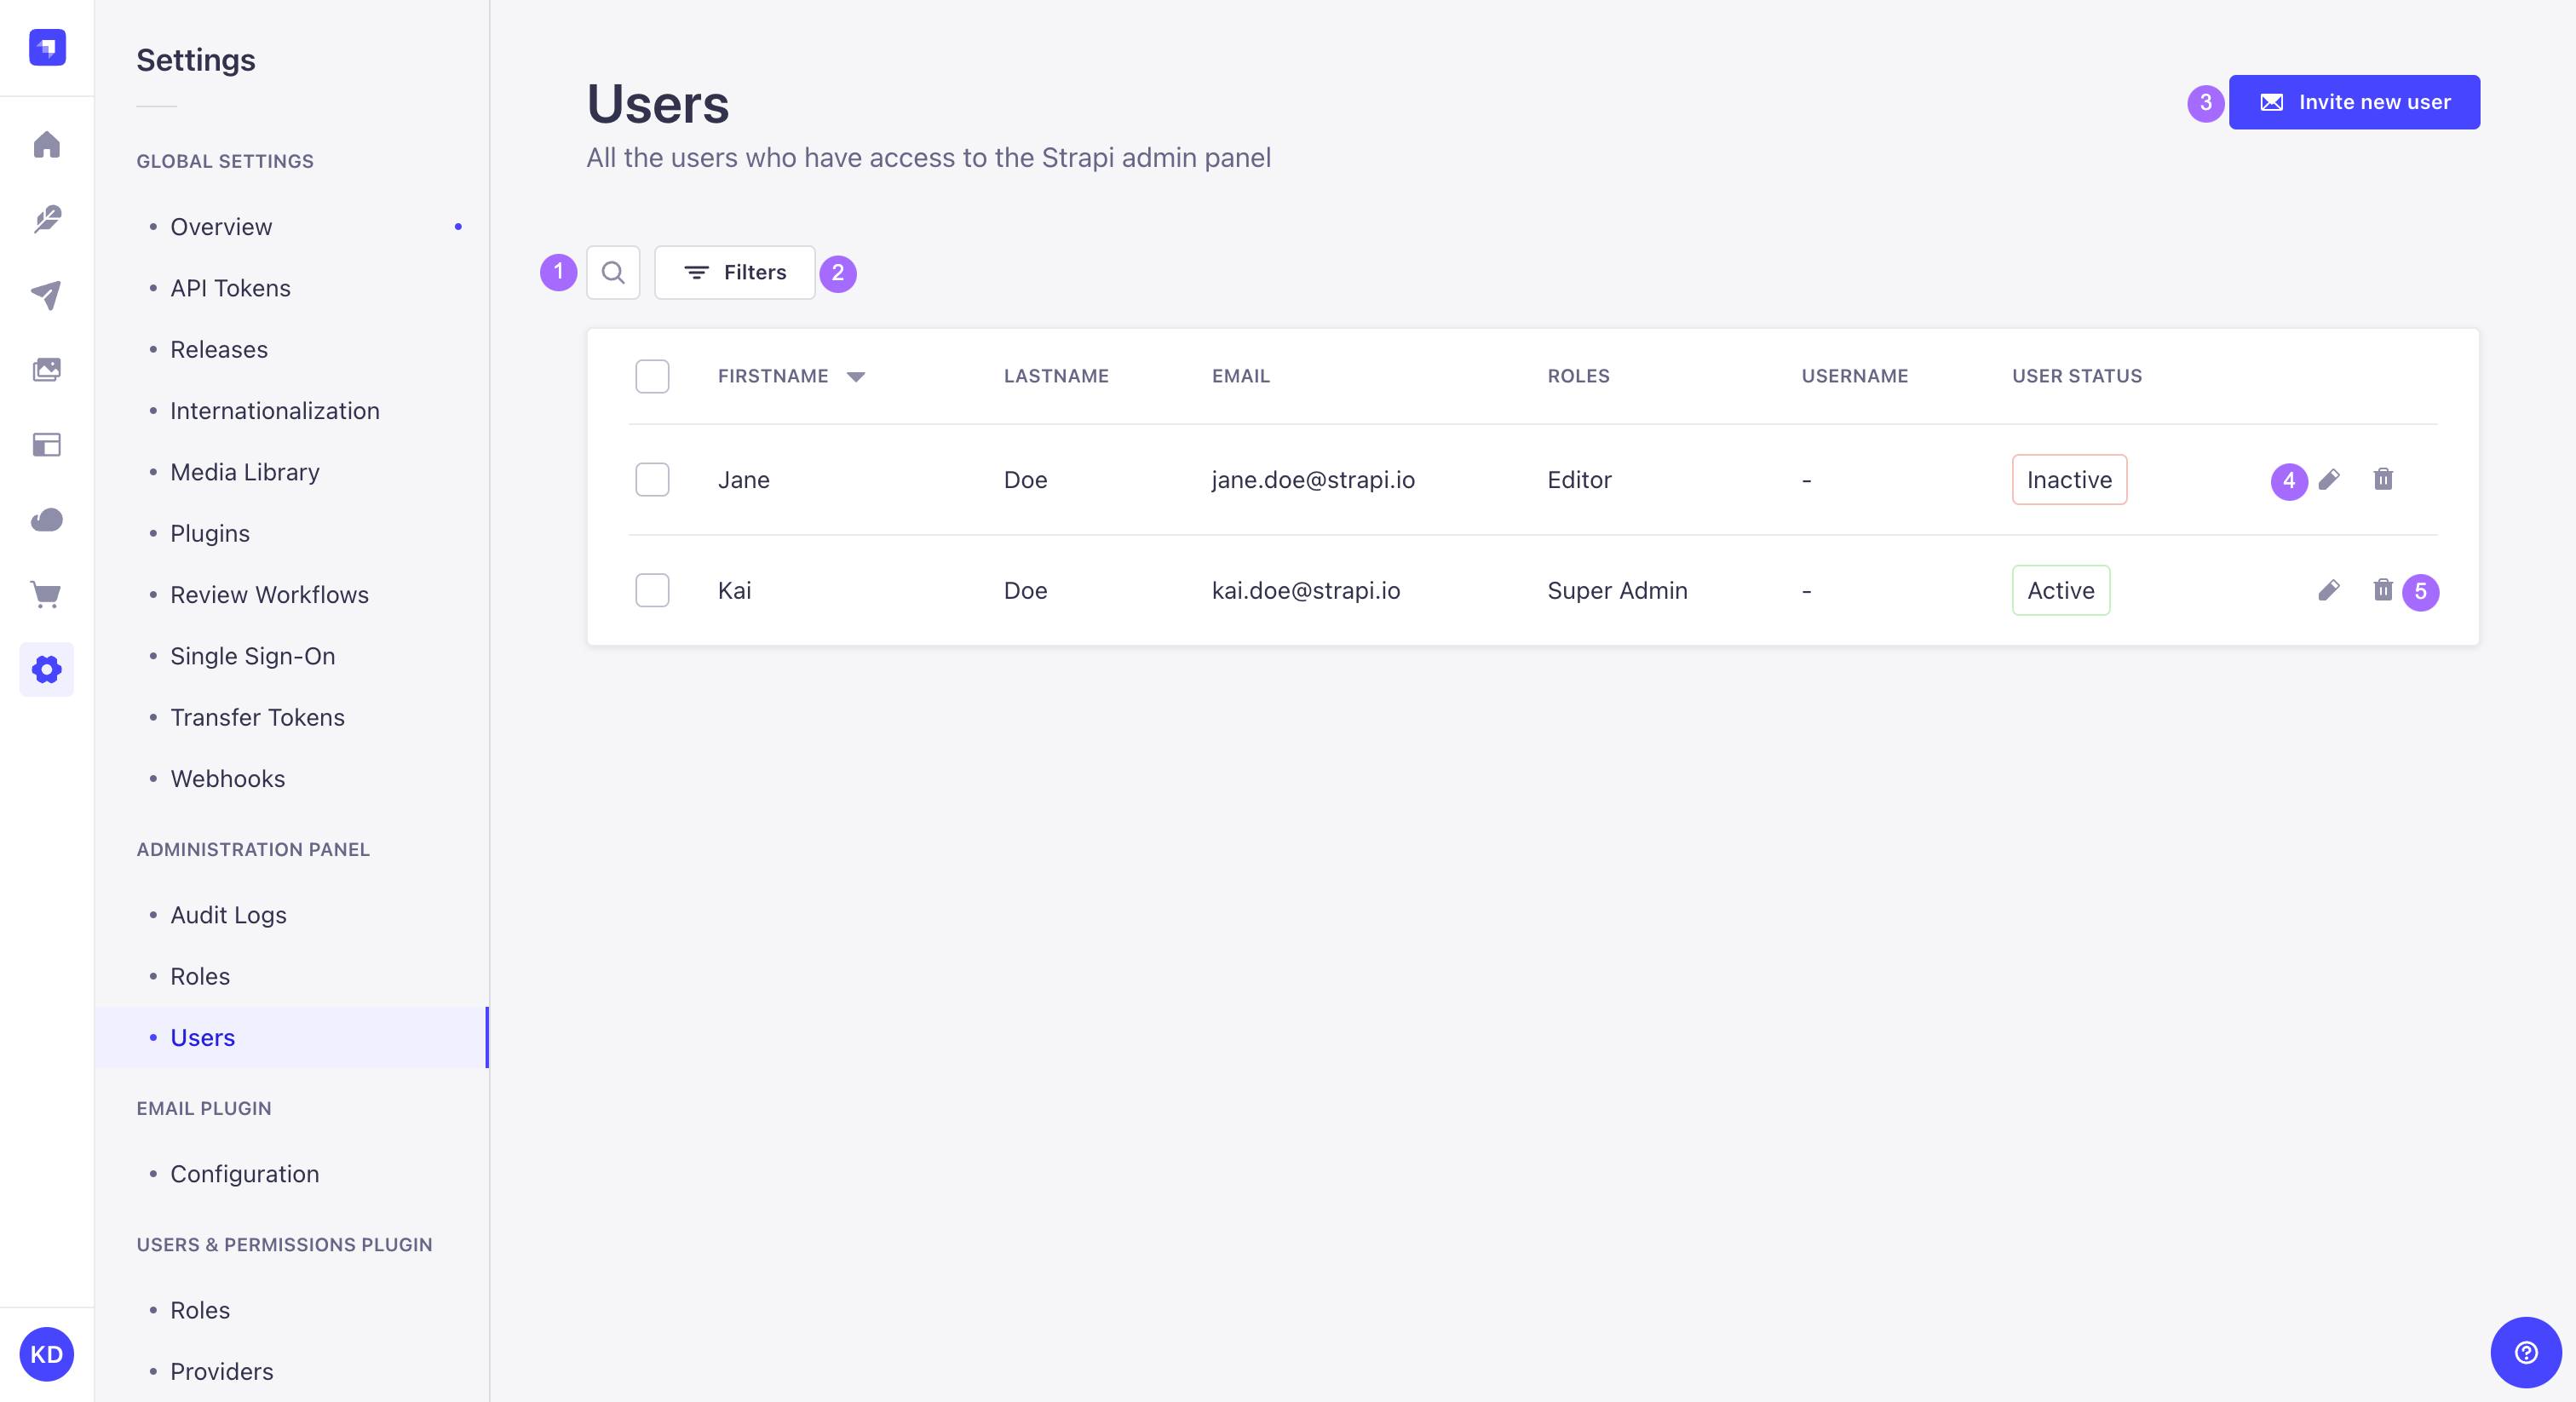
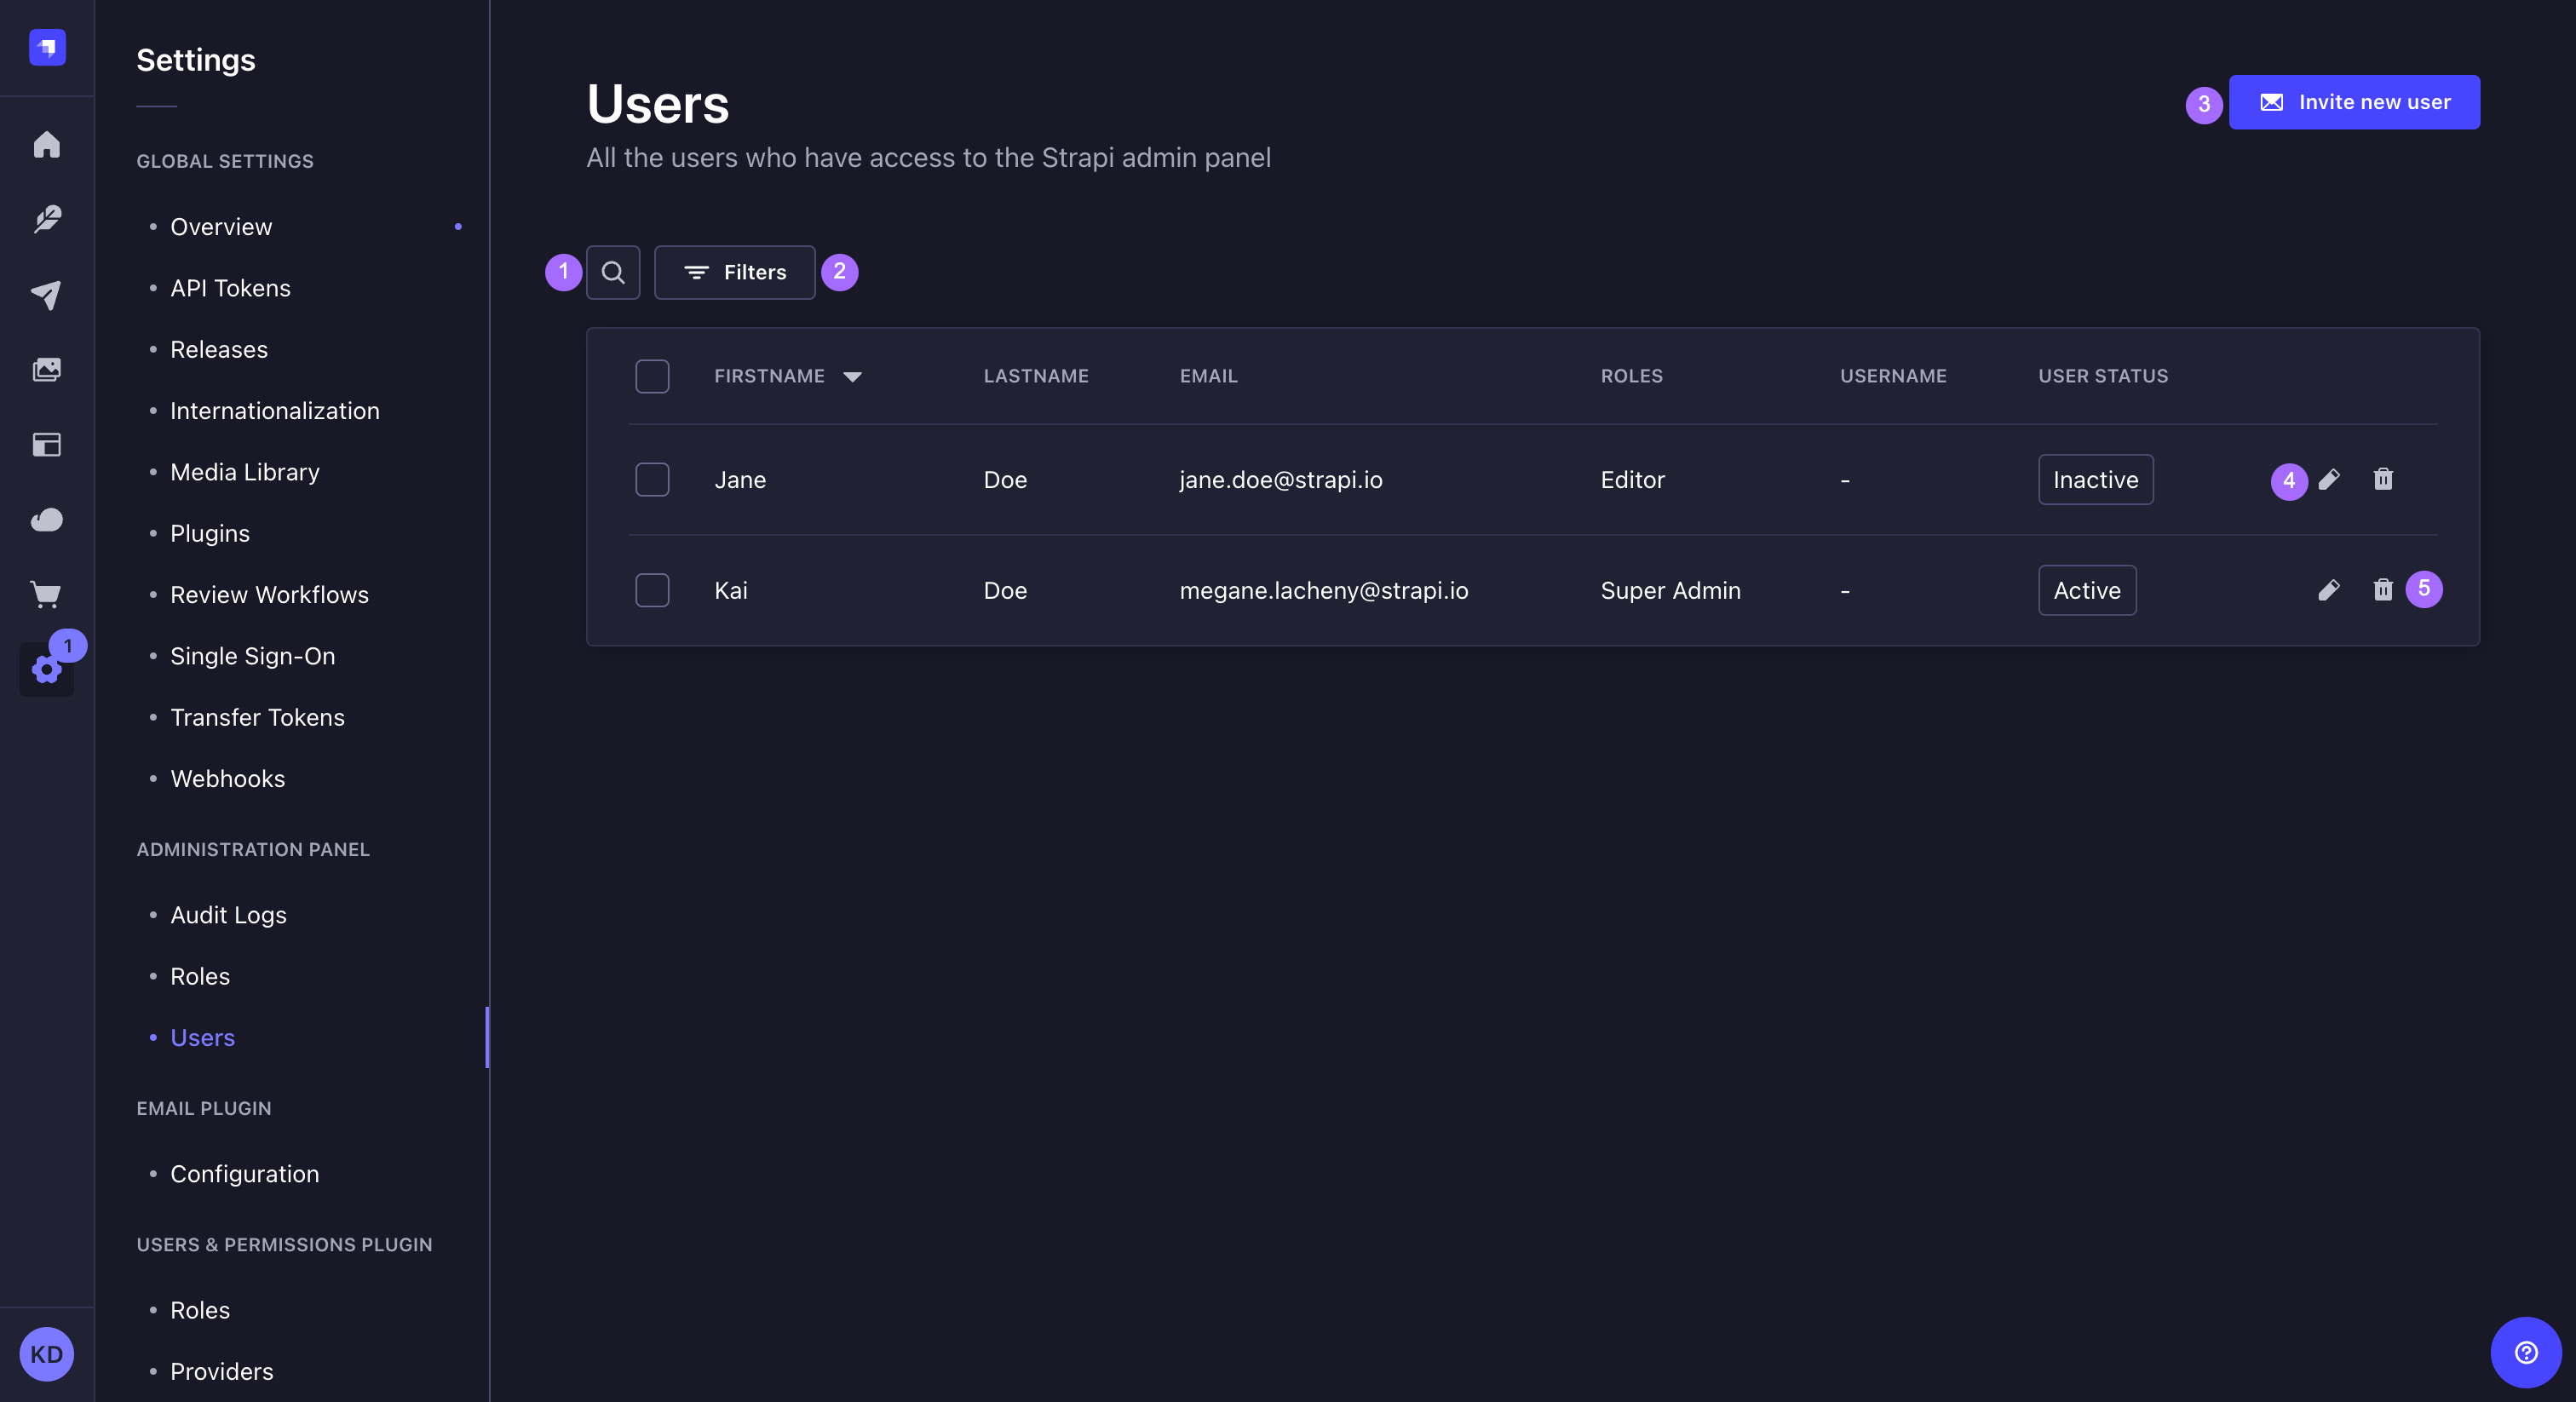
From this interface, it is possible to:
- make a textual search 1 to find specific administrators,
- set filters 2 to find specific administrators,
- create a new administrator account (see Creating a new account) 3,
- delete an administrator account 4 (see Deleting an account),
- or access information regarding an administrator account, and edit it 5 (see Editing an account).
Sorting can be enabled for most fields displayed in the table. Click on a field name, in the header of the table, to sort on that field.
Creating a new account
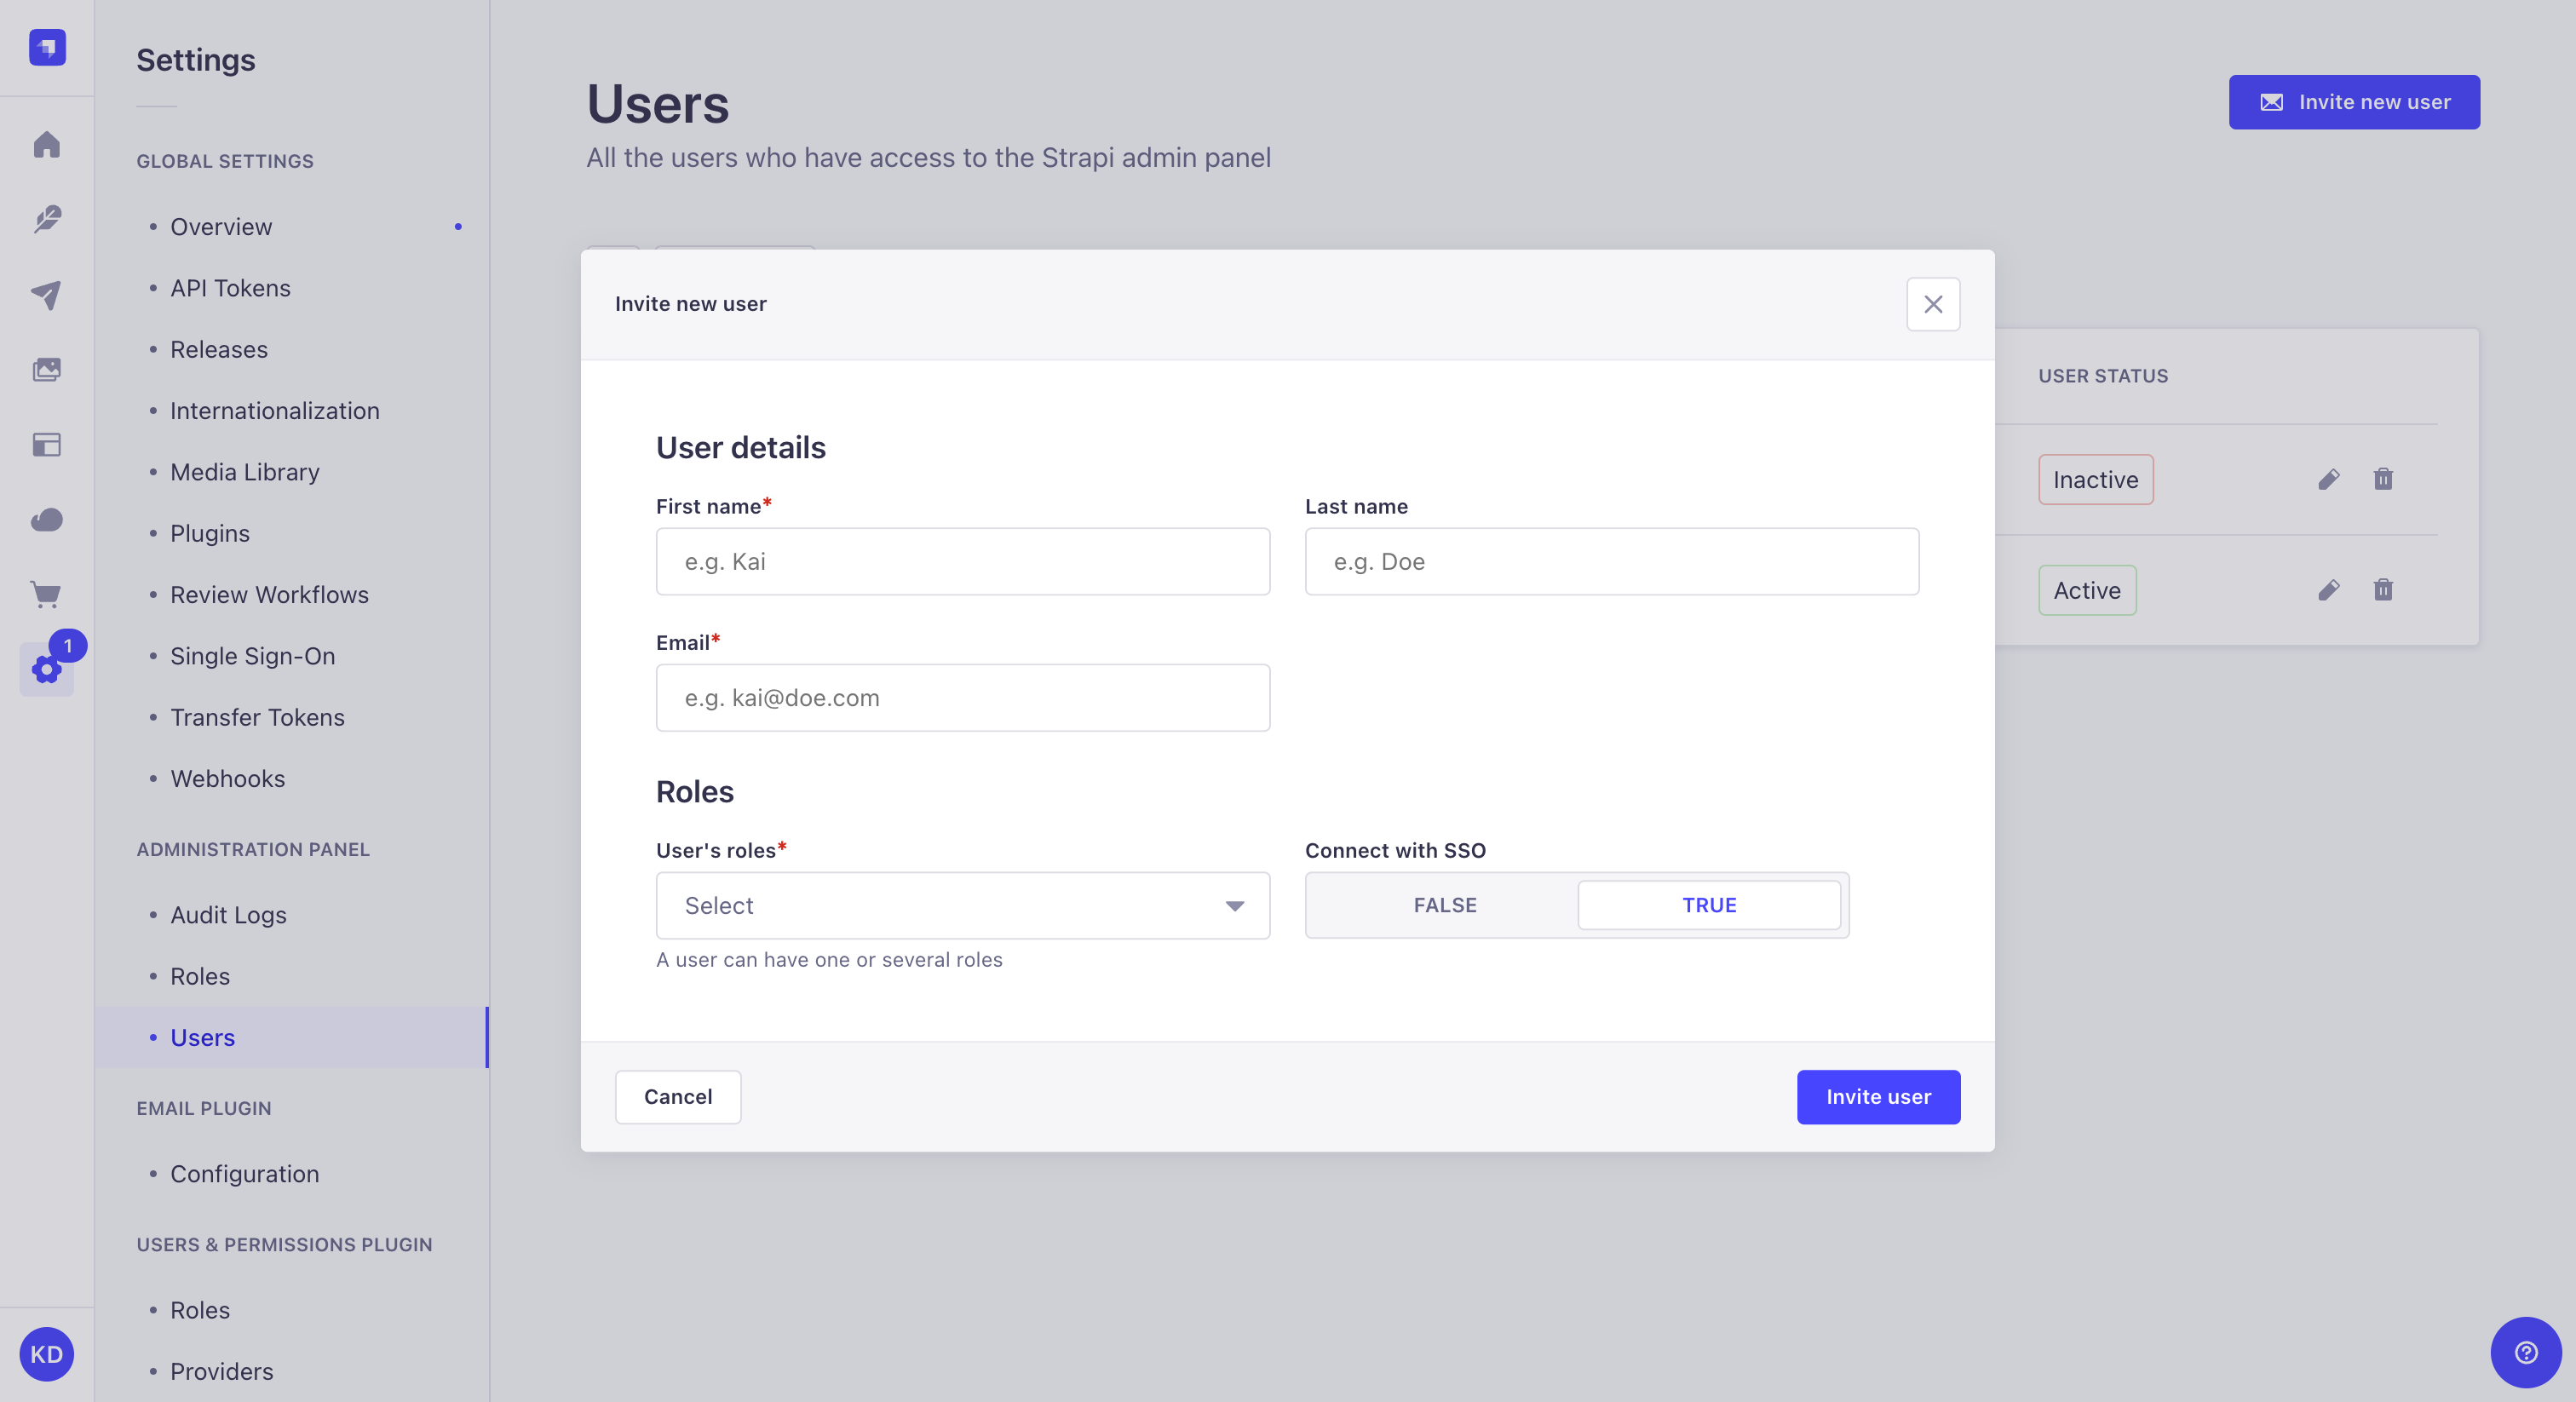
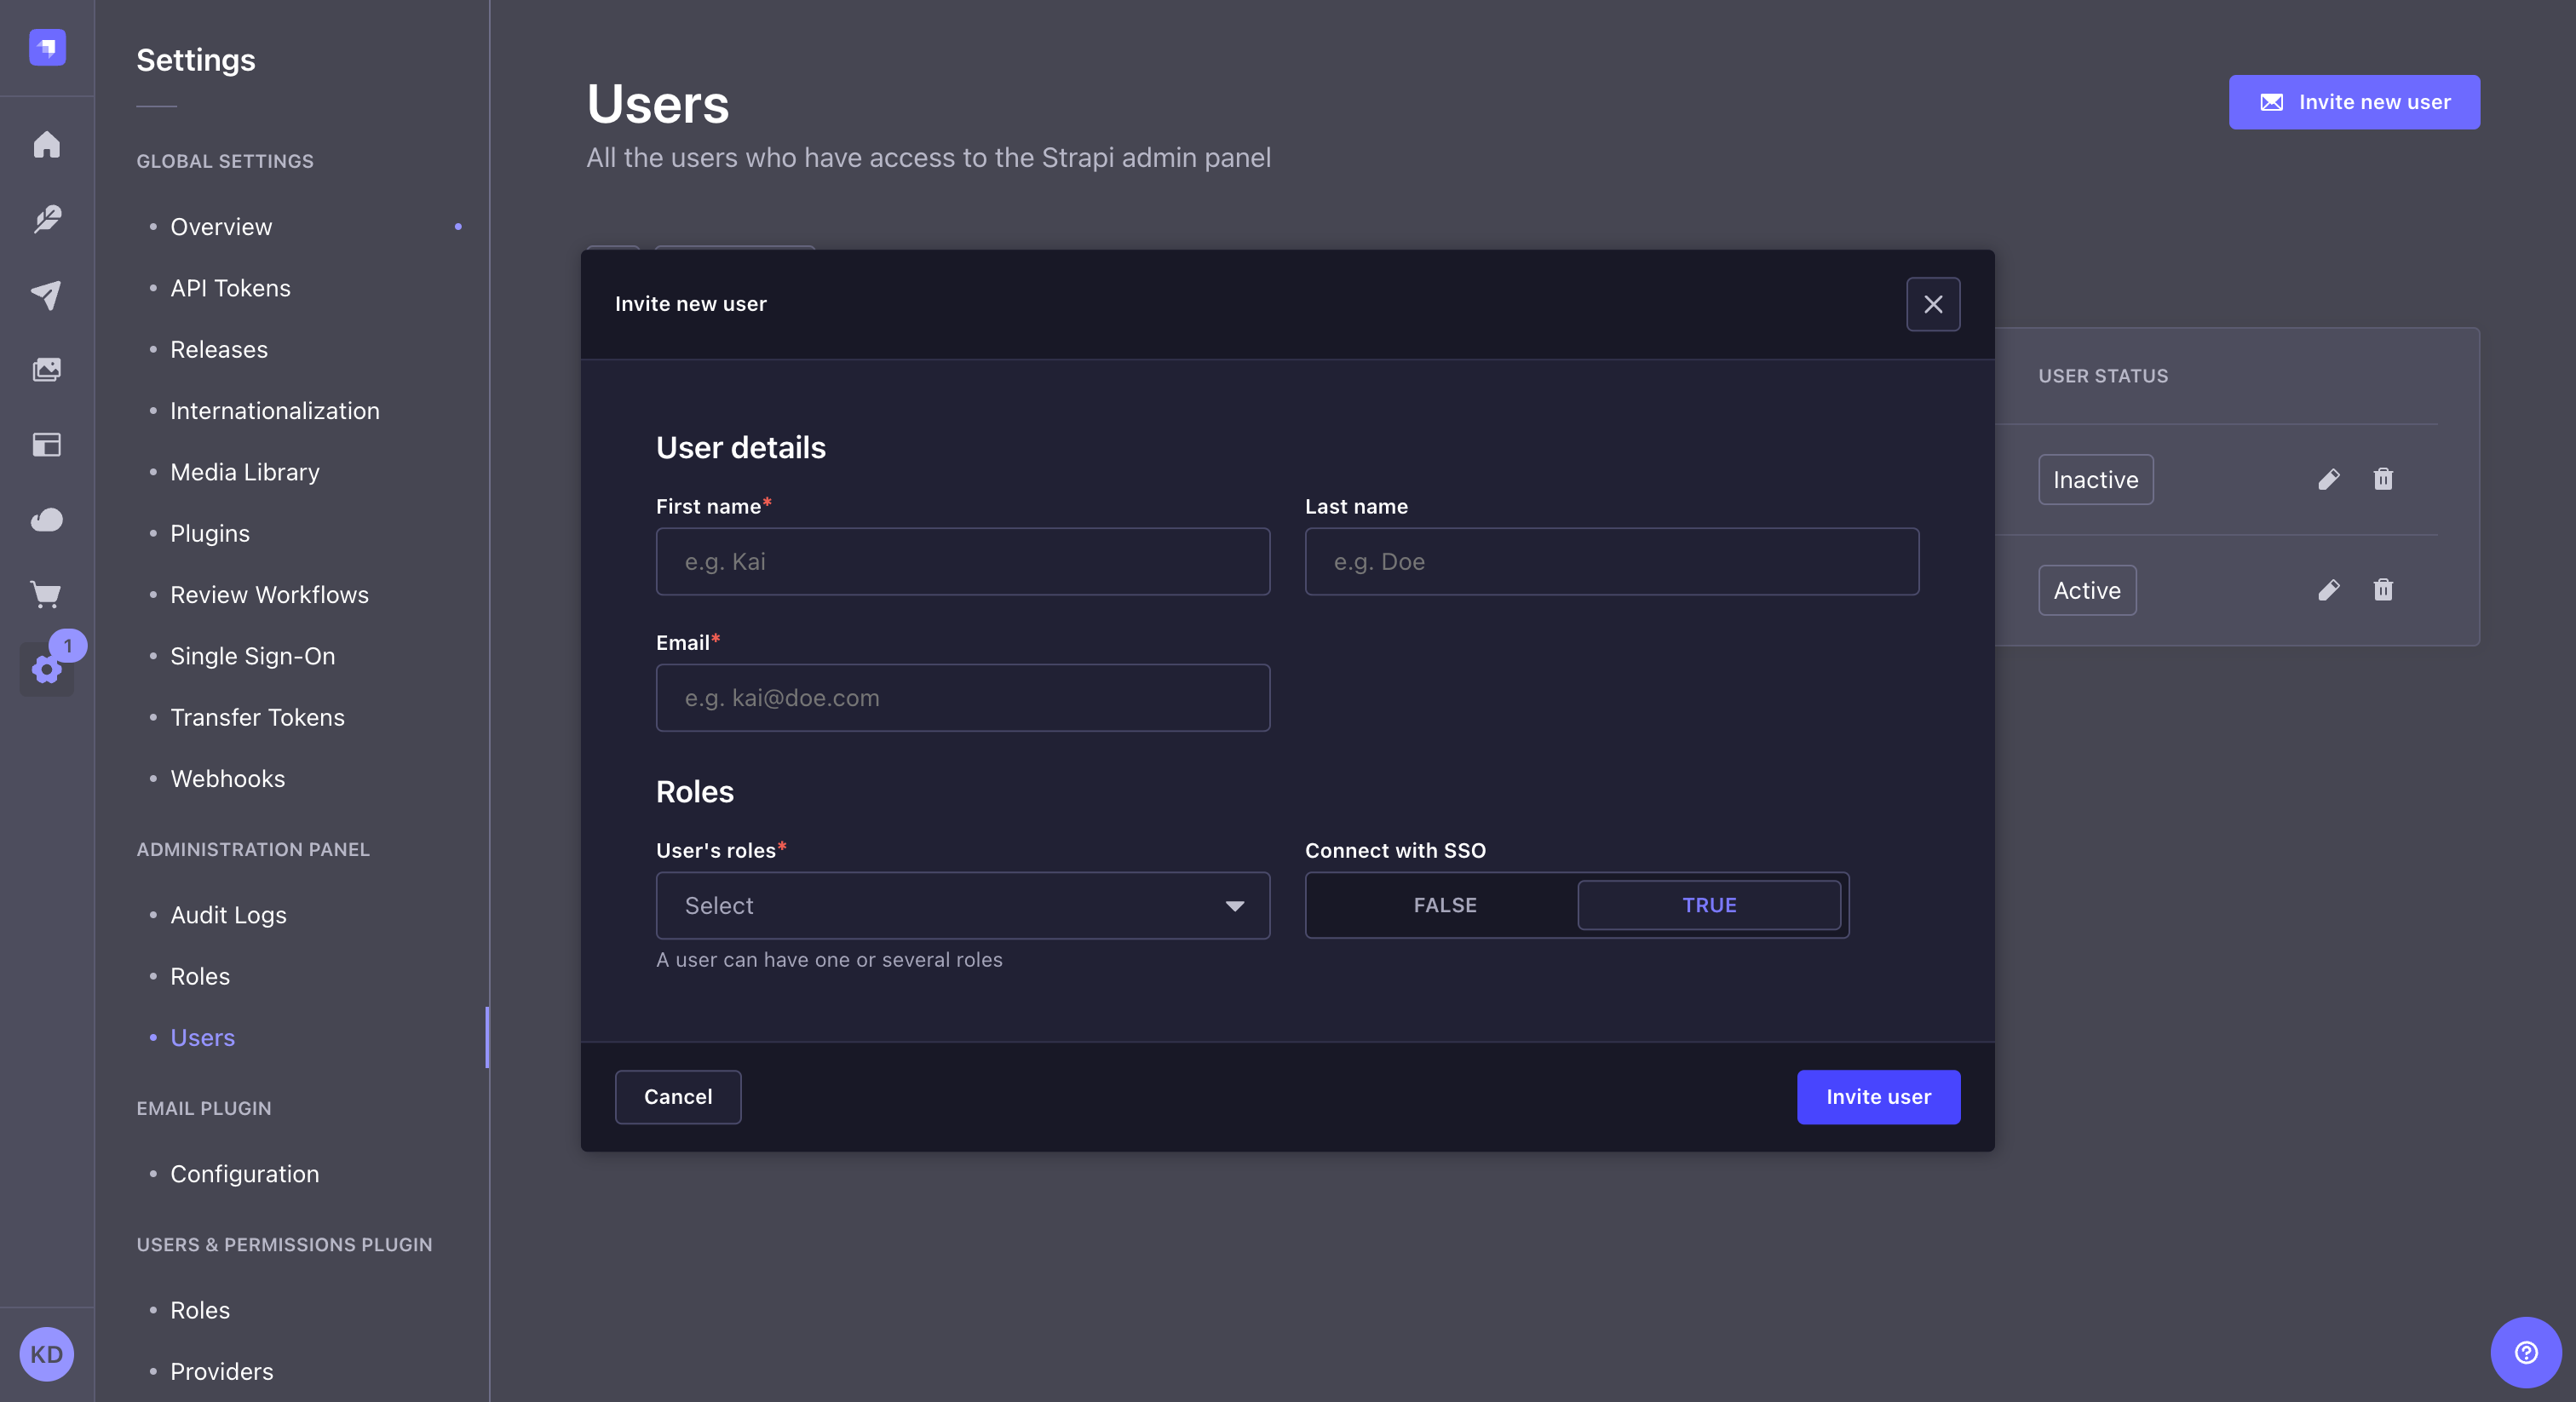
- Click on the Invite new user button.
- In the Invite new user window, fill in the Details information about the new administrator:
| User information | Instructions |
|---|---|
| First name | (mandatory) Write the administrator's first name in the textbox. |
| Last name | (mandatory) Write the administrator's last name in the textbox. |
| (mandatory) Write the administrator's complete email address in the textbox. |
- Fill in the Login settings about the new administrator:
| Setting | Instructions |
|---|---|
| User's roles | (mandatory) Choose from the drop-down list the role to attribute to the new administrator. |
| Connect with SSO | (optional) Click TRUE or FALSE to connect the new administrator account with SSO. |
- Click on the Invite user button in the bottom right corner of the Add new user window.
- A URL appears at the top of the window: it is the URL to send the new administrator for them to log in for the first time to your Strapi application. Click the copy button to copy the URL.
- Click on the Finish button in the bottom right corner to finish the new administrator account creation. The new administrator should now be listed in the table.
The administrator invitation URL is accessible from the administrator's account until it has been activated.
Deleting an account
It is possible to delete one or several administrator accounts at the same time.
- Click on the delete button on the right side of the account's record, or select one or more accounts by ticking the boxes on the left side of the accounts' records then click on the Delete button above the table.
- In the deletion window, click on the Confirm button to confirm the deletion.
Editing an account
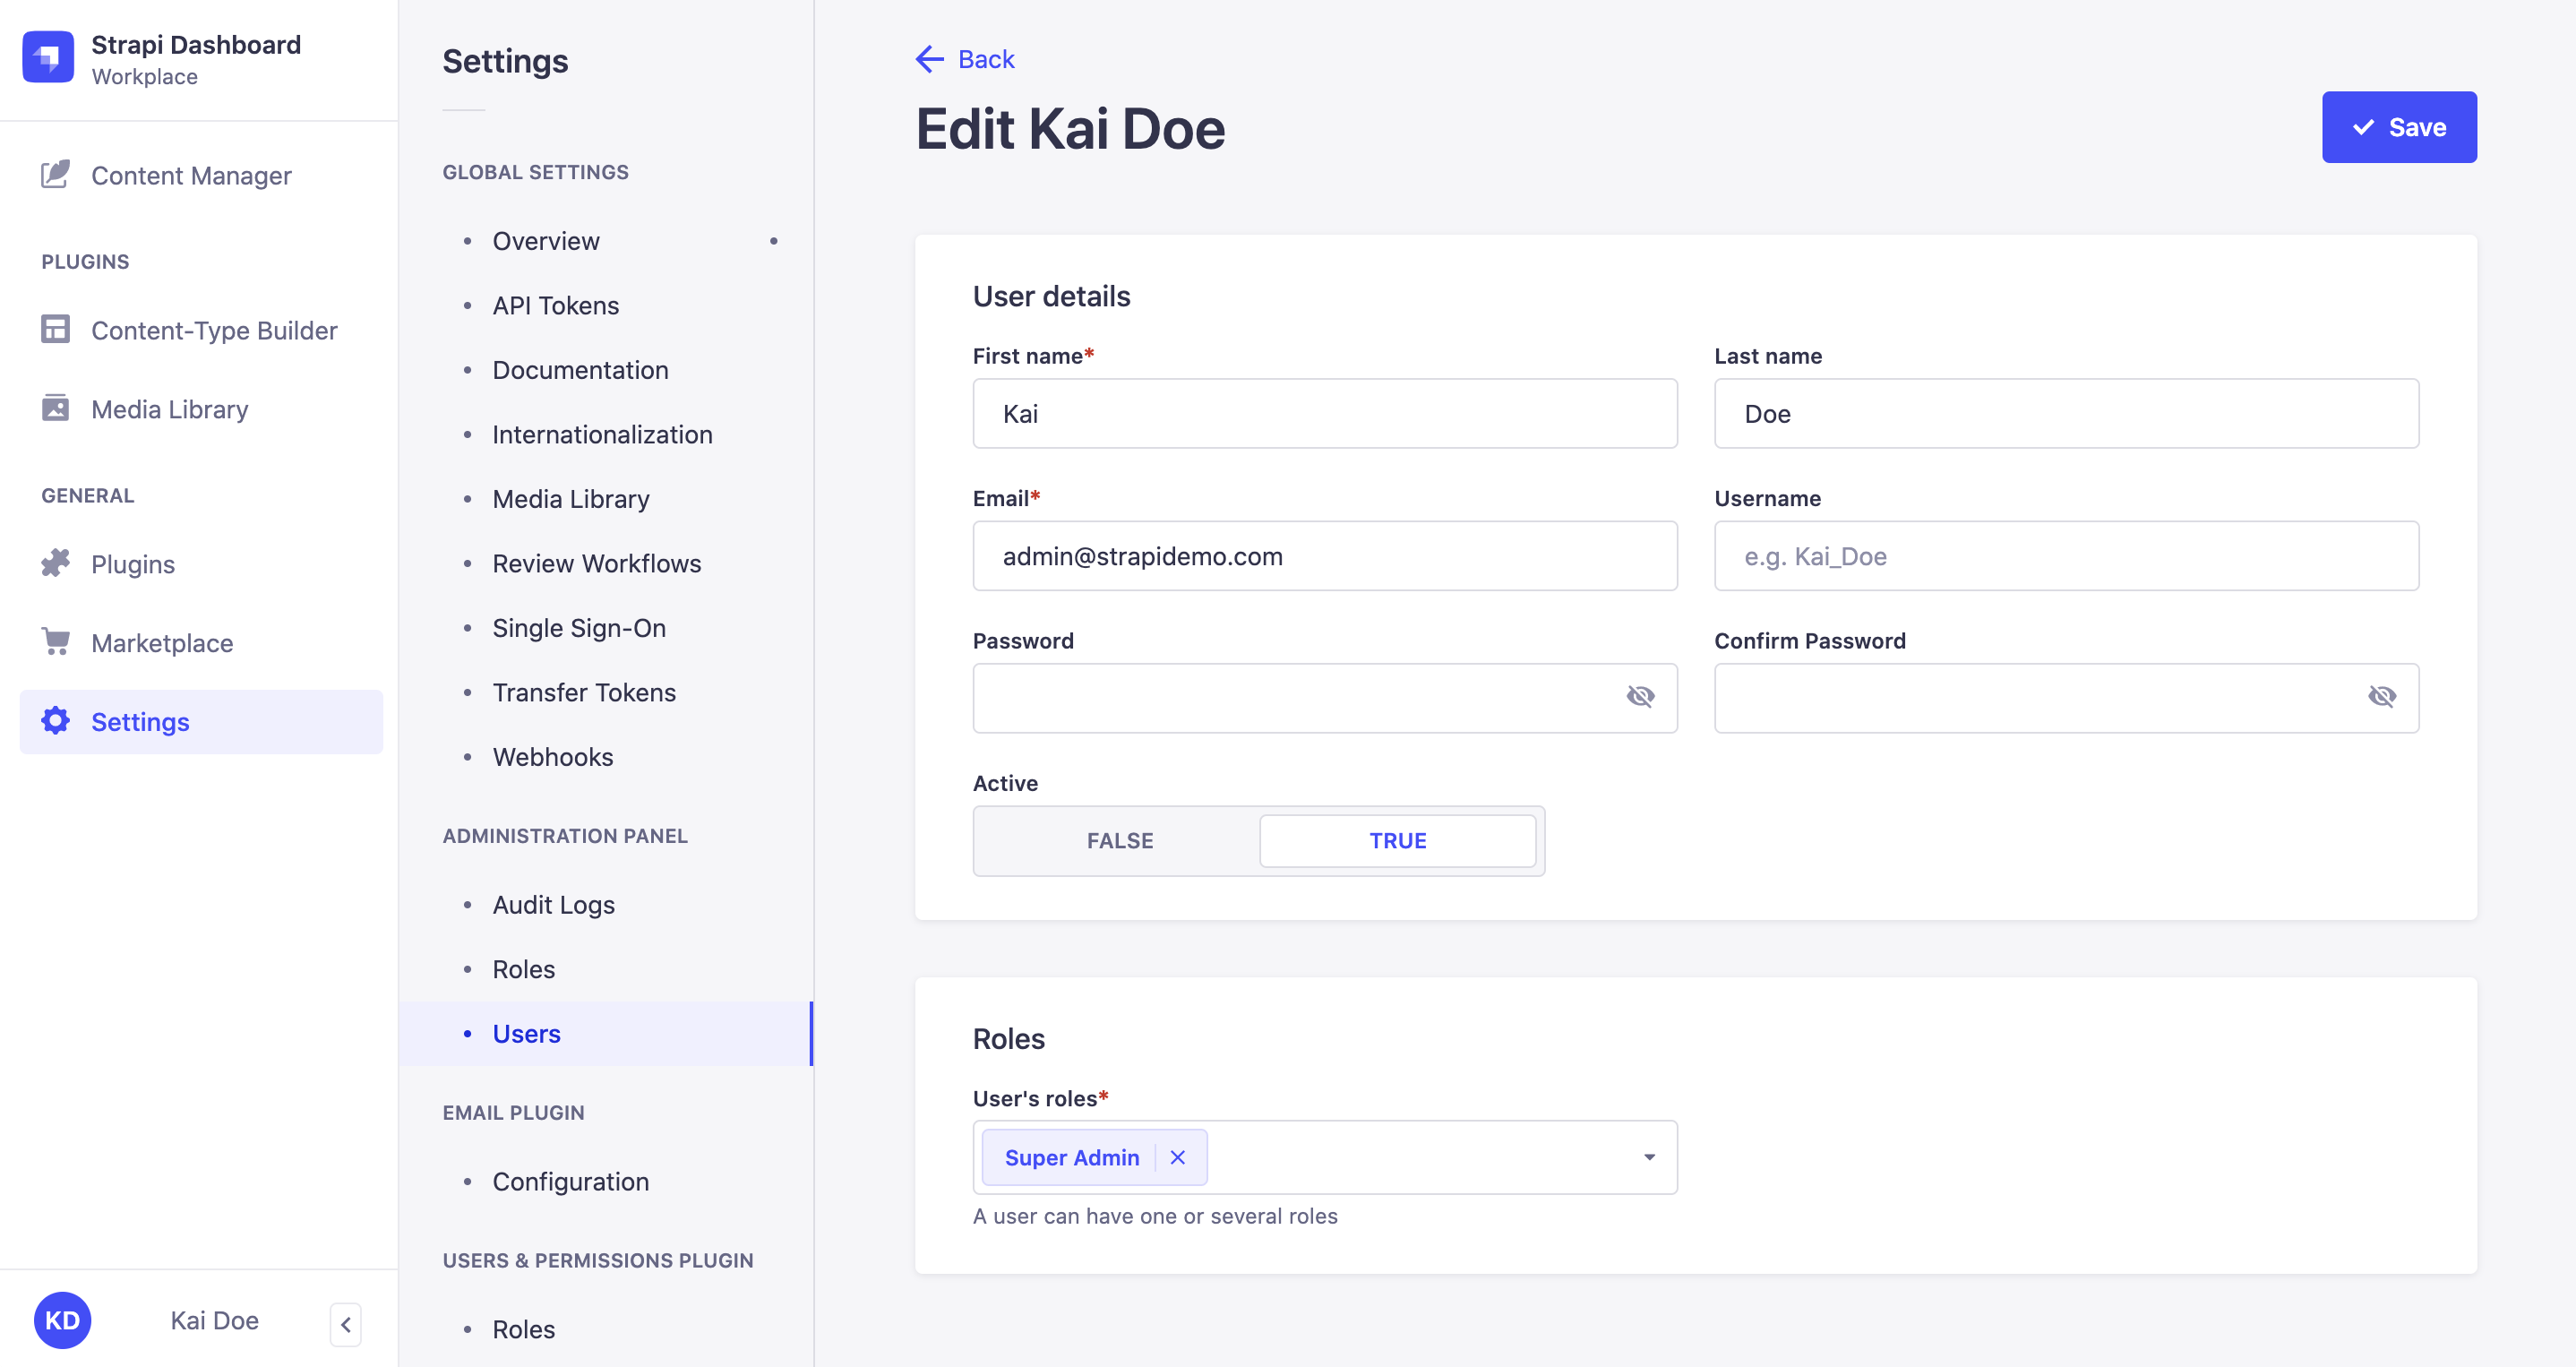
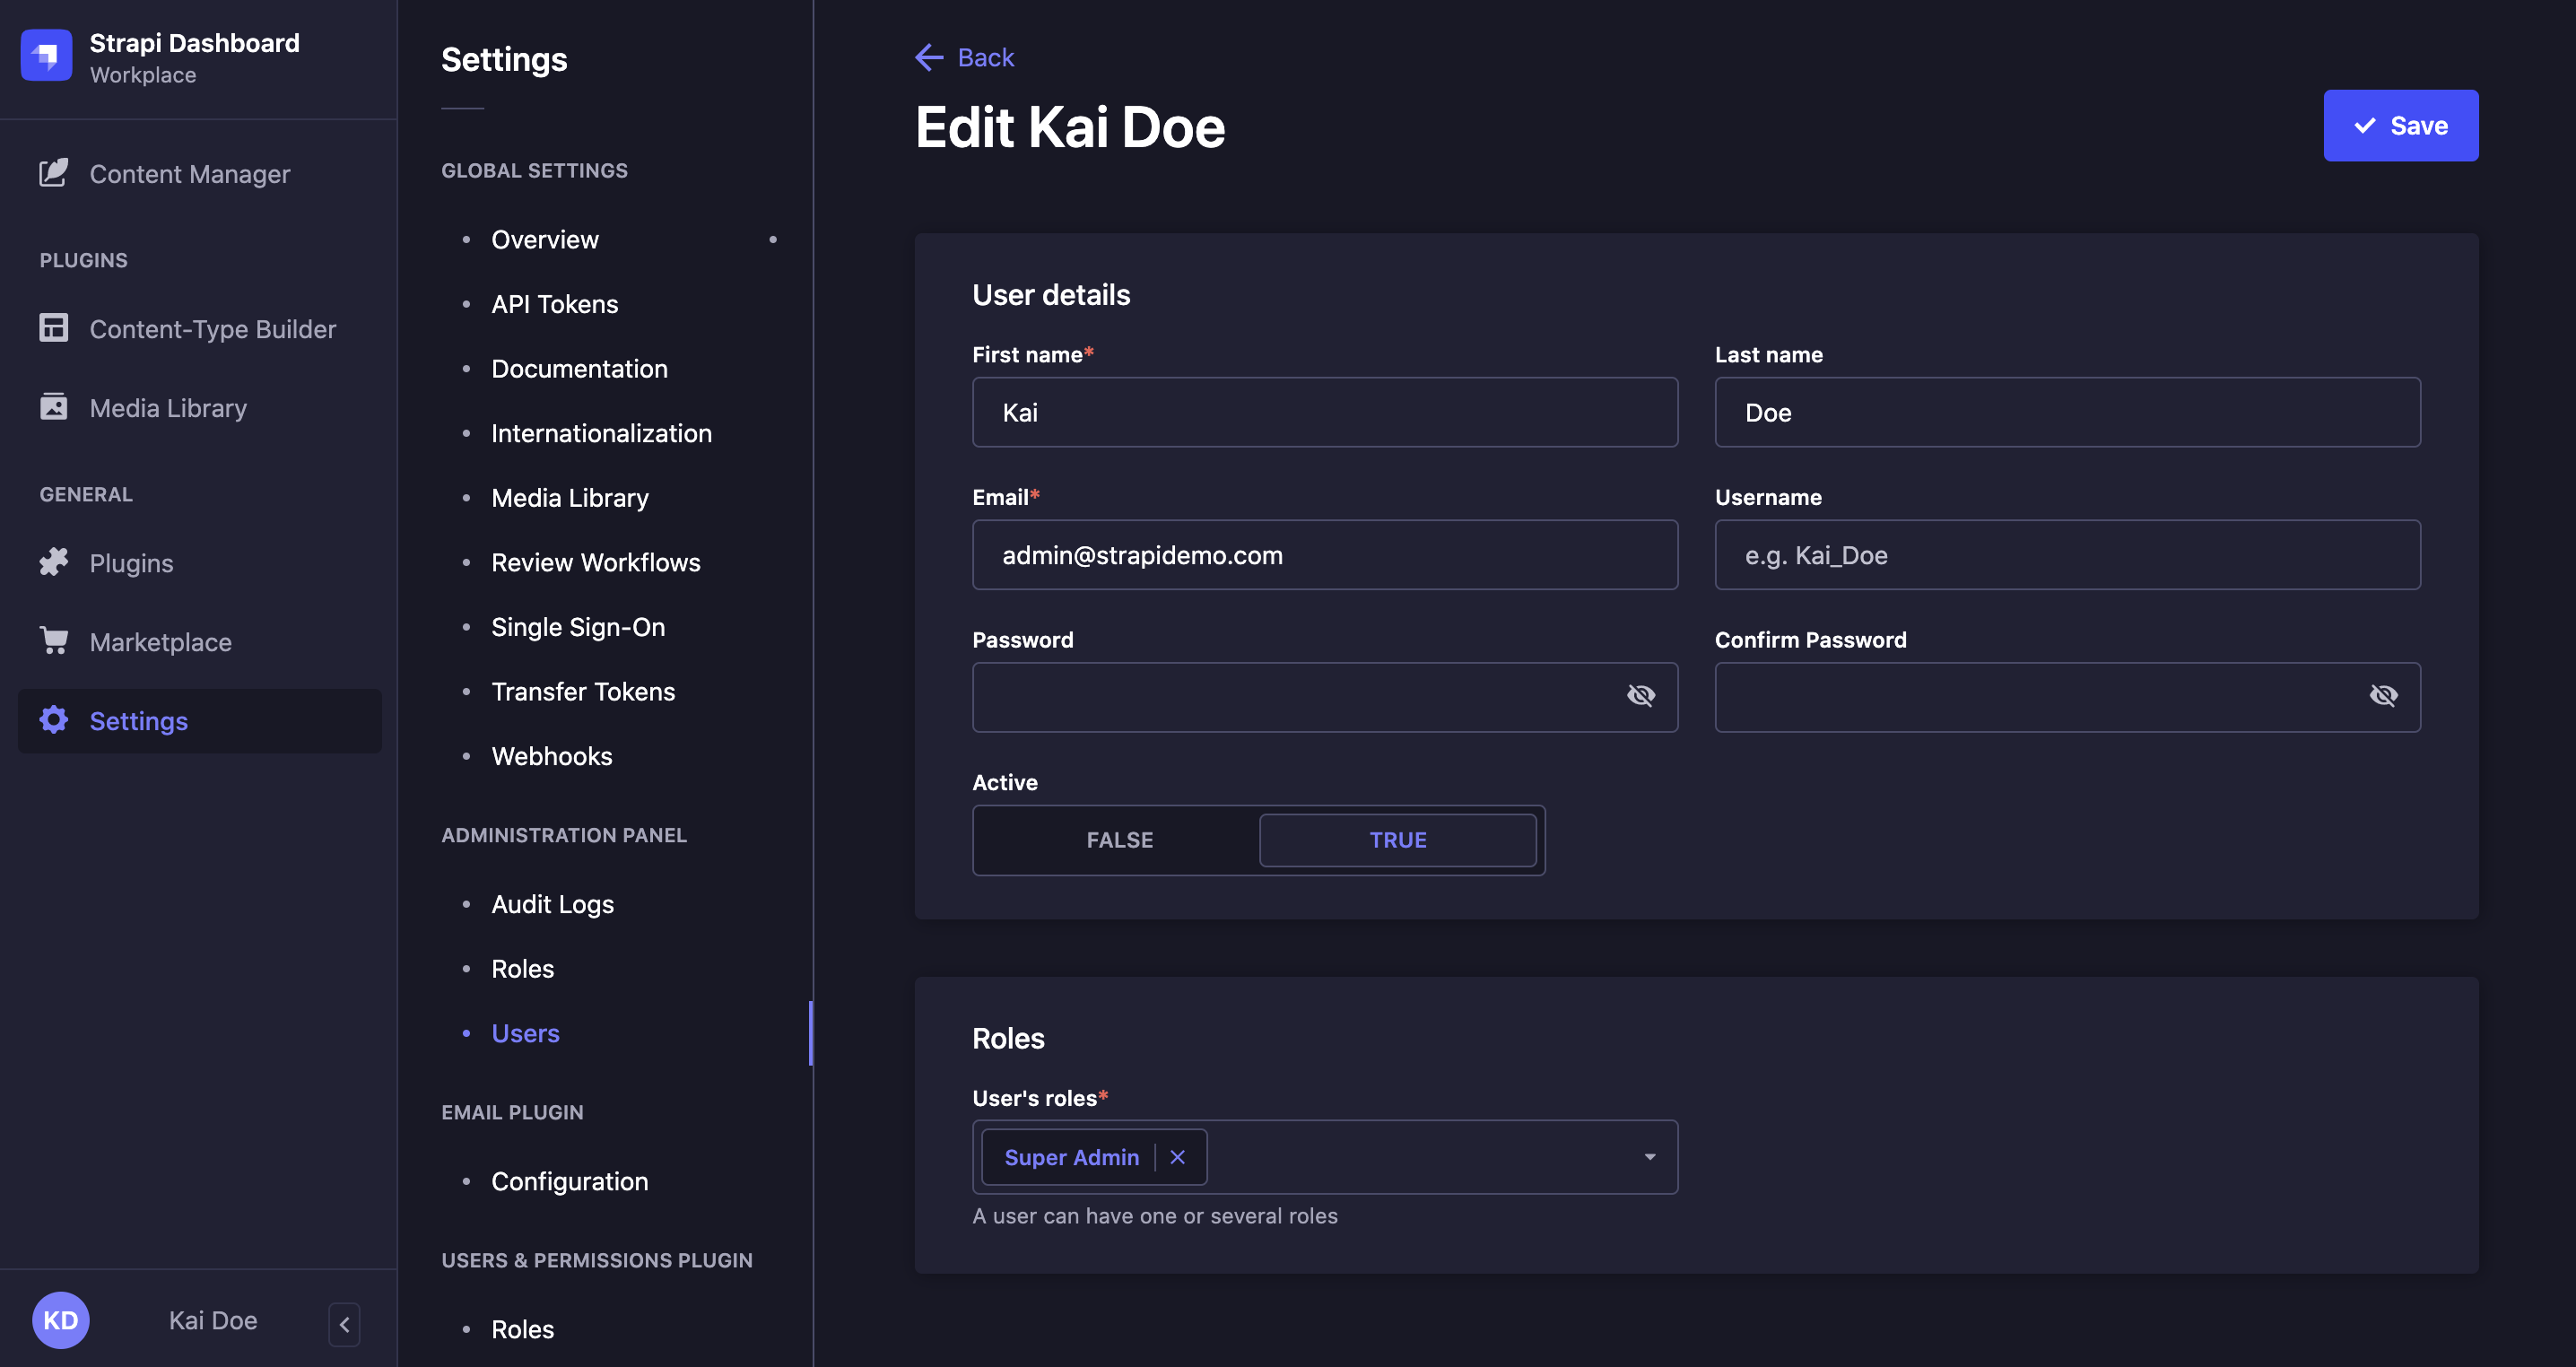
- Click on the name of the administrator whose account you want to edit.
- In the Details area, edit your chosen account details:
| User information | Instructions |
|---|---|
| First name | Write the administrator's first name in the textbox. |
| Last name | Write the administrator's last name in the textbox. |
| Write the administrator's complete email address in the textbox. | |
| Username | Write the administrator's username in the textbox. |
| Password | Write the new administrator account's password in the textbox. |
| Confirm password | Write the new password in the textbox for confirmation. |
| Active | Click on TRUE to activate the administrator's account. |
- (optional) In the Roles area, edit the role of the administrator:
- Click on the drop-down list to choose a new role, and/or add it to the already attributed one.
- Click on the delete button to delete an already attributed role.
- Click on the Save button in the top right corner.