Users & Permissions
Page summary:Users & Permissions manages end-user accounts, JWT-based authentication, and role-based access to APIs. This documentation explains how to create roles, configure permissions, and secure access to your content API.
The Users & Permissions feature allows the management of the end-users of a Strapi project. It provides a full authentication process based on JSON Web Tokens (JWT) to protect your API, and an access-control list (ACL) strategy that enables you to manage permissions between groups of users.
Admin panel configuration
The Users & Permissions feature is configured from both the admin panel settings, and via the code base.
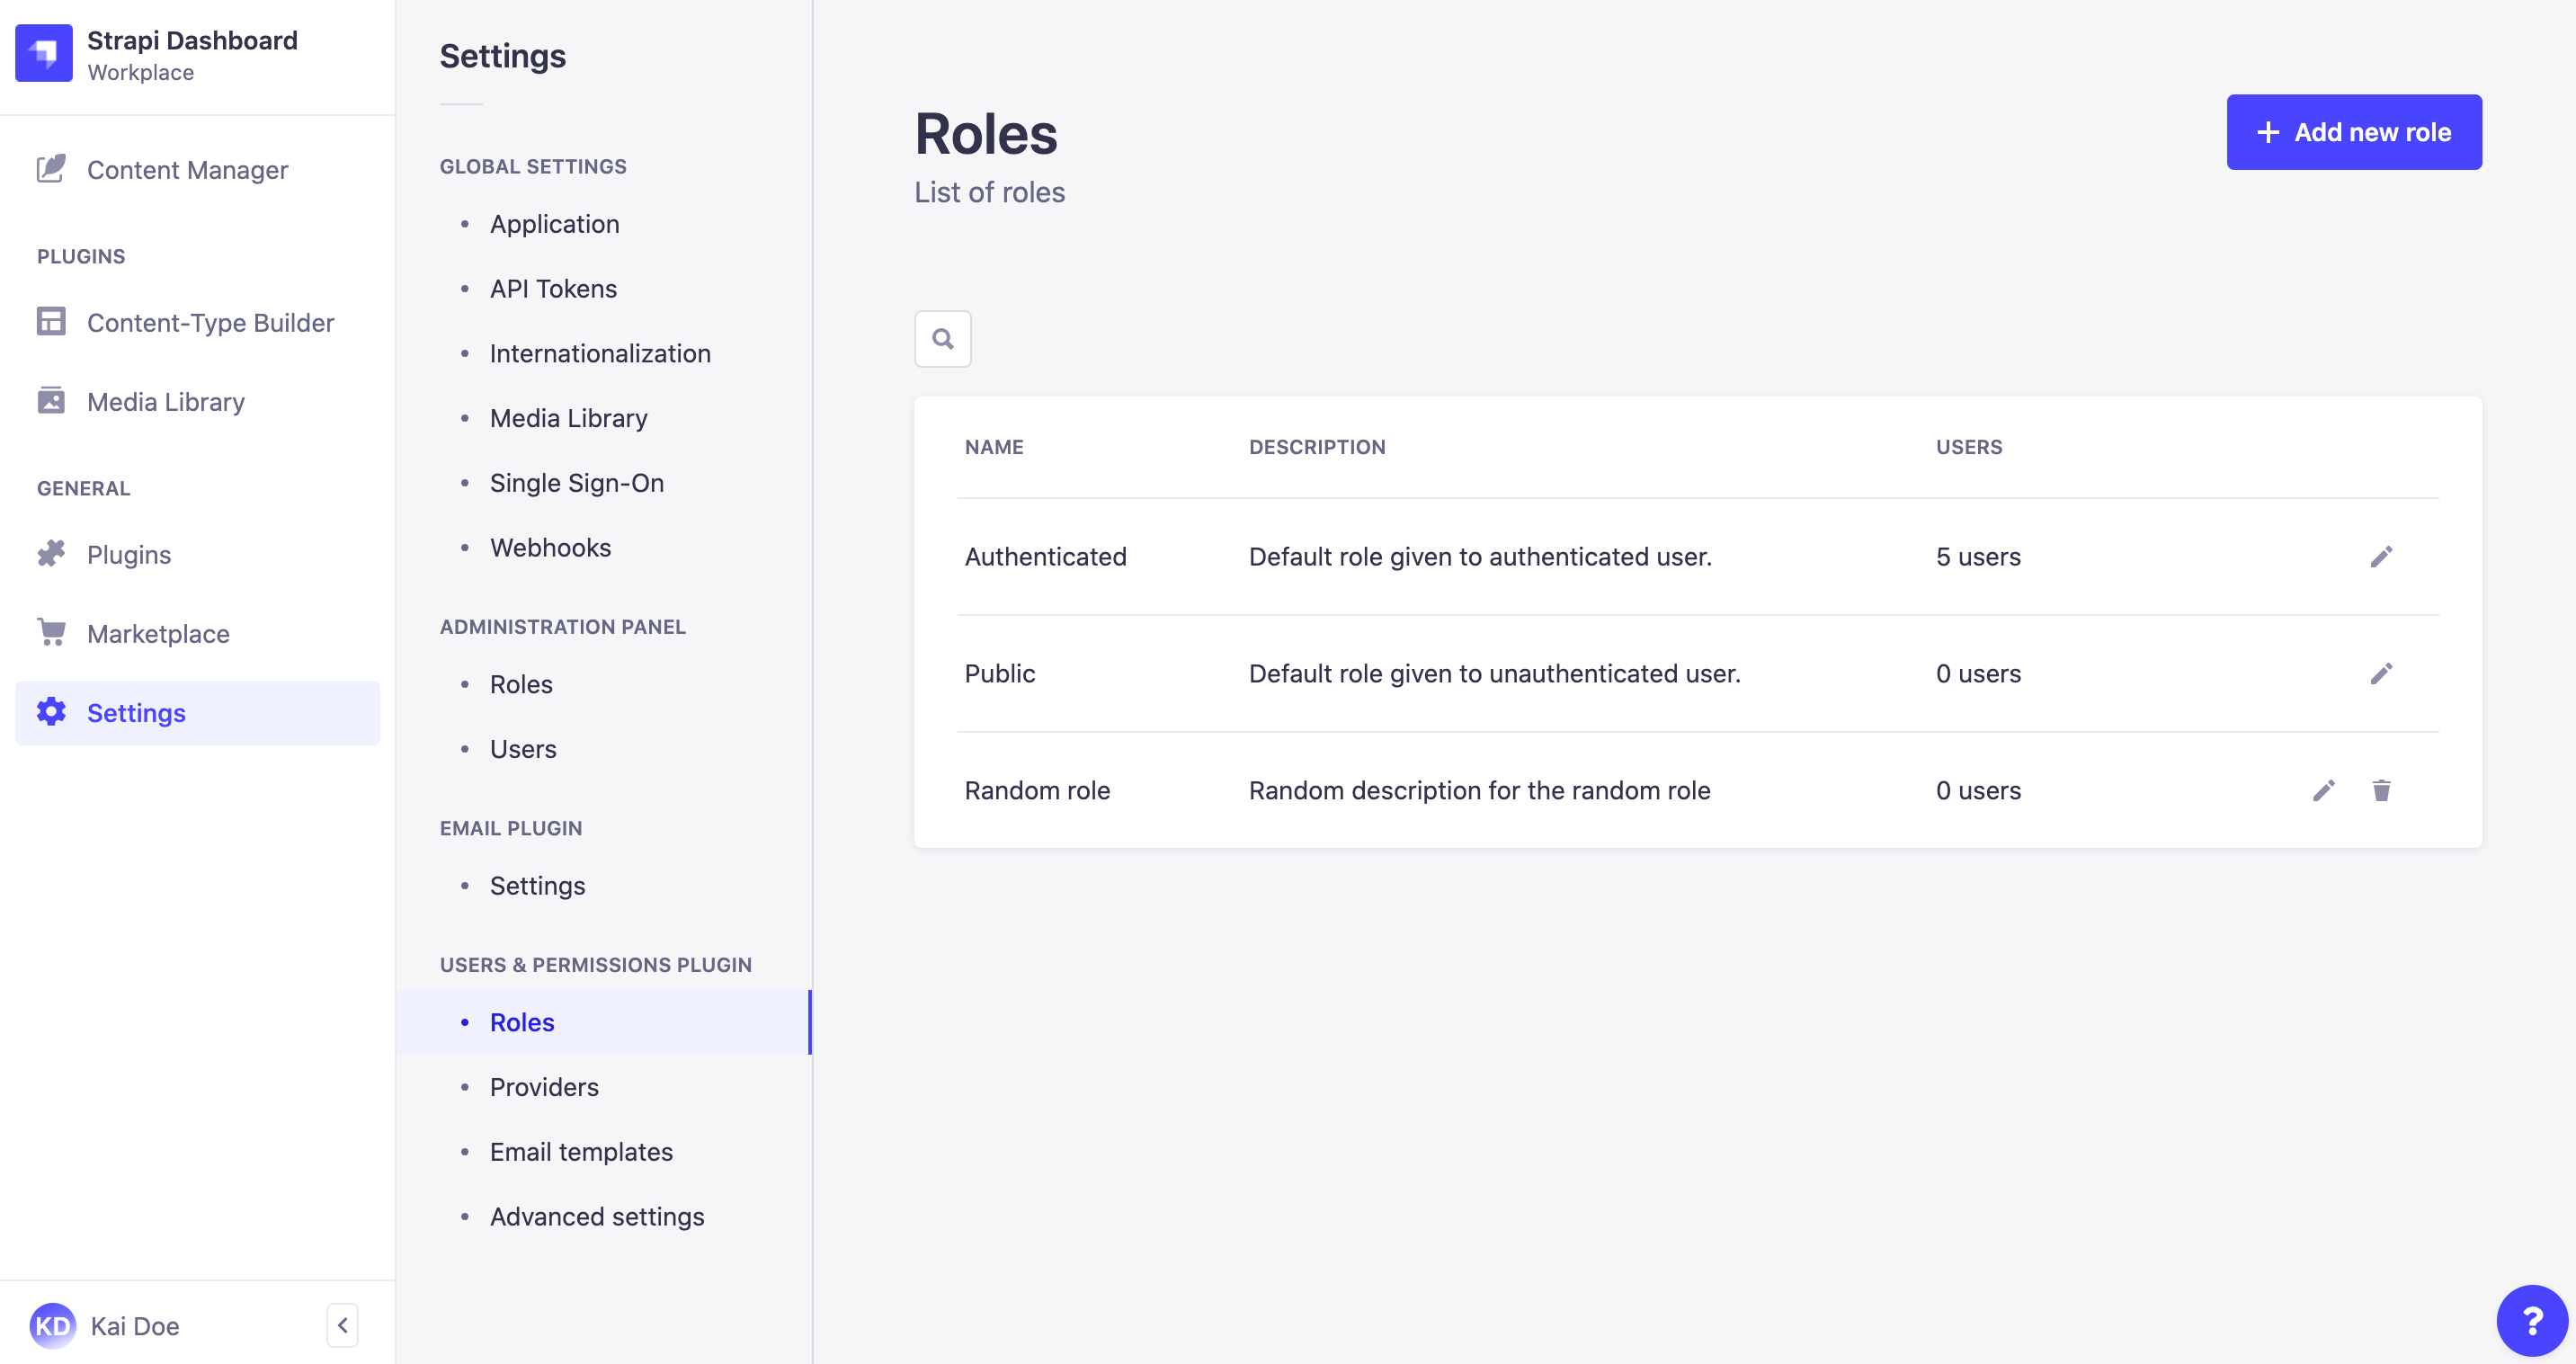
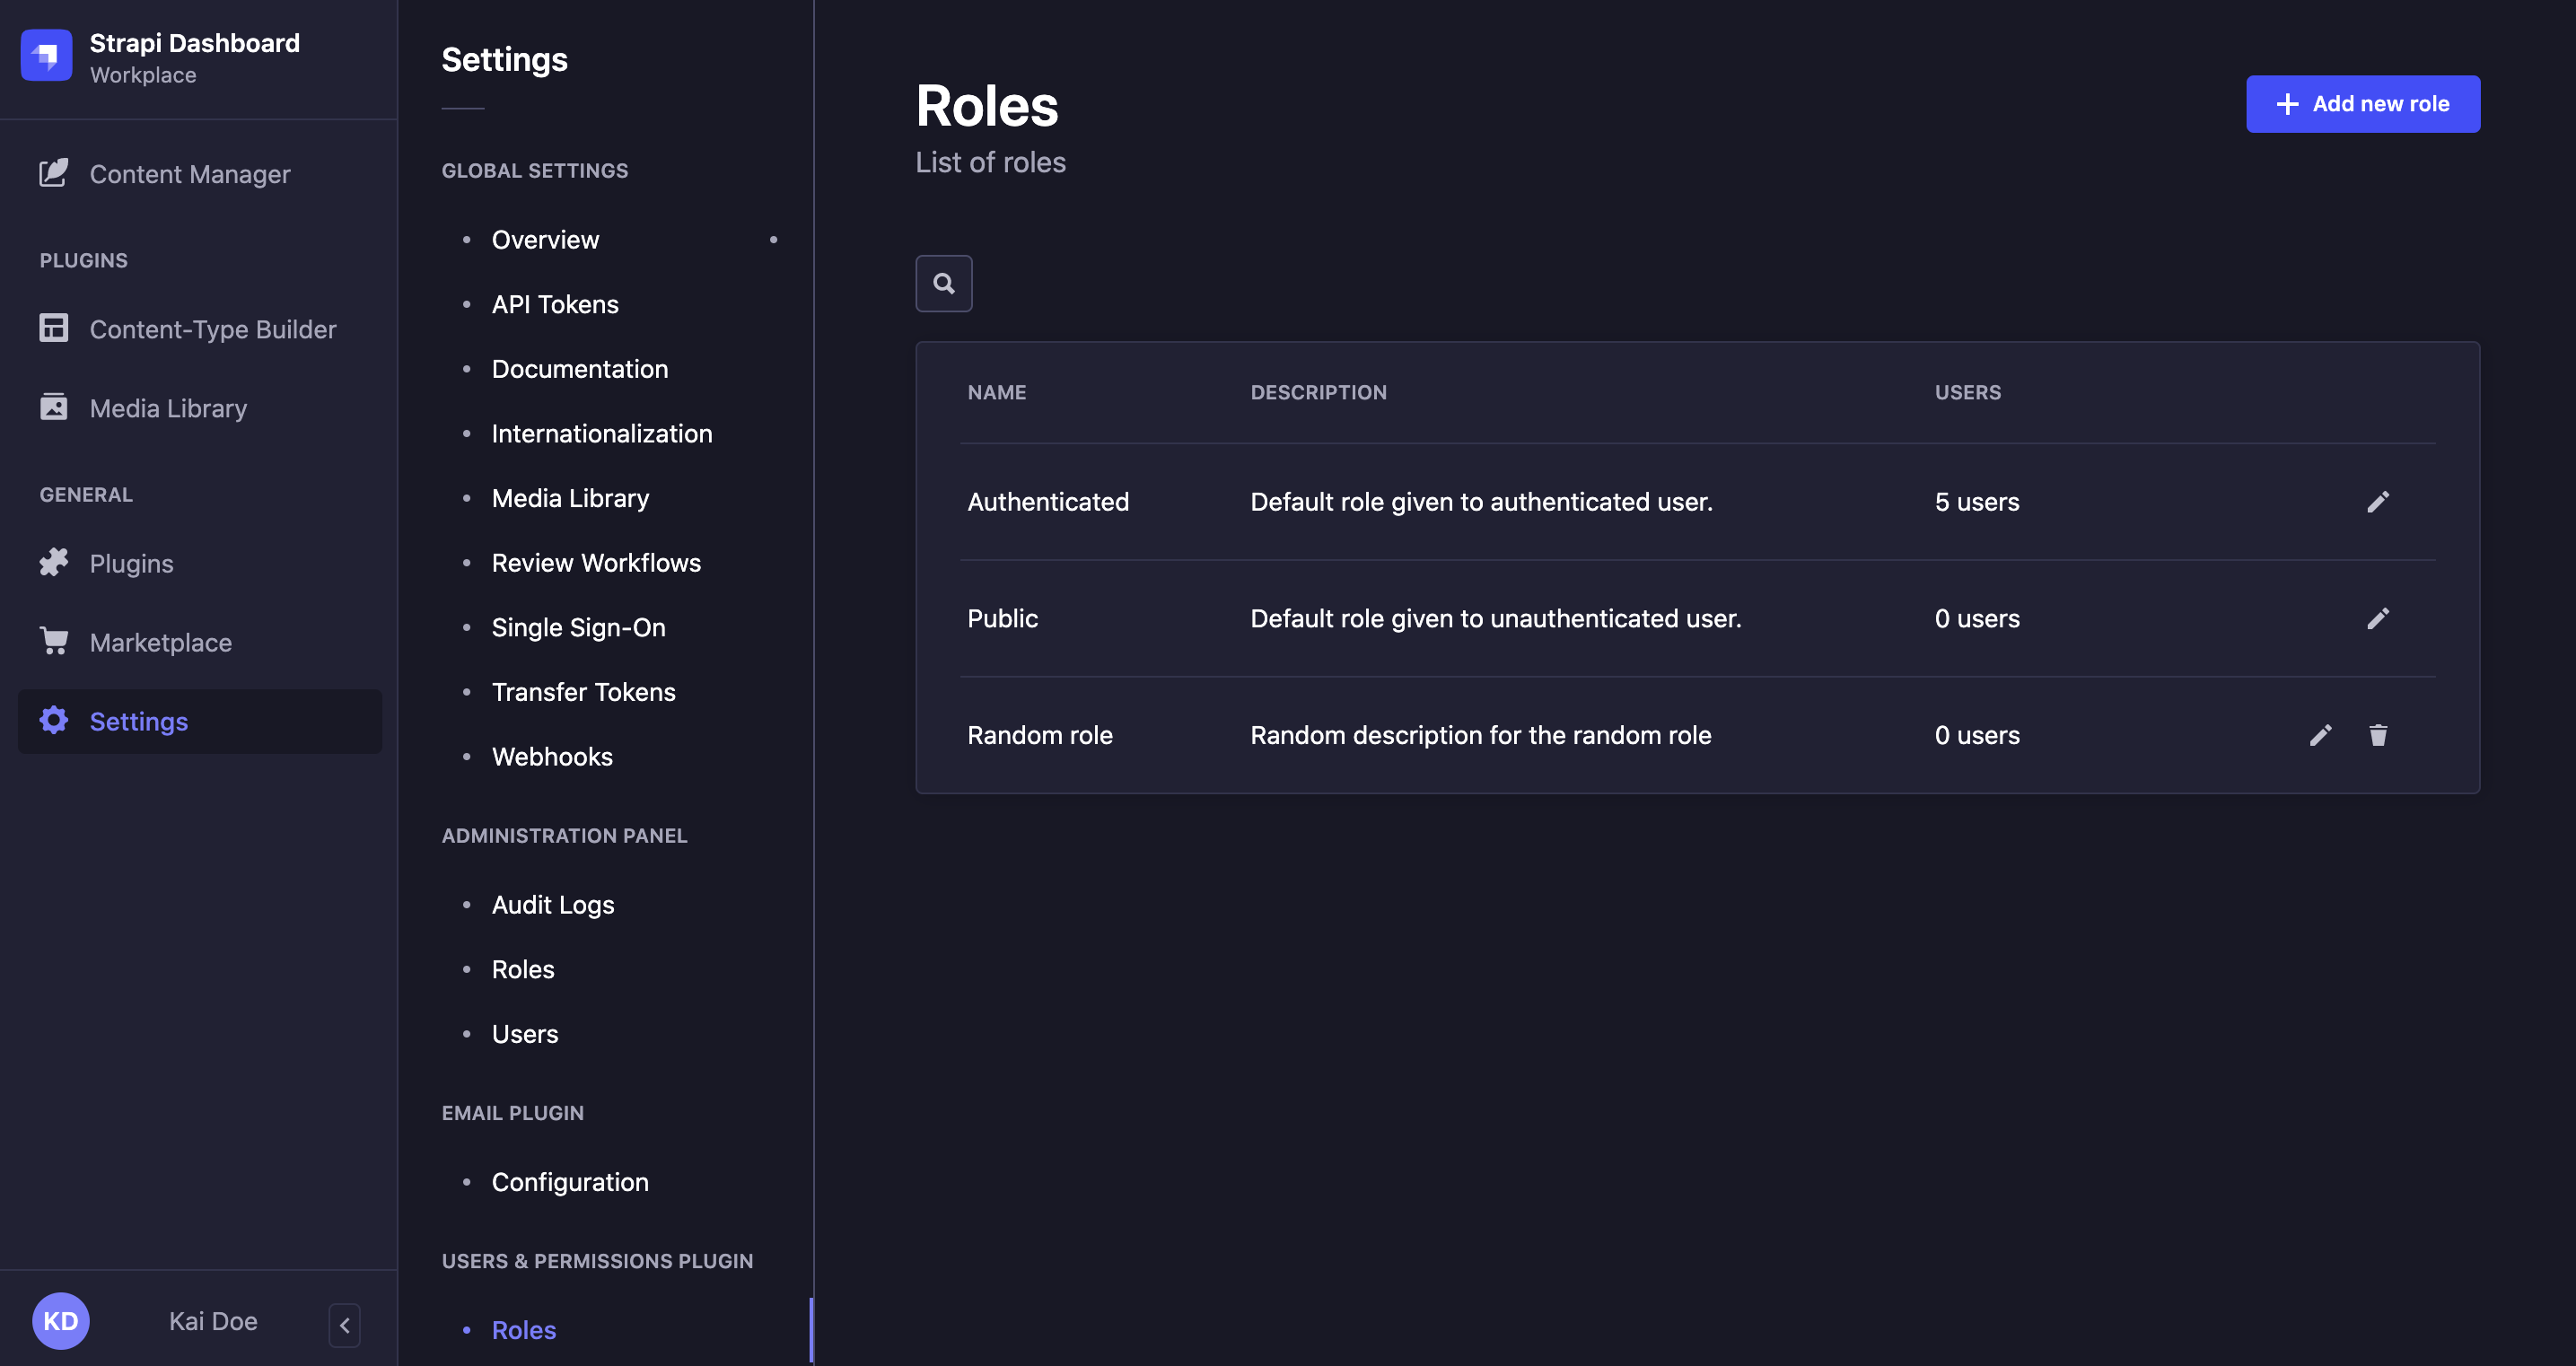
Roles
The Users & Permissions feature allows creating and managing roles for end users, to configure what they can have access to.
Creating a new role
Path: Users & Permissions plugin > Roles
On the top right side of the Roles interface, an Add new role button is displayed. It allows creating a new role for end users of your Strapi application.
Click on the Add new role button to be redirected to the roles edition interface, where you will be able to name your new role and define its details and permissions (see Editing a role).
The end-user role attributed by default to all new end users can be defined in the Advanced settings sub-section of Users & Permissions plugin (see Advanced settings).
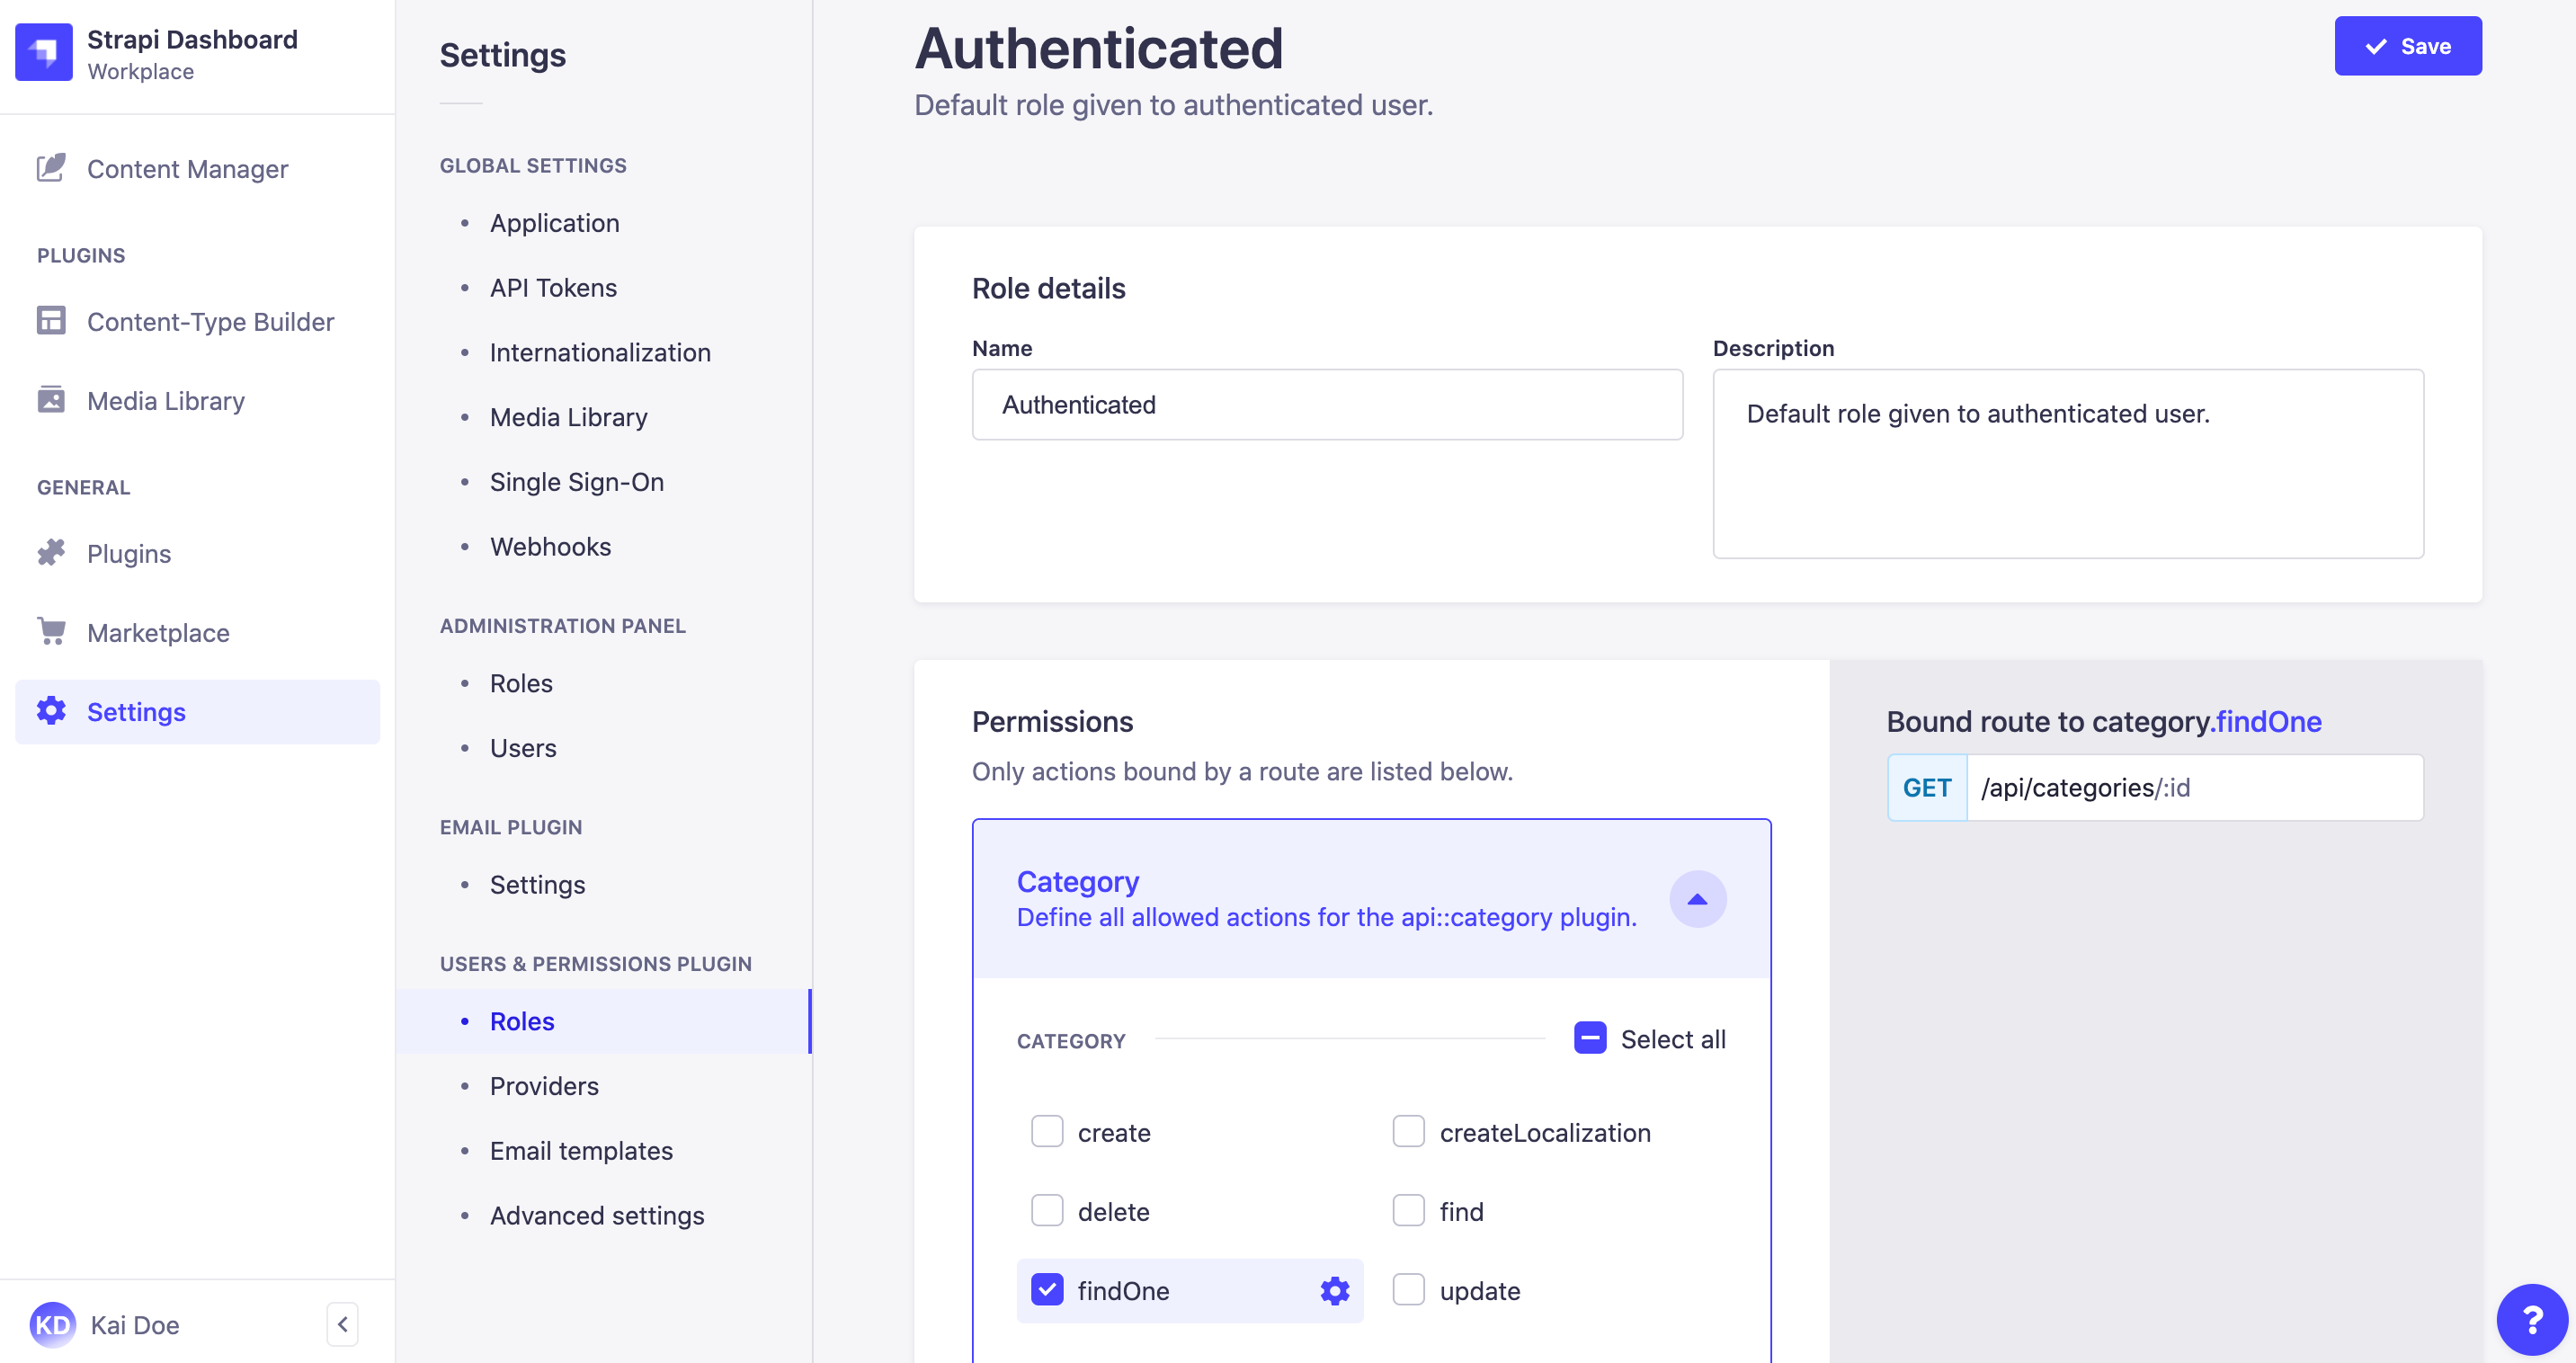
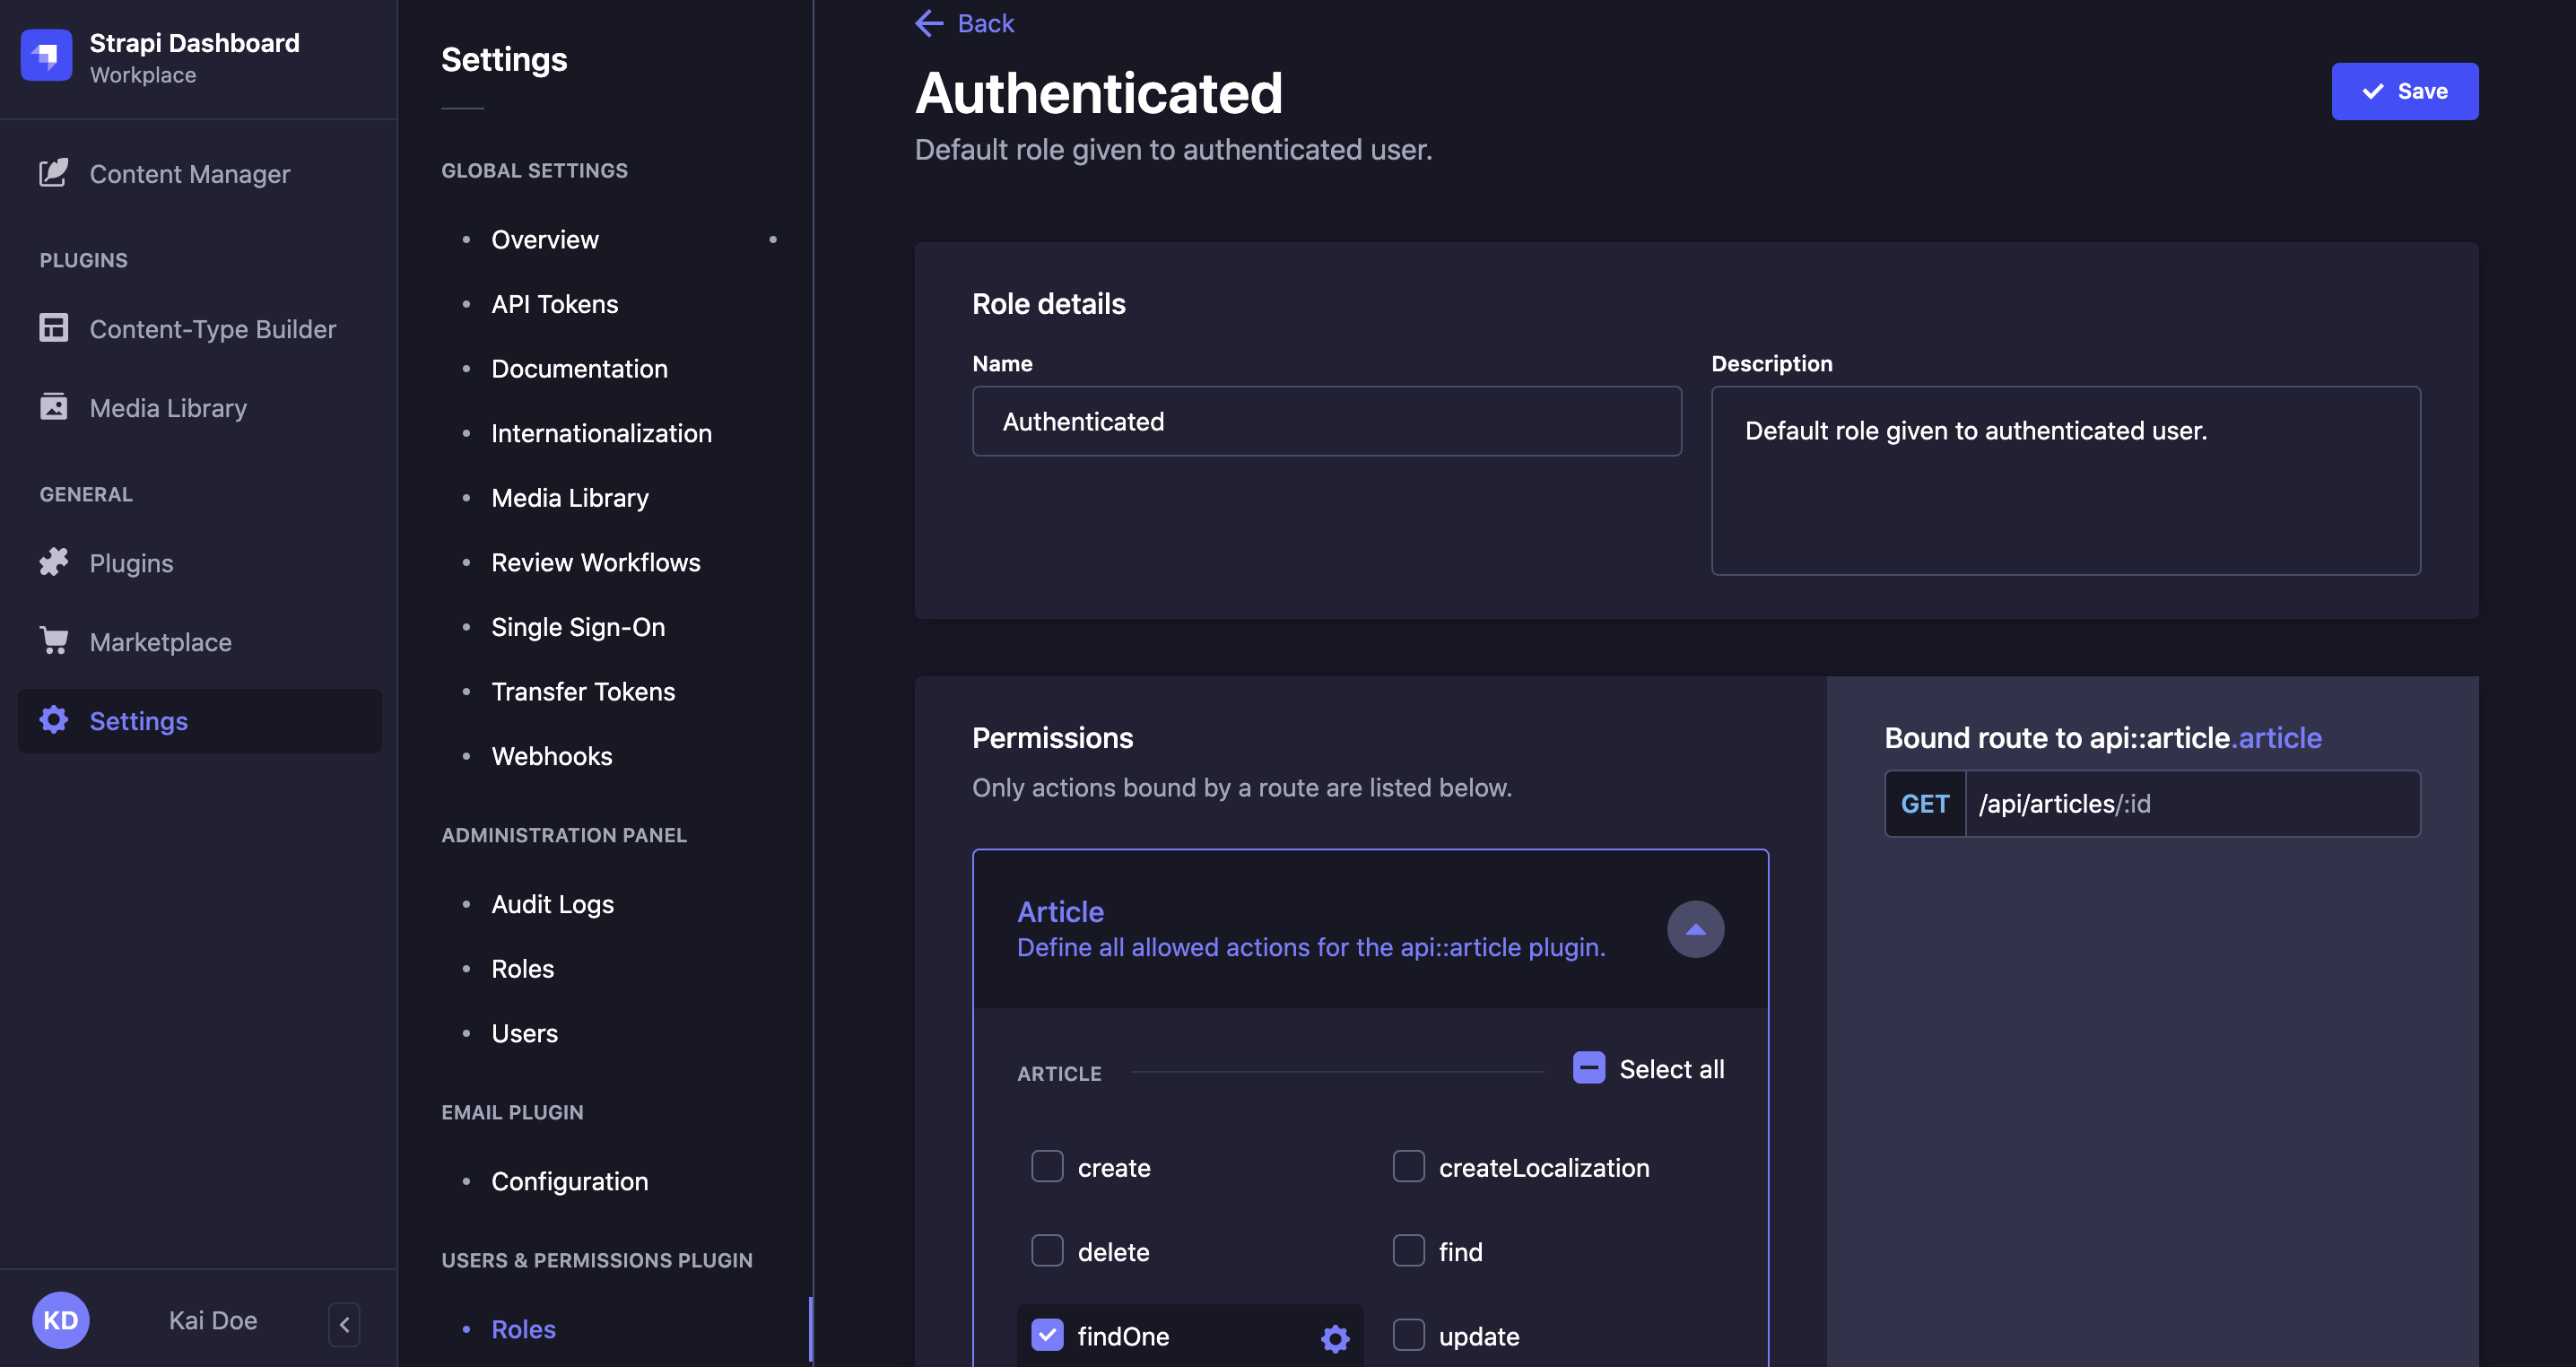
Editing a role
Path: Users & Permissions plugin > Roles
The Roles interface displays all created roles for the end users of your Strapi application.
By default, 2 end-user roles are defined for any Strapi application:
- Authenticated: for end users to access content only if they are logged in to a front-end application.
- Public: for end users to access content without being logged in to a front-end application.
More roles can however be created (see Creating a new role), and all can be edited through the role edition interface.
- Click on the edit button of the role to edit. Skip this step if you directly landed on the role edition interface from creating a new role.
- Fill in the Role details, following the instructions from the table below:
| Role details | Instructions |
|---|---|
| Name | Write the new name of the role in the textbox. |
| Description | Write the description of the role in the textbox. It should help administrators understand what the role gives access to. |
- Configure the end-user role's Permissions by:
- Clicking on the name of the permission category to configure (e.g. Application, Content-Manager, Email etc.).
- Ticking the boxes of the actions and permissions to grant for the role.
- Click on the Save button.
When ticking an action or permission box, related bound routes of the API are displayed in the right side of the interface.
Deleting a role
Path: Users & Permissions plugin > Roles
Although the Public role cannot be deleted, other roles can be deleted. Users currently assigned to a deleted role are automatically reassigned to the Public role.
- Click on the delete button on the right side of the role's record.
- In the deletion window, click on the Confirm button to confirm the deletion.
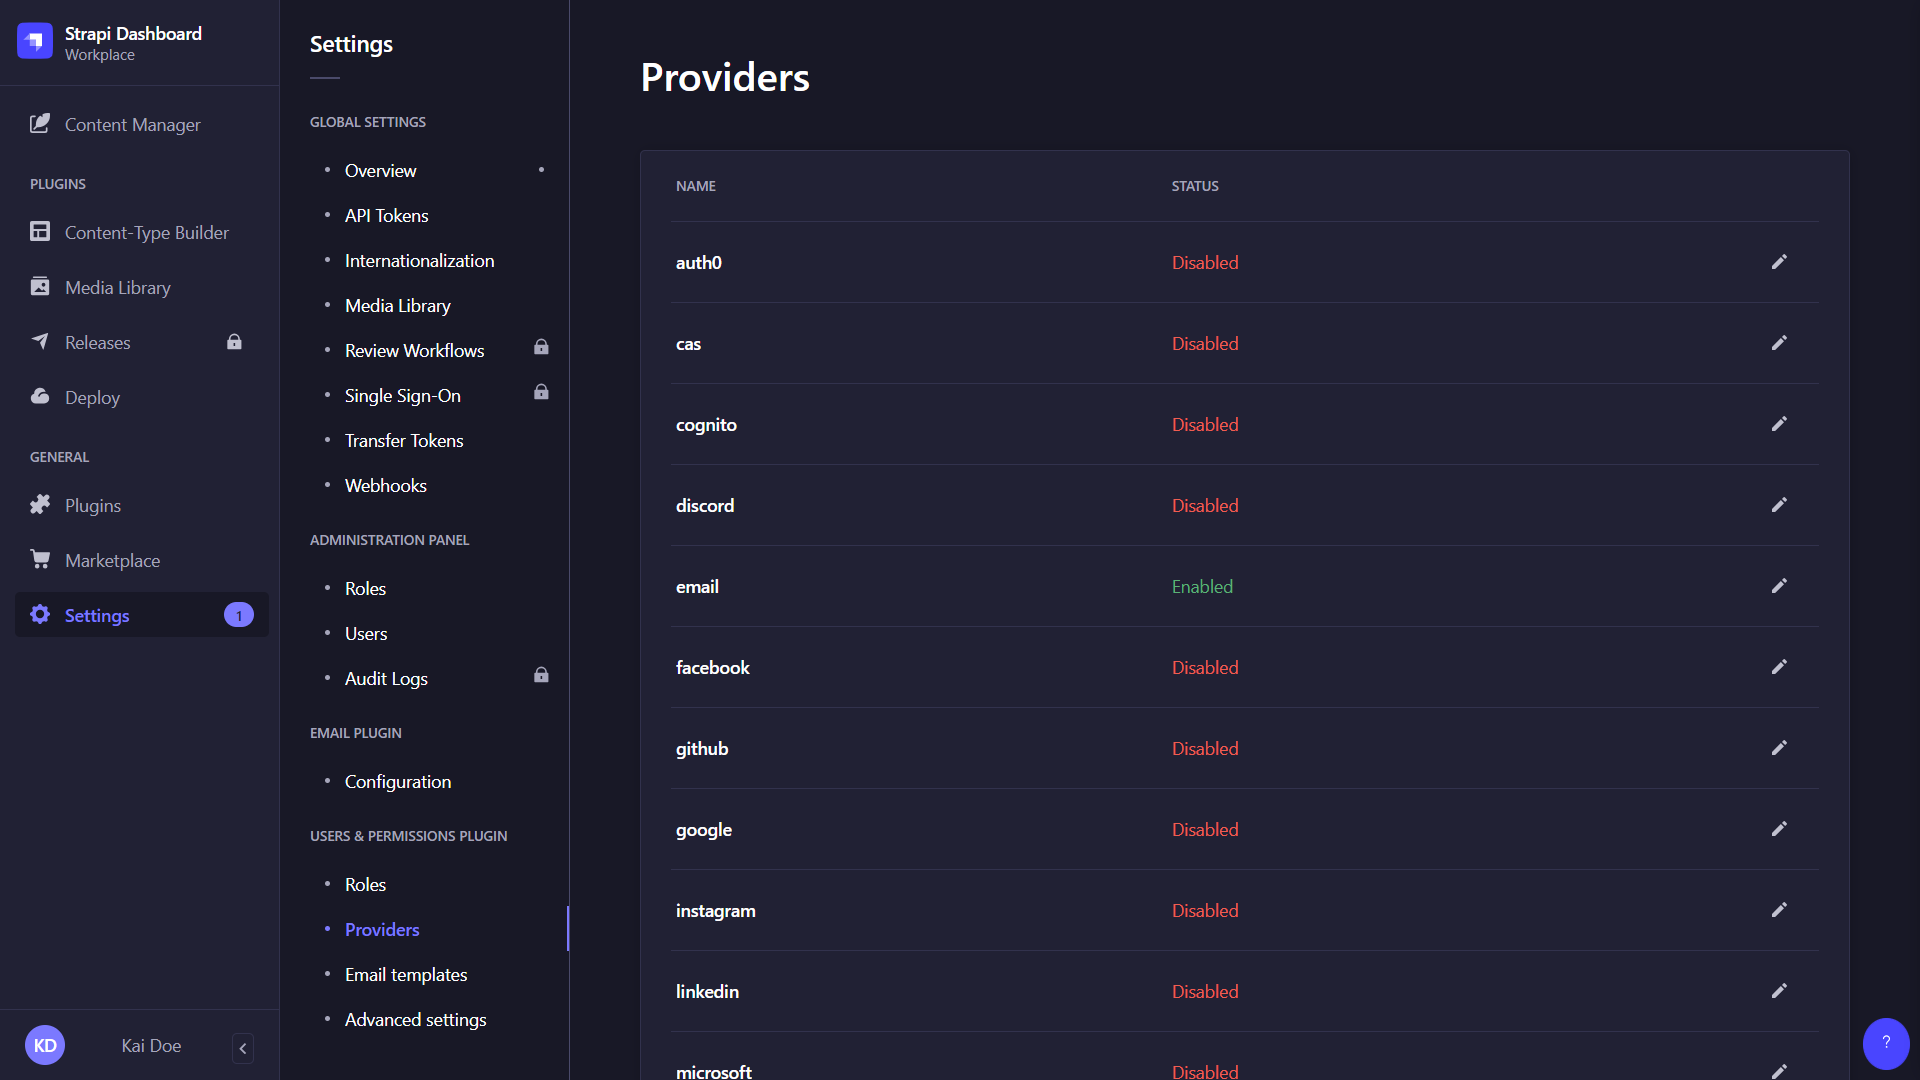
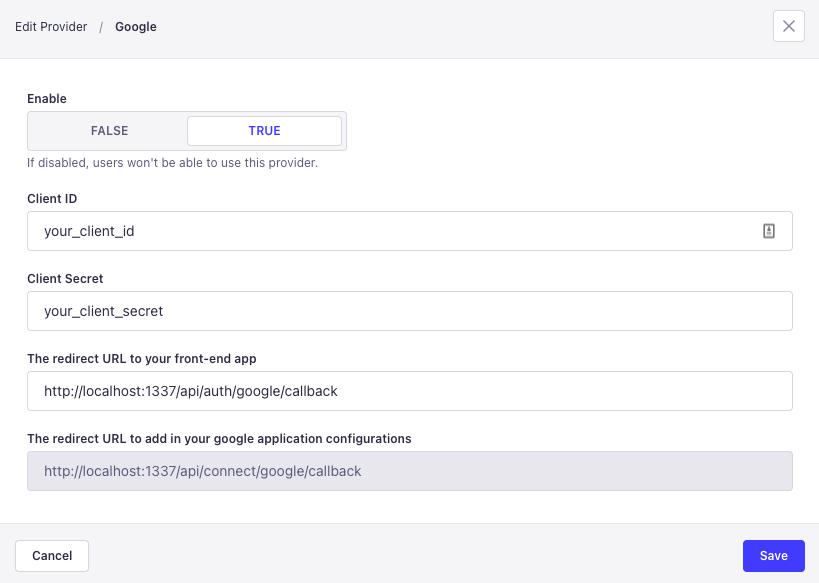
Providers
Path: Users & Permissions plugin > Providers
The Users & Permissions feature allows enabling and configuring providers, for end users to log in via a third-party provider to access the content of a front-end application through the Strapi application API.
By default, a list of providers is available including one, "Email", enabled by default for all Strapi applications with Users & Permissions enabled.
- Click on the edit button of the provider to enable and configure.
- In the provider edition window, click on the TRUE button of the Enable option.
- Fill in the provider's configurations. Each provider has its own specific set of configurations (see Users & Permissions providers documentation).
- Click on the Save button.
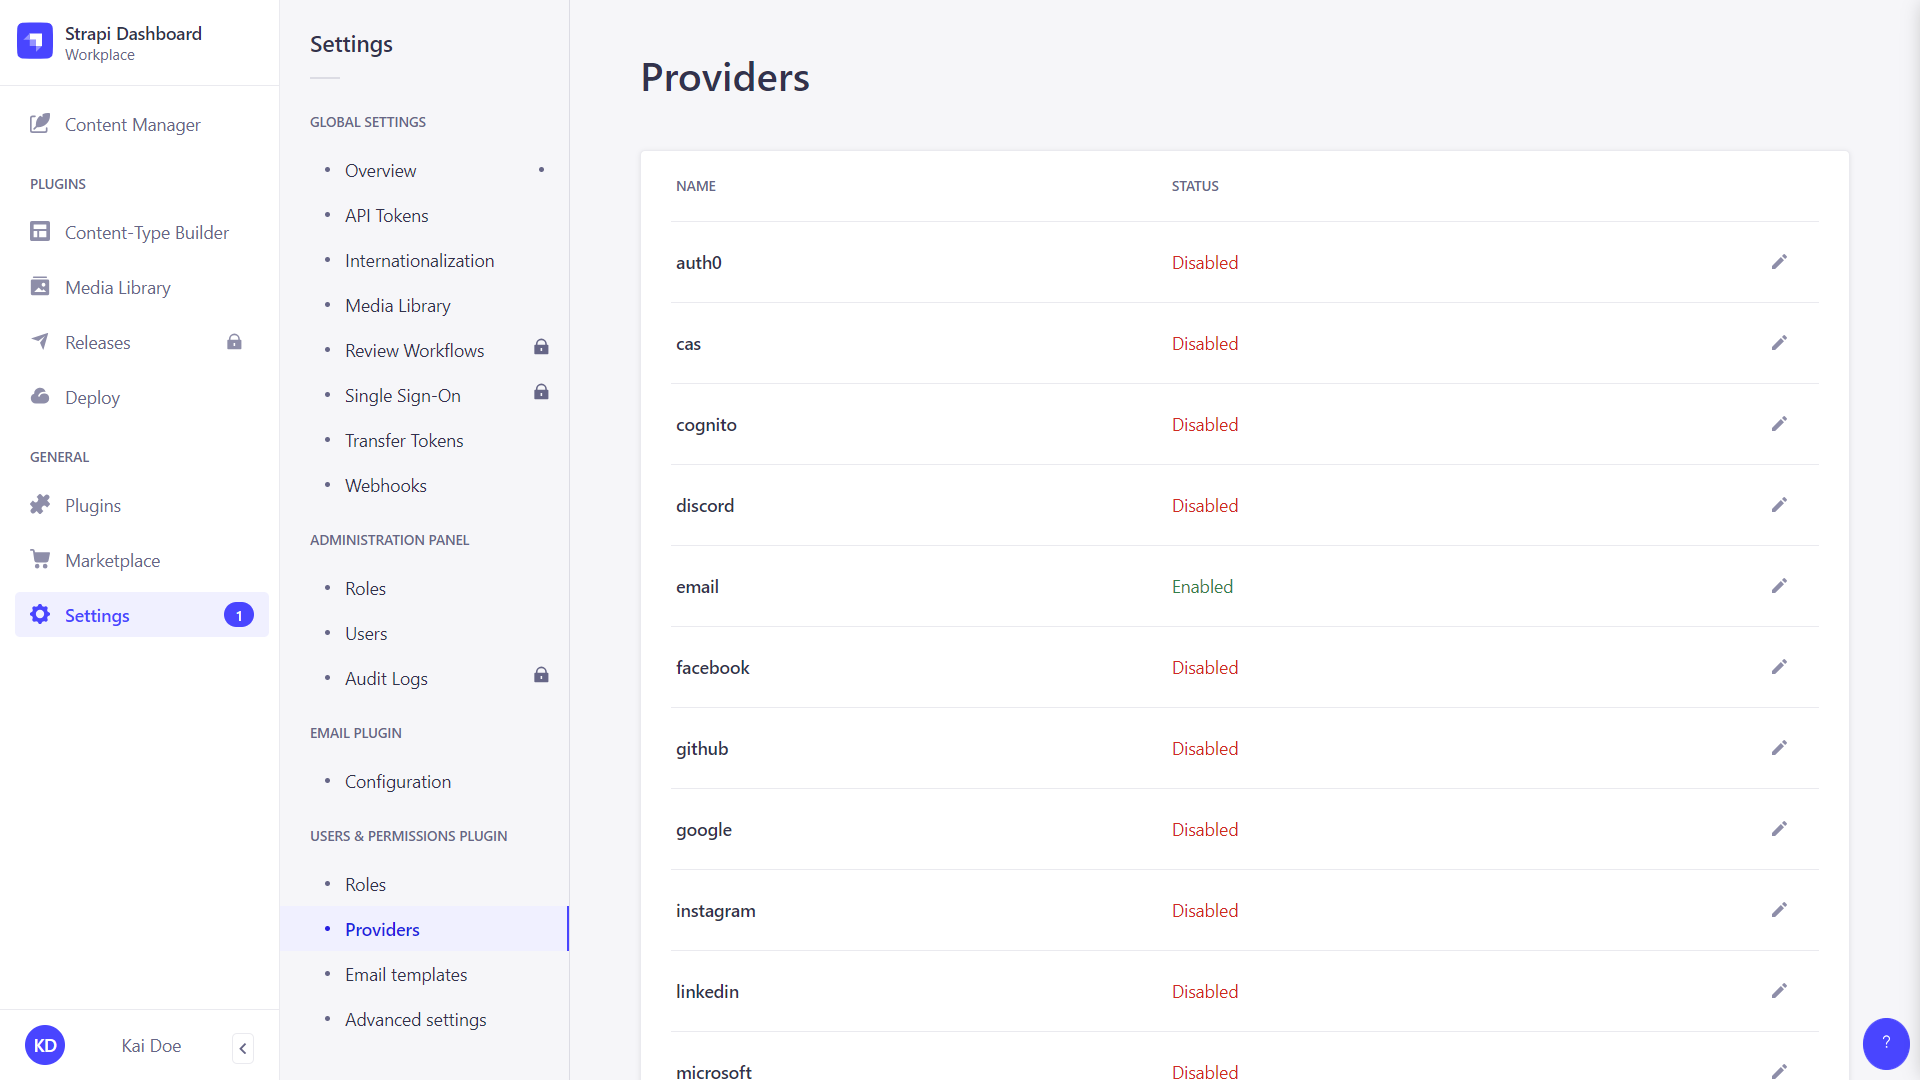
Other providers that are not proposed by default by Strapi can be added manually through the code of your Strapi application. Click on any of the following cards to get additional information on configuring or creating third-party providers:
Setting up providers
Learn how Users & Permissions providers work, understand the login flow, and see common examples.
Creating a custom provider
Learn how to create your own custom provider for the Users & Permissions feature.
When an end user registers via an authentication provider (such as Google or GitHub), Strapi automatically generates a username from the provider email address, using the part before the @ symbol (e.g., joe from joe@gmail.com).
If the generated username is already taken, Strapi appends a random number to make it unique (e.g., joe1234). The existing account's username is not affected.
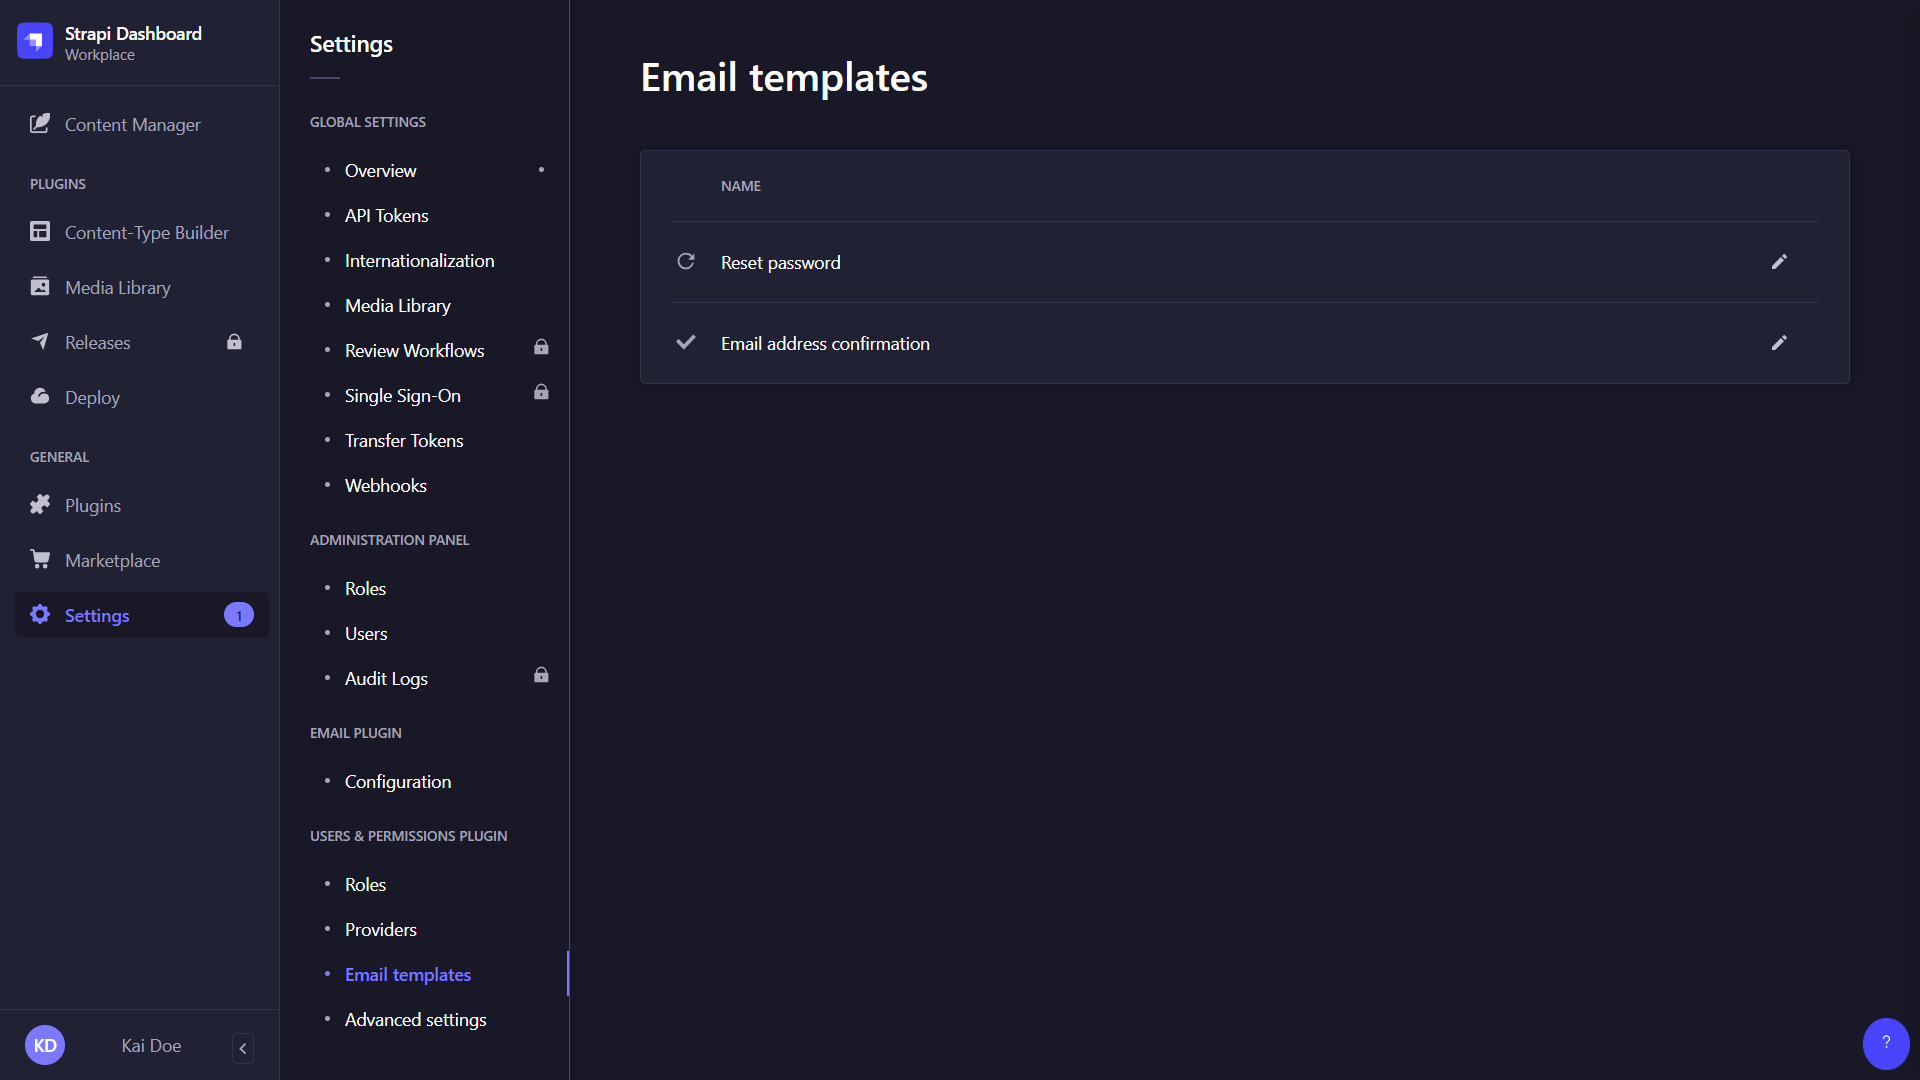
Email templates
Path: Users & Permissions plugin > Email templates
The Users & Permissions feature uses 2 email templates, "Email address confirmation" and "Reset password", that are sent to end users:
- if their account must be confirmed to be activated,
- if they need to reset the password of their Strapi account.
Both email templates can be modified.
- Click on the edit button of the email template to configure and edit.
- Configure the email template:
Setting name Instructions Shipper name Indicate the name of the shipper of the email. Shipper email Indicate the email address of the shipper of the email. Response email (optional) Indicate the email address to which responses emails from the end users will be sent. Subject Write the subject of the email. Variables can be used (see templating emails). - Edit the content of the email in the "Message" textbox. Email templates content is in HTML and uses variables (see templating emails).
- Click on the Finish button.

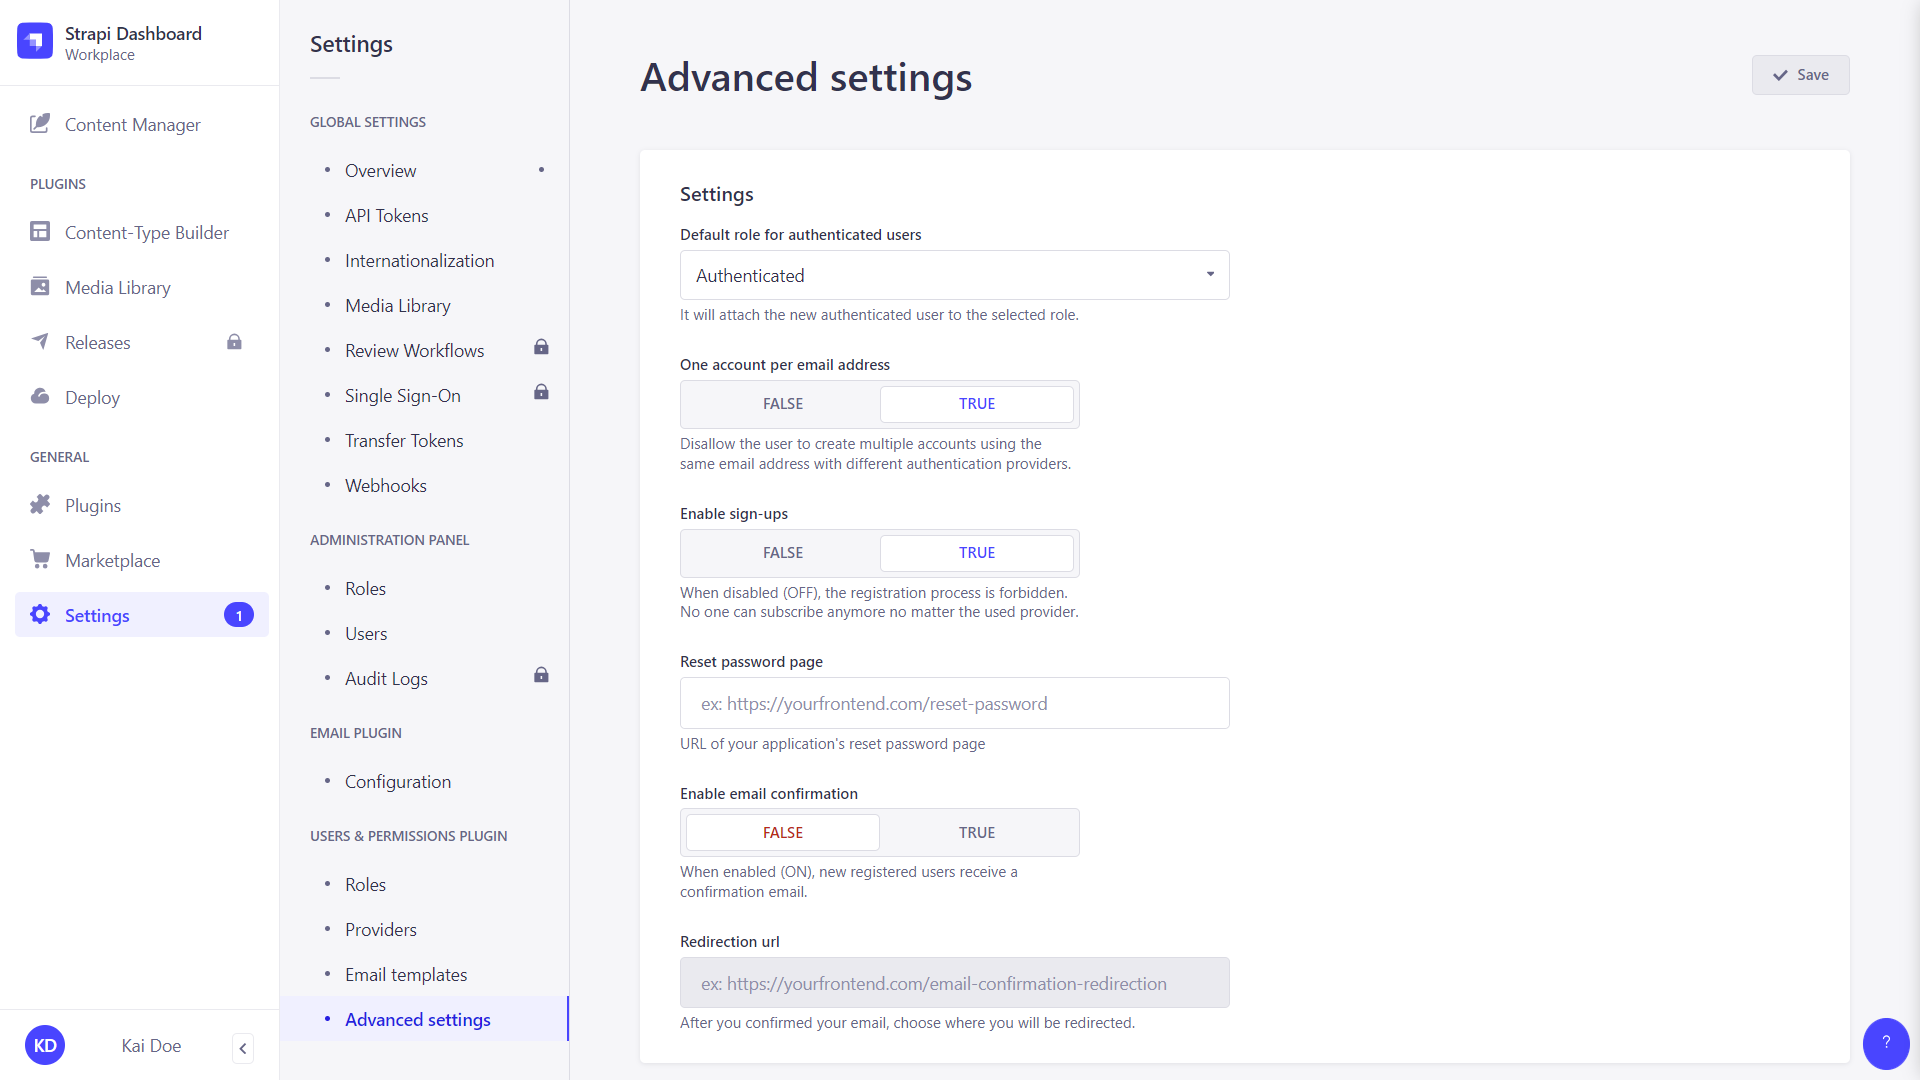
Advanced settings
Path: Users & Permissions plugin > Advanced settings
All settings related to the Users & Permissions feature are managed from the Advanced Settings interface, including the choice of a default role for end users, the enablement of sign-ups and email confirmation, as well as the choice of landing page for resetting a password.
-
Configure the settings of your choice, following the instructions below:
Setting name Instructions Default role for authenticated users Click the drop-down list to choose the default role for new end users. One account per email address Click on the TRUE button to limit to 1 the number of end-user accounts with the same email address.
Click on FALSE to disable this limitation and allow several end-user accounts to be associated with the same email address (e.g.kai.doe@strapi.iocan be used when logging in via several different providers).Enable sign-ups Click on the TRUE button to enable end-user sign-ups.
Click on FALSE to prevent end-user registration to your front-end application(s).Reset password page Indicate the URL of the reset password page for your front-end application(s). Enable email confirmation Click on the TRUE button to enable end-user account confirmation by sending them a confirmation email.
Click on FALSE to disable account confirmation.Redirection url Indicate the URL of the page where end users should be redirected after confirming their Strapi account. -
Click the Save button.

Code-based configuration
While most of the Users & Permissions settings are handled via the admin panel, some more specific settings can be fine-tuned by configuring and customizing your Strapi project's code.
JWT configuration
You can configure the JSON Web Token (JWT) generation by using the plugins configuration file.
Strapi uses jsonwebtoken to generate the JWT.
JWT management modes
The Users & Permissions feature supports 2 JWT management modes.
Defining which mode is used is done by setting the jwtManagement property of the users-permissions.config object in the /config/plugins file. The property accepts either legacy-support or refresh:
| Mode | Description | Use case |
|---|---|---|
legacy-support | (default) Issues long-lived JWTs using traditional configuration | Existing applications, simple authentication |
refresh | Uses session management with short-lived access tokens and refresh tokens for enhanced security | New applications, enhanced security requirements (see admin panel configuration) |
For backwards compatibility, the Users & Permissions feature defaults to legacy mode:
module.exports = ({ env }) => ({
  'users-permissions': {
    config: {
      jwtManagement: 'legacy-support',
      jwt: {
        expiresIn: '30d', // Traditional JWT expiry
      },
    },
  },
});
jwtSecretis a random string used to create new JWTs, typically set using theJWT_SECRETenvironment variable.jwt.expiresInis (legacy-mode only) is expressed in seconds or a string describing a time span.
For example: 60, "45m", "10h", "2 days", "7d", "2y". A numeric value is interpreted as a seconds count. If you use a string be sure you provide the time units (minutes, hours, days, years, etc), otherwise milliseconds unit is used by default ("120" is equal to "120ms").
Setting JWT expiry for more than 30 days is not recommended due to security concerns.
When the refresh mode is used, the configuration file looks like the following:
- JavaScript
- TypeScript
module.exports = ({ env }) => ({
  // …
  'users-permissions': {
    config: {
      jwtManagement: 'refresh',
      sessions: {
        accessTokenLifespan: 600, // 10 minutes (default)
        maxRefreshTokenLifespan: 2592000, // 30 days (default)
        idleRefreshTokenLifespan: 1209600, // 14 days (default)
        maxSessionLifespan: 86400, // 1 day (default)
        idleSessionLifespan: 7200, // 2 hours (default)
        httpOnly: false, // Set to true for HTTP-only cookies
        cookie: {
          name: 'strapi_up_refresh',
          sameSite: 'lax',
          path: '/',
          secure: false, // true in production
        },
      },
    },
  },
  // ...
});
export default ({ env }) => ({
  // …
  'users-permissions': {
    config: {
      jwtManagement: 'refresh',
      sessions: {
        accessTokenLifespan: 600, // 10 minutes (default)
        maxRefreshTokenLifespan: 2592000, // 30 days (default)
        idleRefreshTokenLifespan: 1209600, // 14 days (default)
        maxSessionLifespan: 86400, // 1 day (default)
        idleSessionLifespan: 7200, // 2 hours (default)
        httpOnly: false, // Set to true for HTTP-only cookies
        cookie: {
          name: 'strapi_up_refresh',
          sameSite: 'lax',
          path: '/',
          secure: false, // true in production
        },
      },
    },
  },
  // ...
});
Registration configuration
If you have added any additional fields in your User model that need to be accepted on registration, you need to add them to the list of allowed fields in the config.register object of the /config/plugins file, otherwise they will not be accepted.
The following example shows how to ensure a field called "nickname" is accepted by the API on user registration:
- JavaScript
- TypeScript
module.exports = ({ env }) => ({
  // ...
  "users-permissions": {
    config: {
      register: {
        allowedFields: ["nickname"],
      },
    },
  },
  // ...
});
export default ({ env }) => ({
  // ...
  "users-permissions": {
    config: {
      register: {
        allowedFields: ["nickname"],
      },
    },
  },
  // ...
});
Rate limiting configuration
Rate limiting is applied to authentication and registration endpoints to prevent abuse. The following parameters can be configured to change its behavior. Additional configuration options are provided by the koa2-ratelimit package:
The following options are available in the /config/plugins file:
| Parameter | Description | Type | Default |
|---|---|---|---|
ratelimit | Settings to customize the rate limiting of the authentications and registration endpoints | object | {} |
ratelimit.enabled | Enable or disable the rate limiter | boolean | true |
ratelimit.interval | Time window for requests to be considered as part of the same rate limiting bucket (in milliseconds) | integer | 60000 (1 minute) |
ratelimit.max | Maximum number of requests allowed in the time window | integer | 10 |
ratelimit.prefixKey | Prefix for the rate limiting key | string | ${userIdentifier}:${requestPath}:${ctx.request.ip} |
- JavaScript
- TypeScript
module.exports = ({ env }) => ({
  // ... other plugins configuration ...
  // Users & Permissions configuration
  'users-permissions': {
    config: {
      ratelimit: {
        enabled: true,
        interval: 60000, // 1 minute
        max: 10,
      },
    },
  },
  // ...
});
export default ({ env }) => ({
  // ... other plugins configuration ...
  // Users & Permissions configuration
  'users-permissions': {
    config: {
      ratelimit: {
        enabled: true,
        interval: 60000, // 1 minute
        max: 10,
      },
    },
  },
  // ...
});
Email template configuration
By default this plugin comes with two templates: reset password and email address confirmation. The templates use Lodash's `template()` method to populate the variables.
You can update these templates under Plugins > Roles & Permissions > Email Templates tab in the admin panel (see configuring email templates).
The following variables can be used:
- Reset password
- Email address confirmation
USER(object)usernameemail
TOKENcorresponds to the token generated to be able to reset the password.URLis the link where the user will be redirected after clicking on it in the email.SERVER_URLis the absolute server URL (configured in server configuration).
USER(object)usernameemail
CODEcorresponds to the CODE generated to be able confirm the user email.URLis the Strapi backend URL that confirms the code (by default/auth/email-confirmation).SERVER_URLis the absolute server URL (configured in server configuration).
Security configuration
JWTs can be verified and trusted because the information is digitally signed. To sign a token, a secret is required. By default, Strapi stores it as the JWT_SECRET environment variable in the .env file.
If you want to use a different environment variable, you can update the configuration file.
- JavaScript
- TypeScript
module.exports = {
  jwtSecret: process.env.SOME_ENV_VAR,
};
export default {
  jwtSecret: process.env.SOME_ENV_VAR,
};
Creating a custom callback validator
By default, Strapi SSO only redirects to the redirect URL that is exactly equal to the url in the configuration:
If you need to configure a custom handler to accept other URLs, you can create a callback validate function in your plugins.js for the users-permissions plugin.
  // ... other plugins configuration ...
  // Users & Permissions configuration
  'users-permissions': {
    enabled: true,
    config: {
      callback: {
        validate: (cbUrl, options) => {
          // cbUrl is where Strapi is being asked to redirect the auth info
          // that was received from the provider to

          // in this case, we will only validate that the
          // if using a base url, you should always include the trailing slash
          // although in real-world usage you should also include the full paths
          if (cbUrl.startsWith('https://myproxy.mysite.com/') ||
              cbUrl.startsWith('https://mysite.com/')) {
            return;
          }

          // Note that you MUST throw an error to fail validation
          // return values are not checked
          throw new Error('Invalid callback url');
        },
      },
    },
  },
Route and policy customization
The Users & Permissions feature routes and controllers can be extended and overridden through the plugin extension system. This is useful for adding custom policies to user endpoints, overriding controller logic, or adding new routes.
Usage
The Users & Permissions feature can be used both via the admin panel, to create new end-user accounts, and via the APIs.
Admin panel usage
Path to use the feature: Content Manager
With the Users & Permissions feature, the end users and their account information are managed as a content-type. When Users & Permissions is installed on a Strapi application, 3 collection types are automatically created, including "User" which is the only one available directly in the Content Manager.
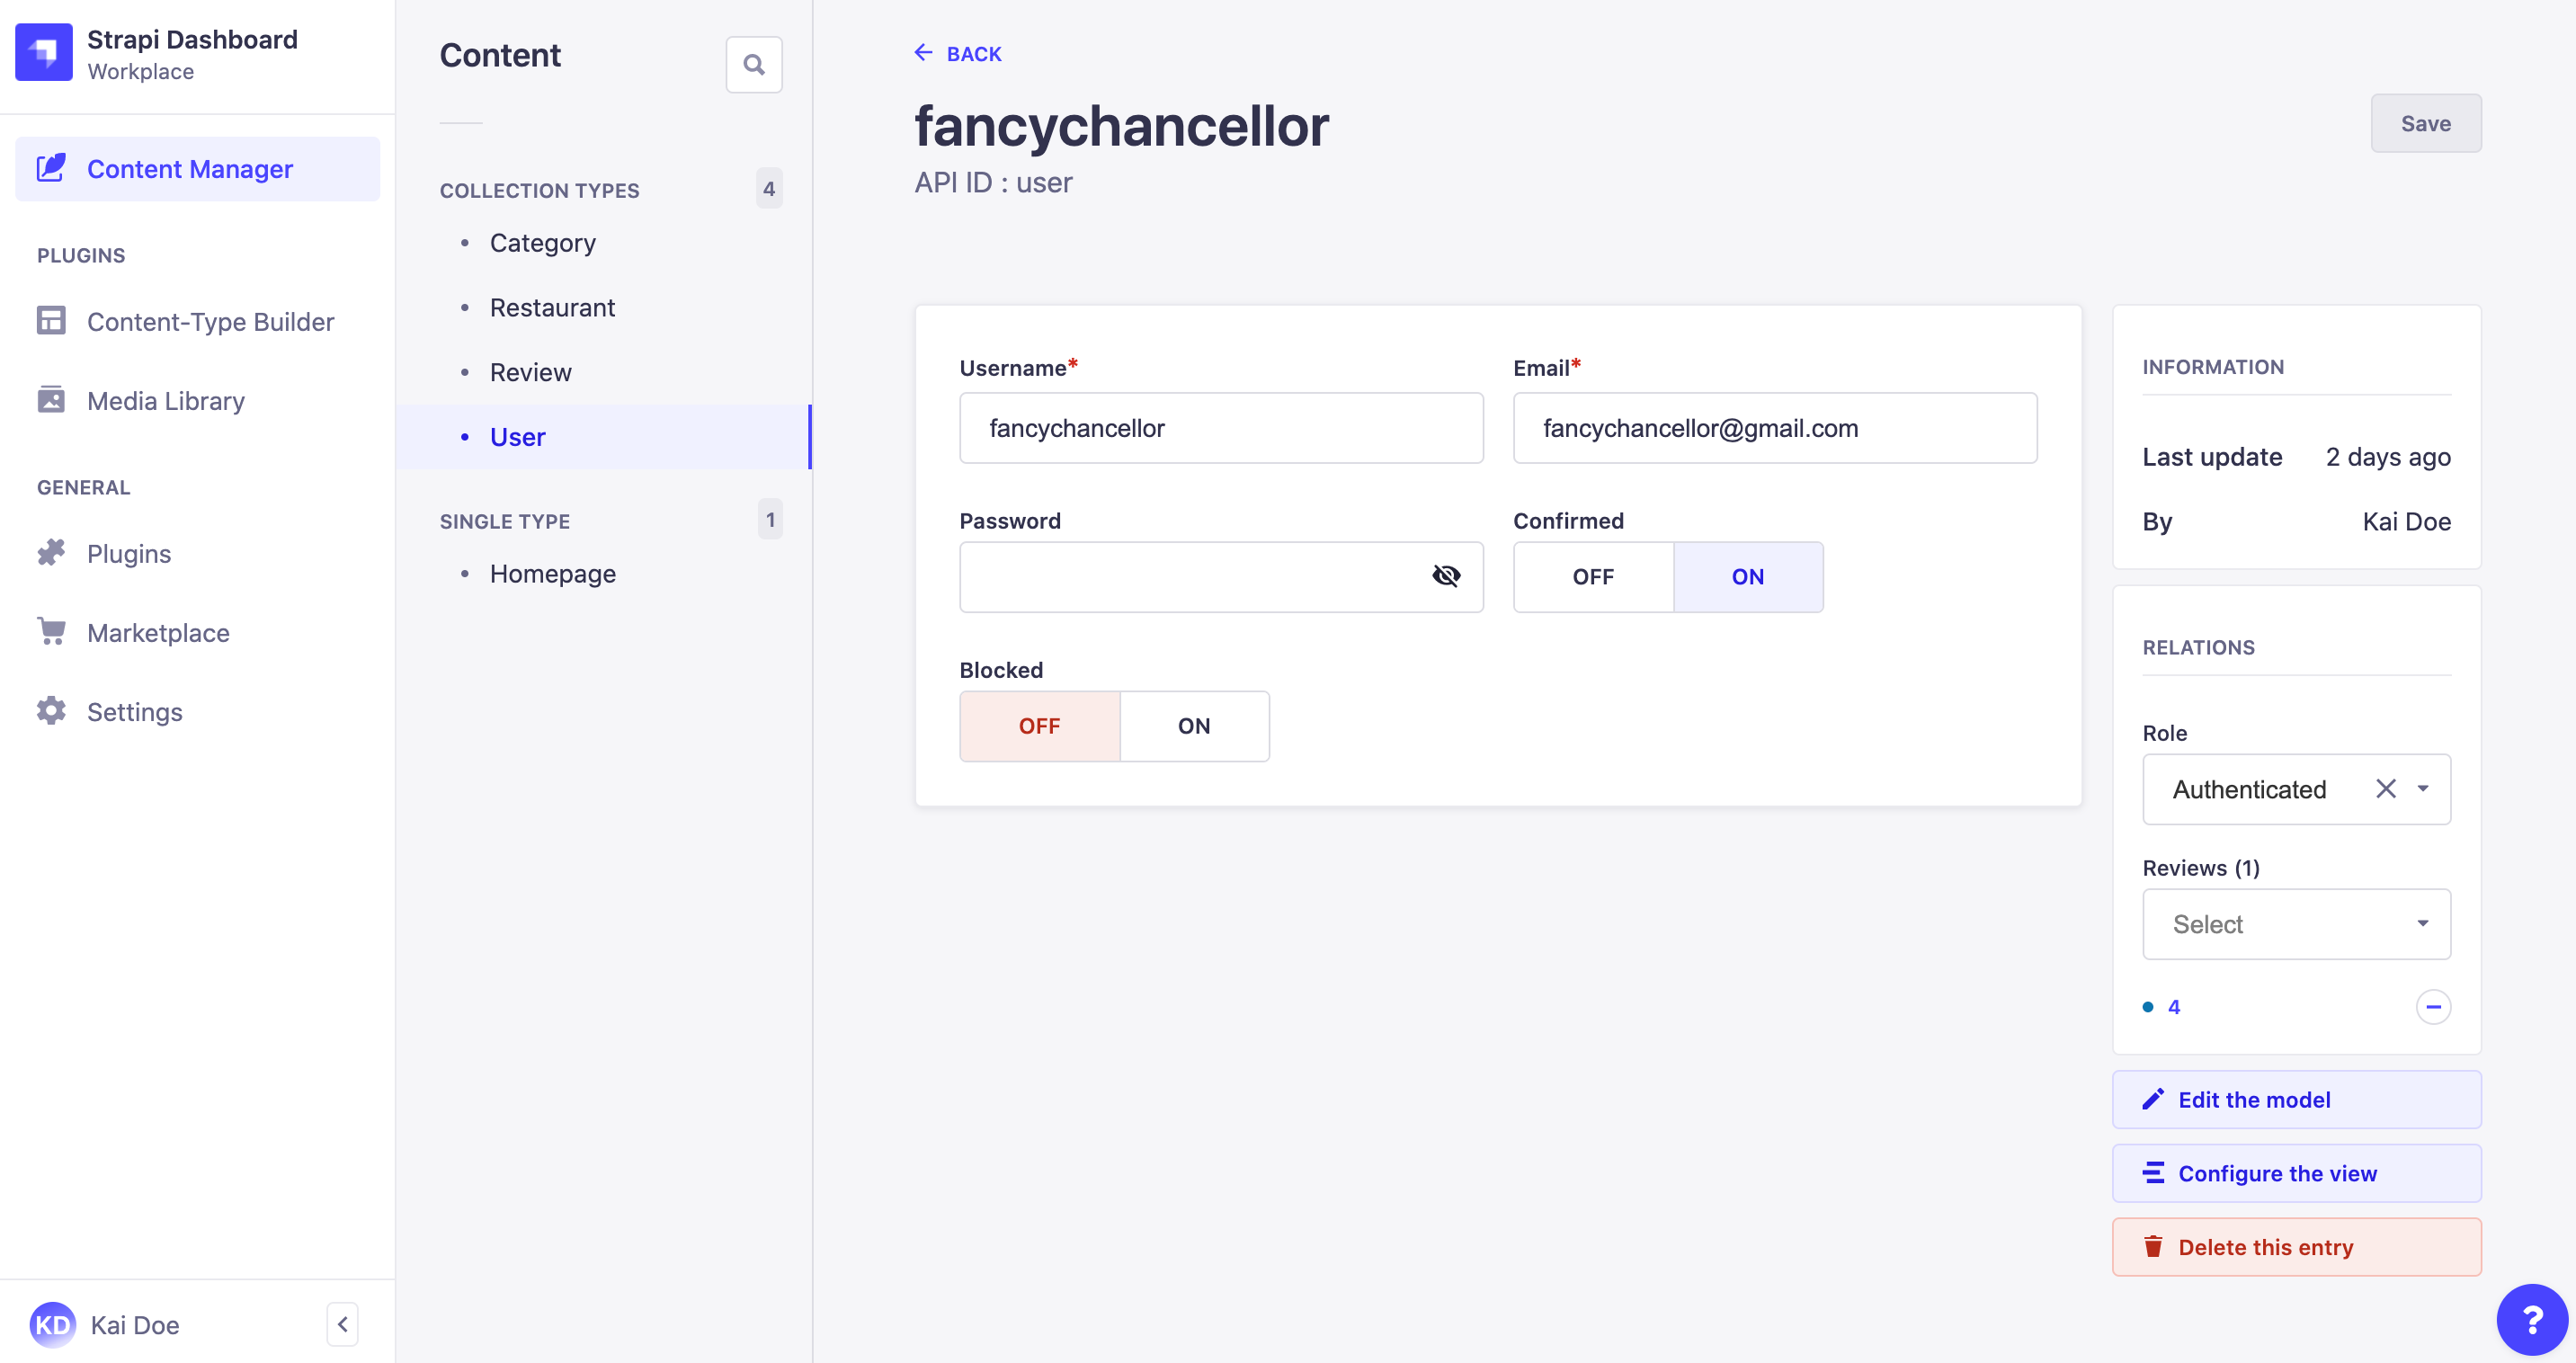
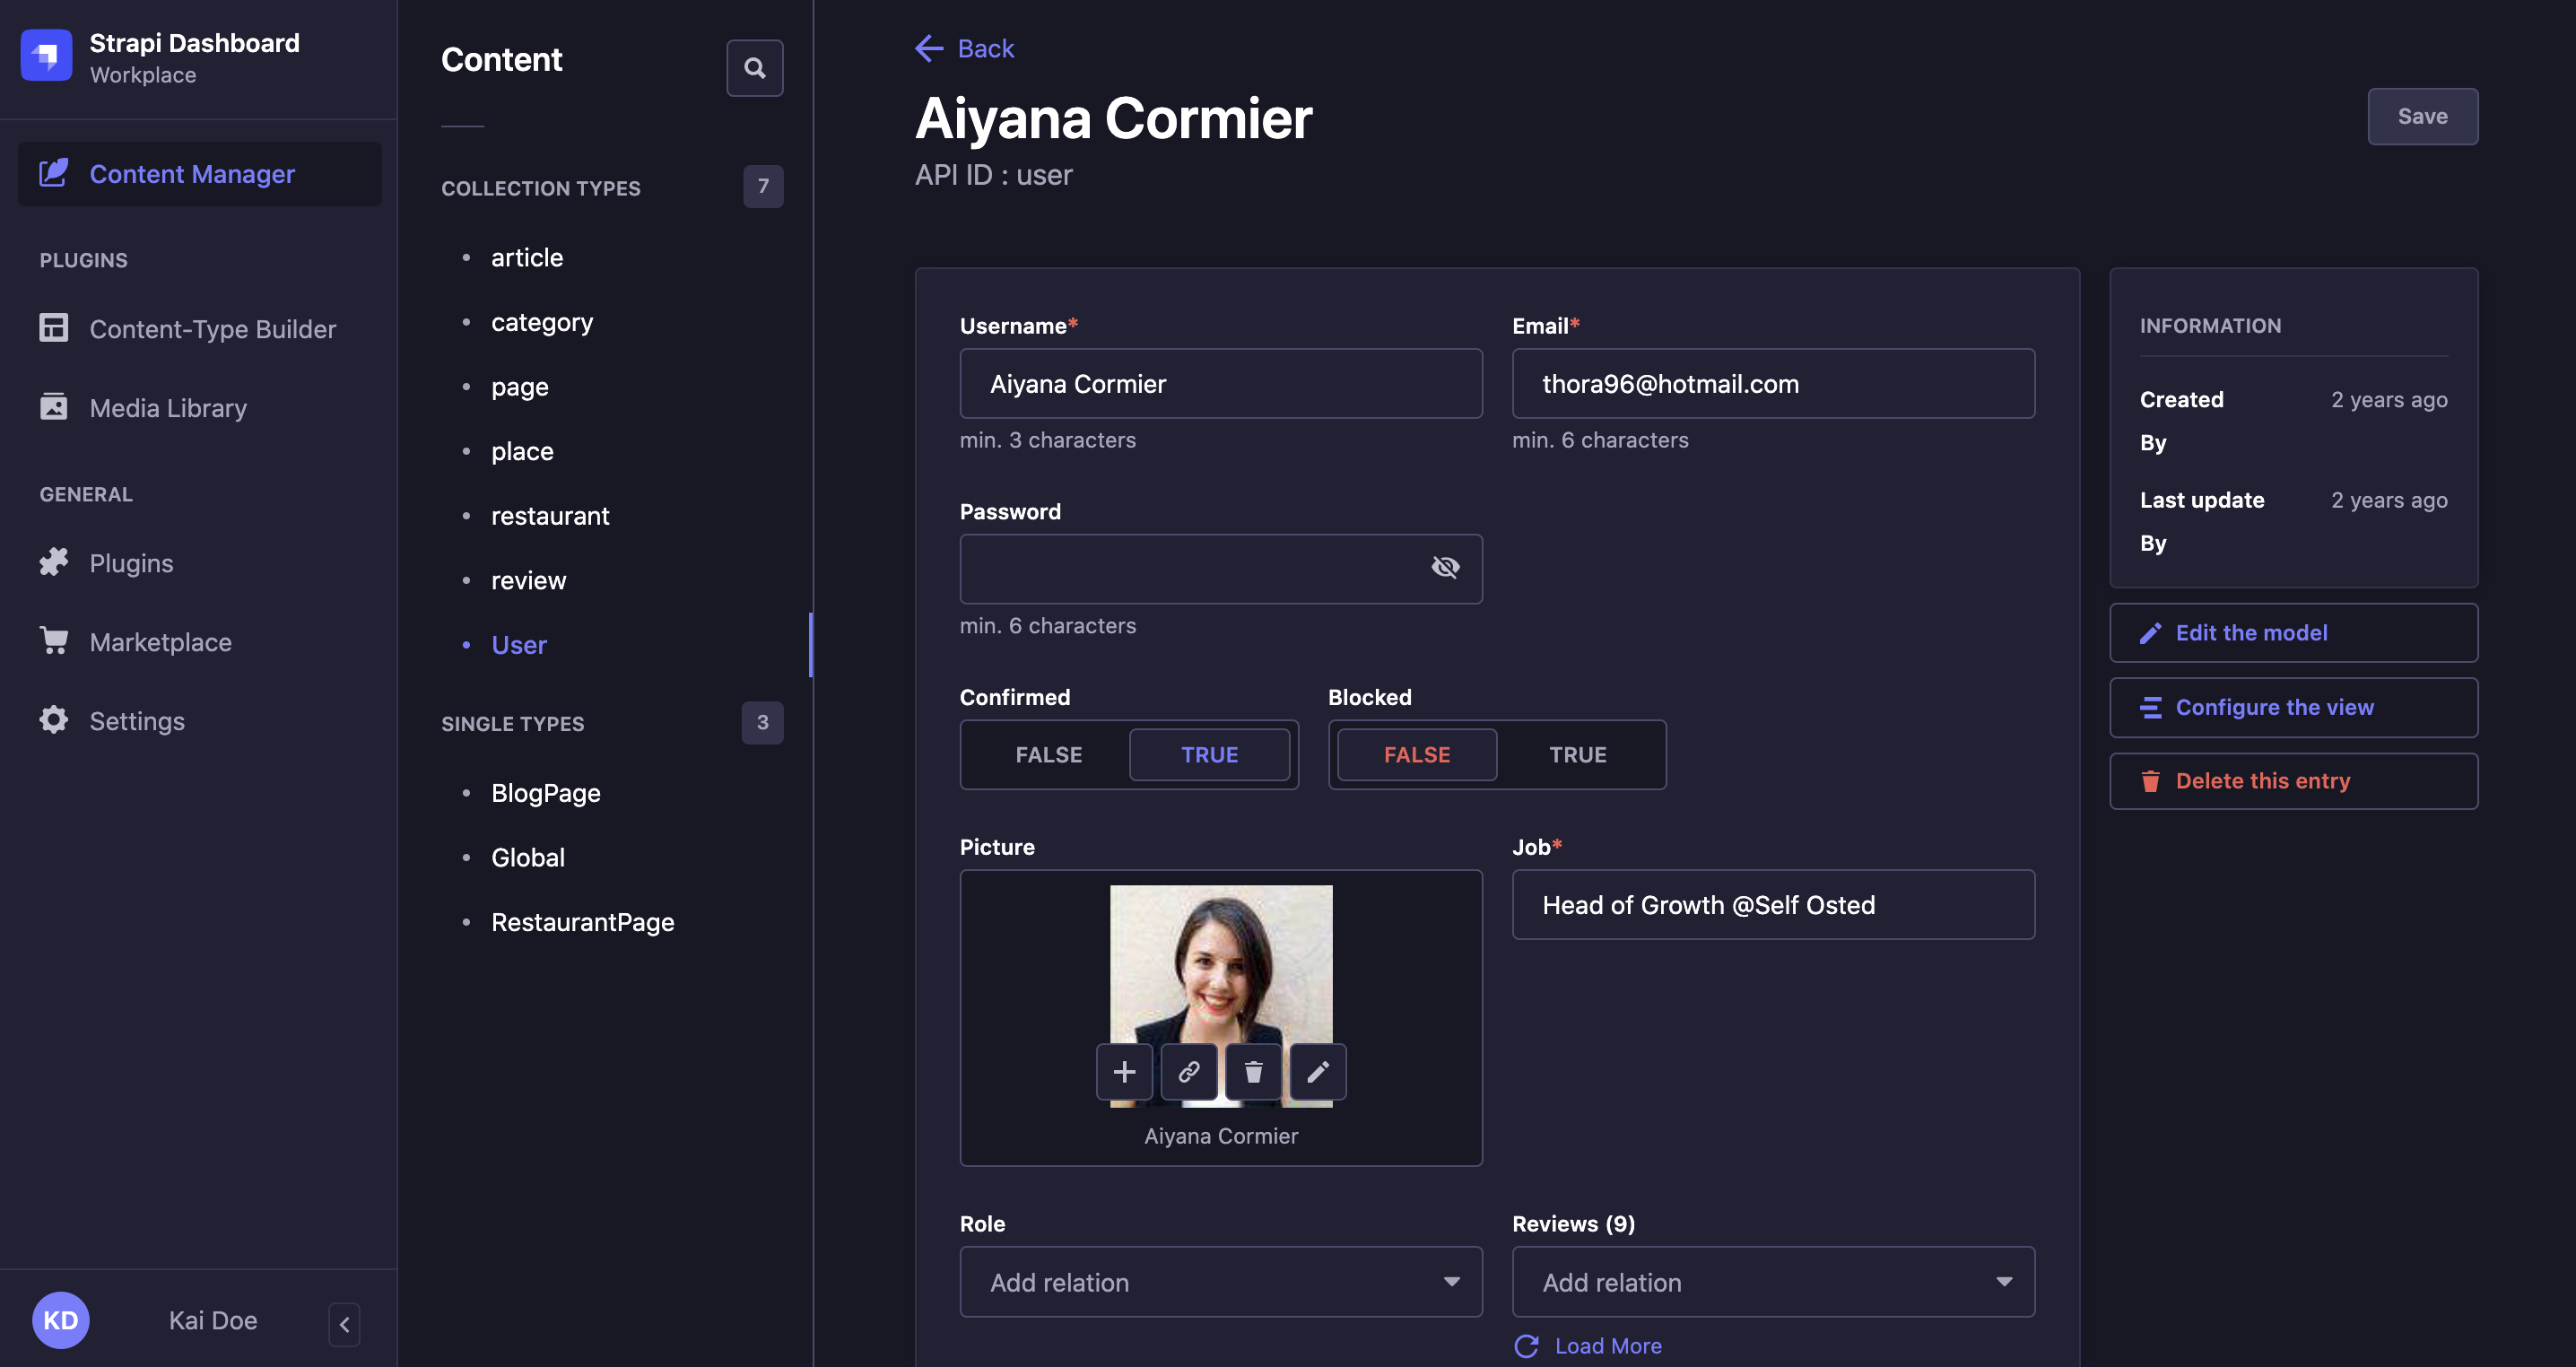
Registering new end users in a front-end application with the Users & Permissions feature consists of adding a new entry to the User collection type.
- Go to the User collection type in the Content Manager.
- Click on the Create new entry button in the top right corner.
- Fill in the default fields of the entry. Additional fields added specifically for your Strapi application by your administrators may be displayed as well.
Field Instructions Username Write the username of the end user. Email Write the complete email address of the end user in the textbox. Password (optional) Write a new password in the textbox. You can click on the icon for the password to be shown. Confirmed (optional) Click ON for the end-user account to be confirmed. Blocked (optional) Click ON to block the account of the end user, to prevent them to access content. Role (optional) Indicate the role that should be granted to the new end user. If this field is not filled in, the end user will be attributed the role set as default (see "Default role" option in advanced settings). - Click on the Save button.
If end users can register themselves on your front-end application (see "Enable signups" option in advanced settings), a new entry will automatically be created and the fields of that entry will be populated with the information indicated by the end user. All fields can however be edited by an administrator of the Strapi application.
API usage
Each time an API request is sent the server checks if an Authorization header is present and verifies if the user making the request has access to the resource.
When you create a user without a role, or if you use the /api/auth/local/register route, the authenticated role is given to the user.
The Users & Permissions feature exposes authentication, user management, and role/permission endpoints through both the REST API and the GraphQL API. Full endpoint references with request and response examples are available on the dedicated sub-pages:
REST API
Authentication endpoints, user CRUD, roles, and permissions for the Users & Permissions feature.
GraphQL API
Authentication mutations, user queries, and role management via GraphQL.
Token usage
The jwt received when logging in or registering may then be used for making permission-restricted API requests. To make an API request as a user, place the JWT into an Authorization header of the request using the Bearer token pattern:
import axios from 'axios';

const token = 'YOUR_TOKEN_HERE';

// Request API.
axios
  .get('http://localhost:1337/api/posts', {
    headers: {
      Authorization: `Bearer ${token}`,
    },
  })
  .then(response => {
    // Handle success.
    console.log('Data: ', response.data);
  })
  .catch(error => {
    // Handle error.
    console.log('An error occurred:', error.response);
  });
Any request without a token will assume the public role permissions by default. Modify the permissions of each user's role in the admin panel. Authentication failures return a 401 (unauthorized) error.
User object in Strapi context
The user object is available to successfully authenticated requests.
The authenticated user object is a property of ctx.state, as shown in the following example:
create: async ctx => {
  const { id } = ctx.state.user;

  const depositObj = {
    ...ctx.request.body,
    depositor: id,
  };

  const data = await strapi.services.deposit.add(depositObj);

  // Send 201 `created`
  ctx.created(data);
};